
Happy belated New Year! It’s been a long hiatus since my last blog post. My move from Honolulu to Portland last year has been an adventure, but I’m settled in now and ready to tackle some new topics. I’ve been busy doing digital twin development with ESRI’s City Engine and procedural modeling, so I thought it might be fun to show how 3D models can be incorporated into a 3D scene in QGIS using the QGIS2threejs plugin.
For this write up, I’m going to create a 3D scene that shows the Grant Park/Grant High School area in NE Portland.
View the 3D Scene on the web
Read this guide to create a 3D web scene of your own.
Software Used
QGIS 3.28.2
QGIS2threejs (QGIS plugin)
Scaniverse (3D scanning app)
Data Required
Existing 3D models (e.g. *dae)
Point layer corresponding to locations of the models
If you would like to use the sample data that I’m using in this tutorial, send me an email and I can send it to you.
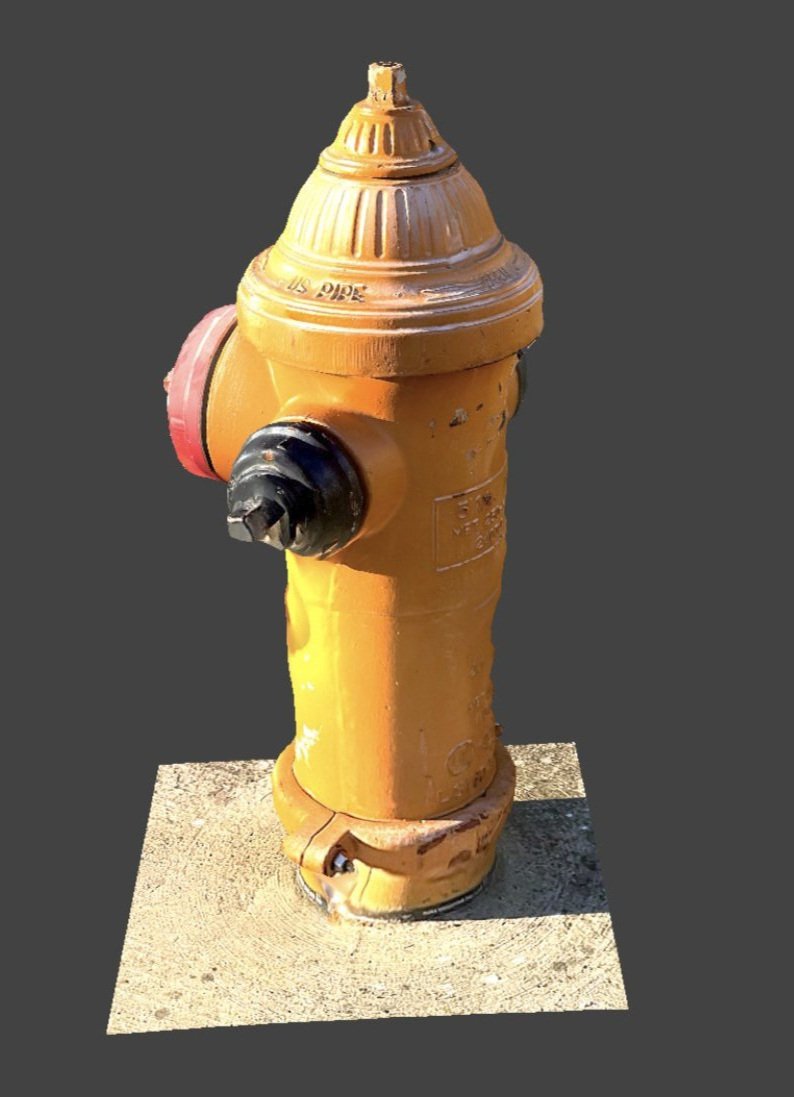
You must have your own 3D models to use. The 3D models can come from a 3D modeling software (e.g. Sketchup, Revit, Blender, etc). You could also quickly create a 3D model by using a 3D scanning app (e.g. Polycam or Scaniverse). Here, I’ve chosen to used Scaniverse because it’s completely free and does a decent job. Here is a look at a 3D fire hydrant model that I created using Scaniverse.
I also have 2 existing tree models of Douglas Fir and Norway Maple - here’s what they look like.

Douglas Fir
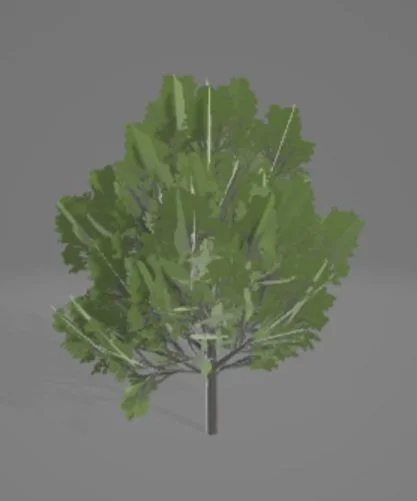
Norway Maple
In addition to having existing 3D models, you must also have a point layer or layers to help locate or place the 3D models in the 3D scene. This could be an existing point location(s) or a temporary scratch layer you create in QGIS for where to place the model on the map. For this example, I have 3 point layers that represent locations of where my trees and fire hydrants are - these layers were downloaded from Portland Open Data Portal.
Tip 1: Create a folder on your phone to make it easier to save and access your 3D models. For example, on my phone I have a folder set up via OneDrive that I save all my Scaniverse scans/models to. This makes my workflow from scanning, editing, and saving the model more efficient. I can easily access my 3D models from my connected OneDrive folder on my desktop/laptop.
For the 3D scene viewing I prefer to use QGIS2threejs plugin for QGIS instead of using the built-in QGIS 3D Map Viewer. I find QGIS2threejs works more consistently in displaying 3D objects and have smoother navigation.
Tip 2: QGIS2threejs plugin only takes models in *.dae, *.gltf, and *.glb formats. So make sure your models are save in one of these format.
Inserting 3D models into the 3D scene
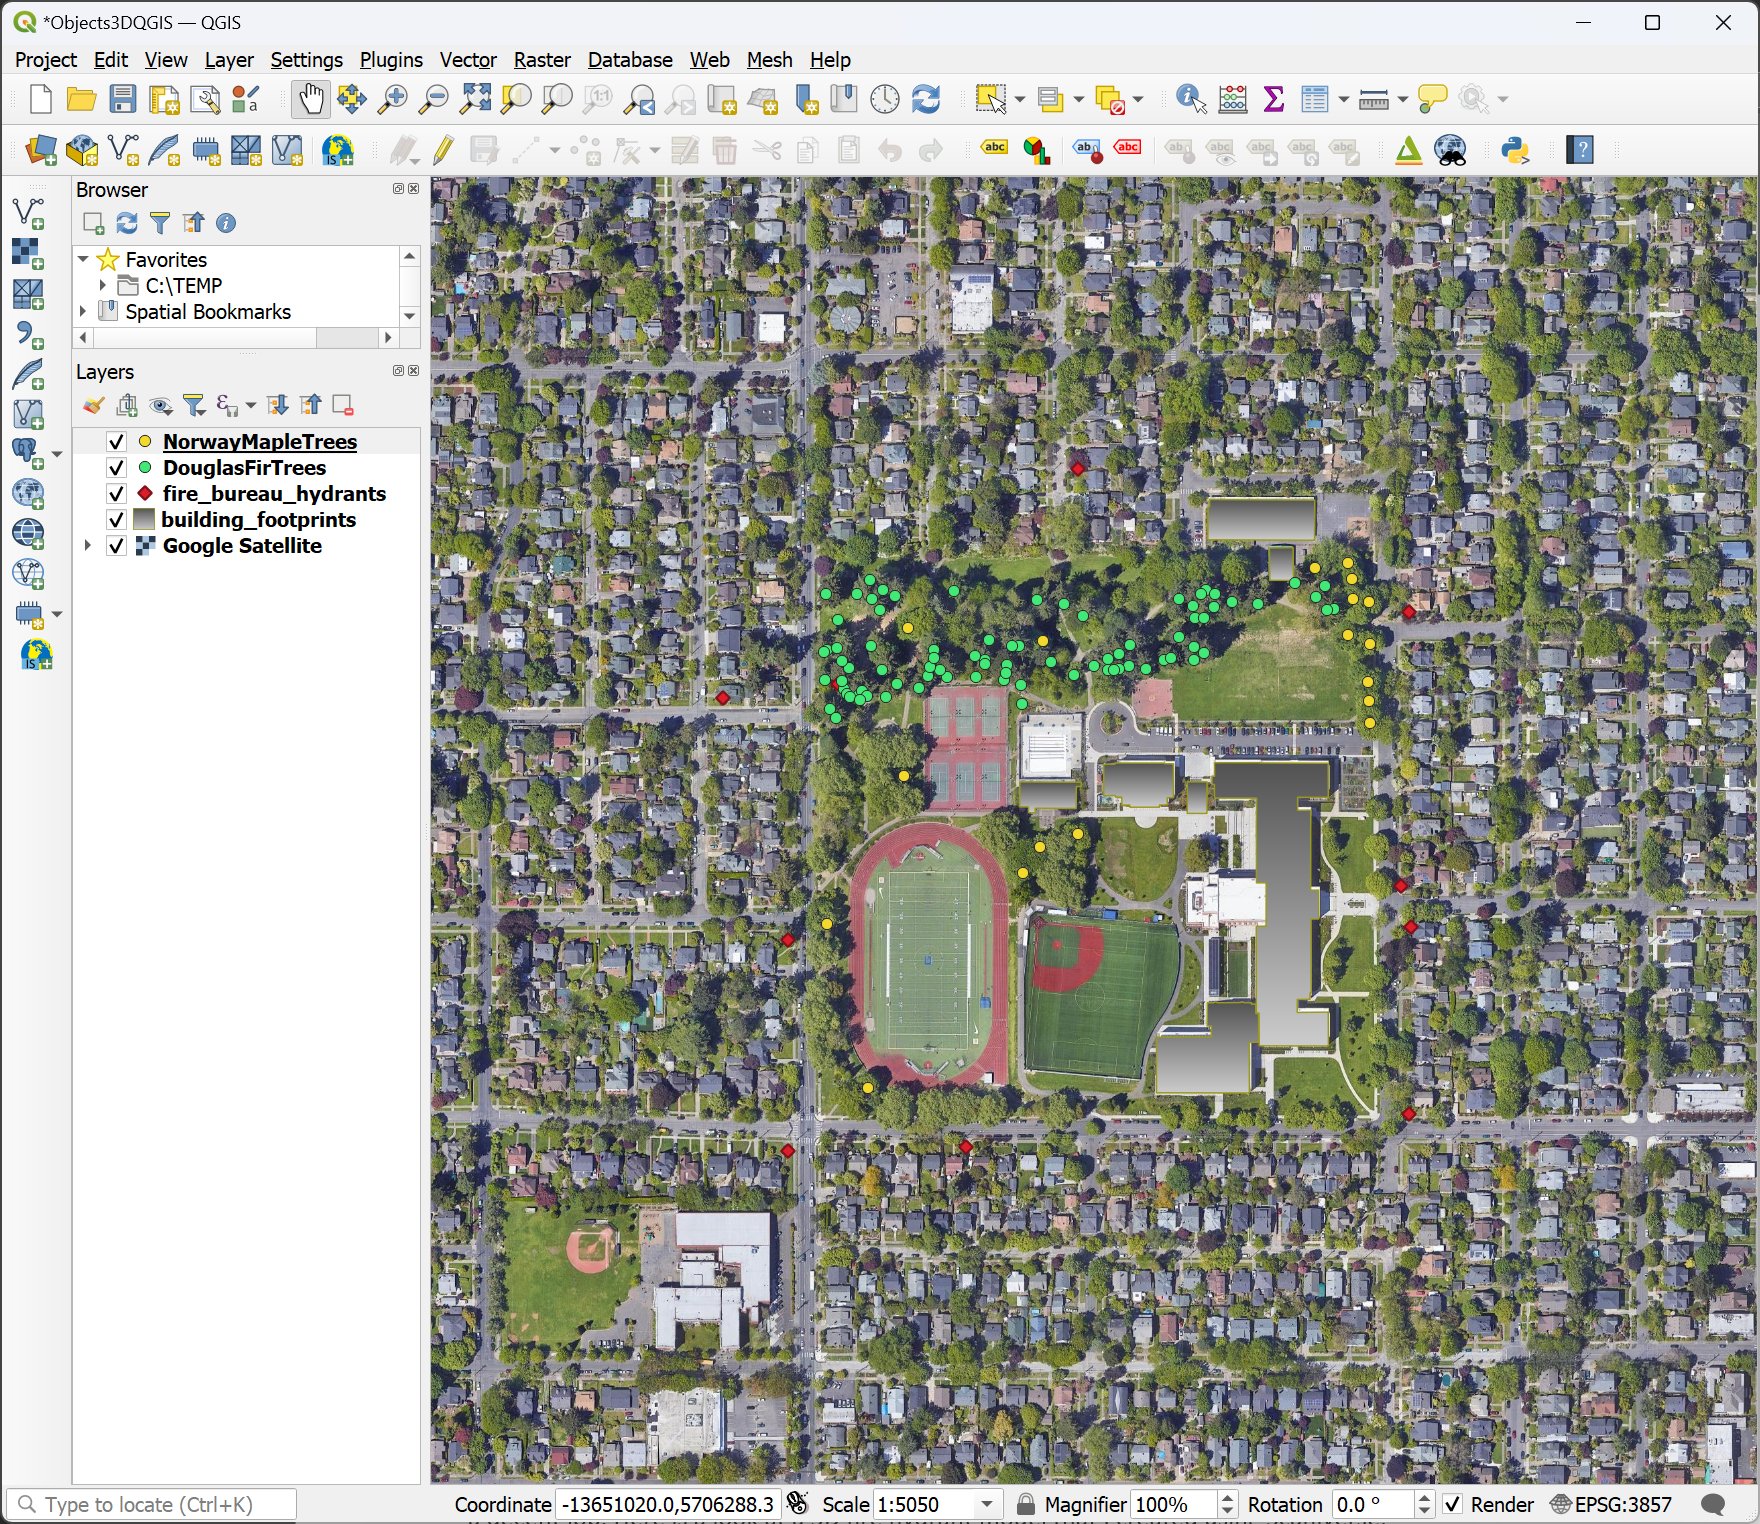
Open QGIS and add in your point layers. Here’s my example with the trees, fire hydrants and building footprints added to my map.
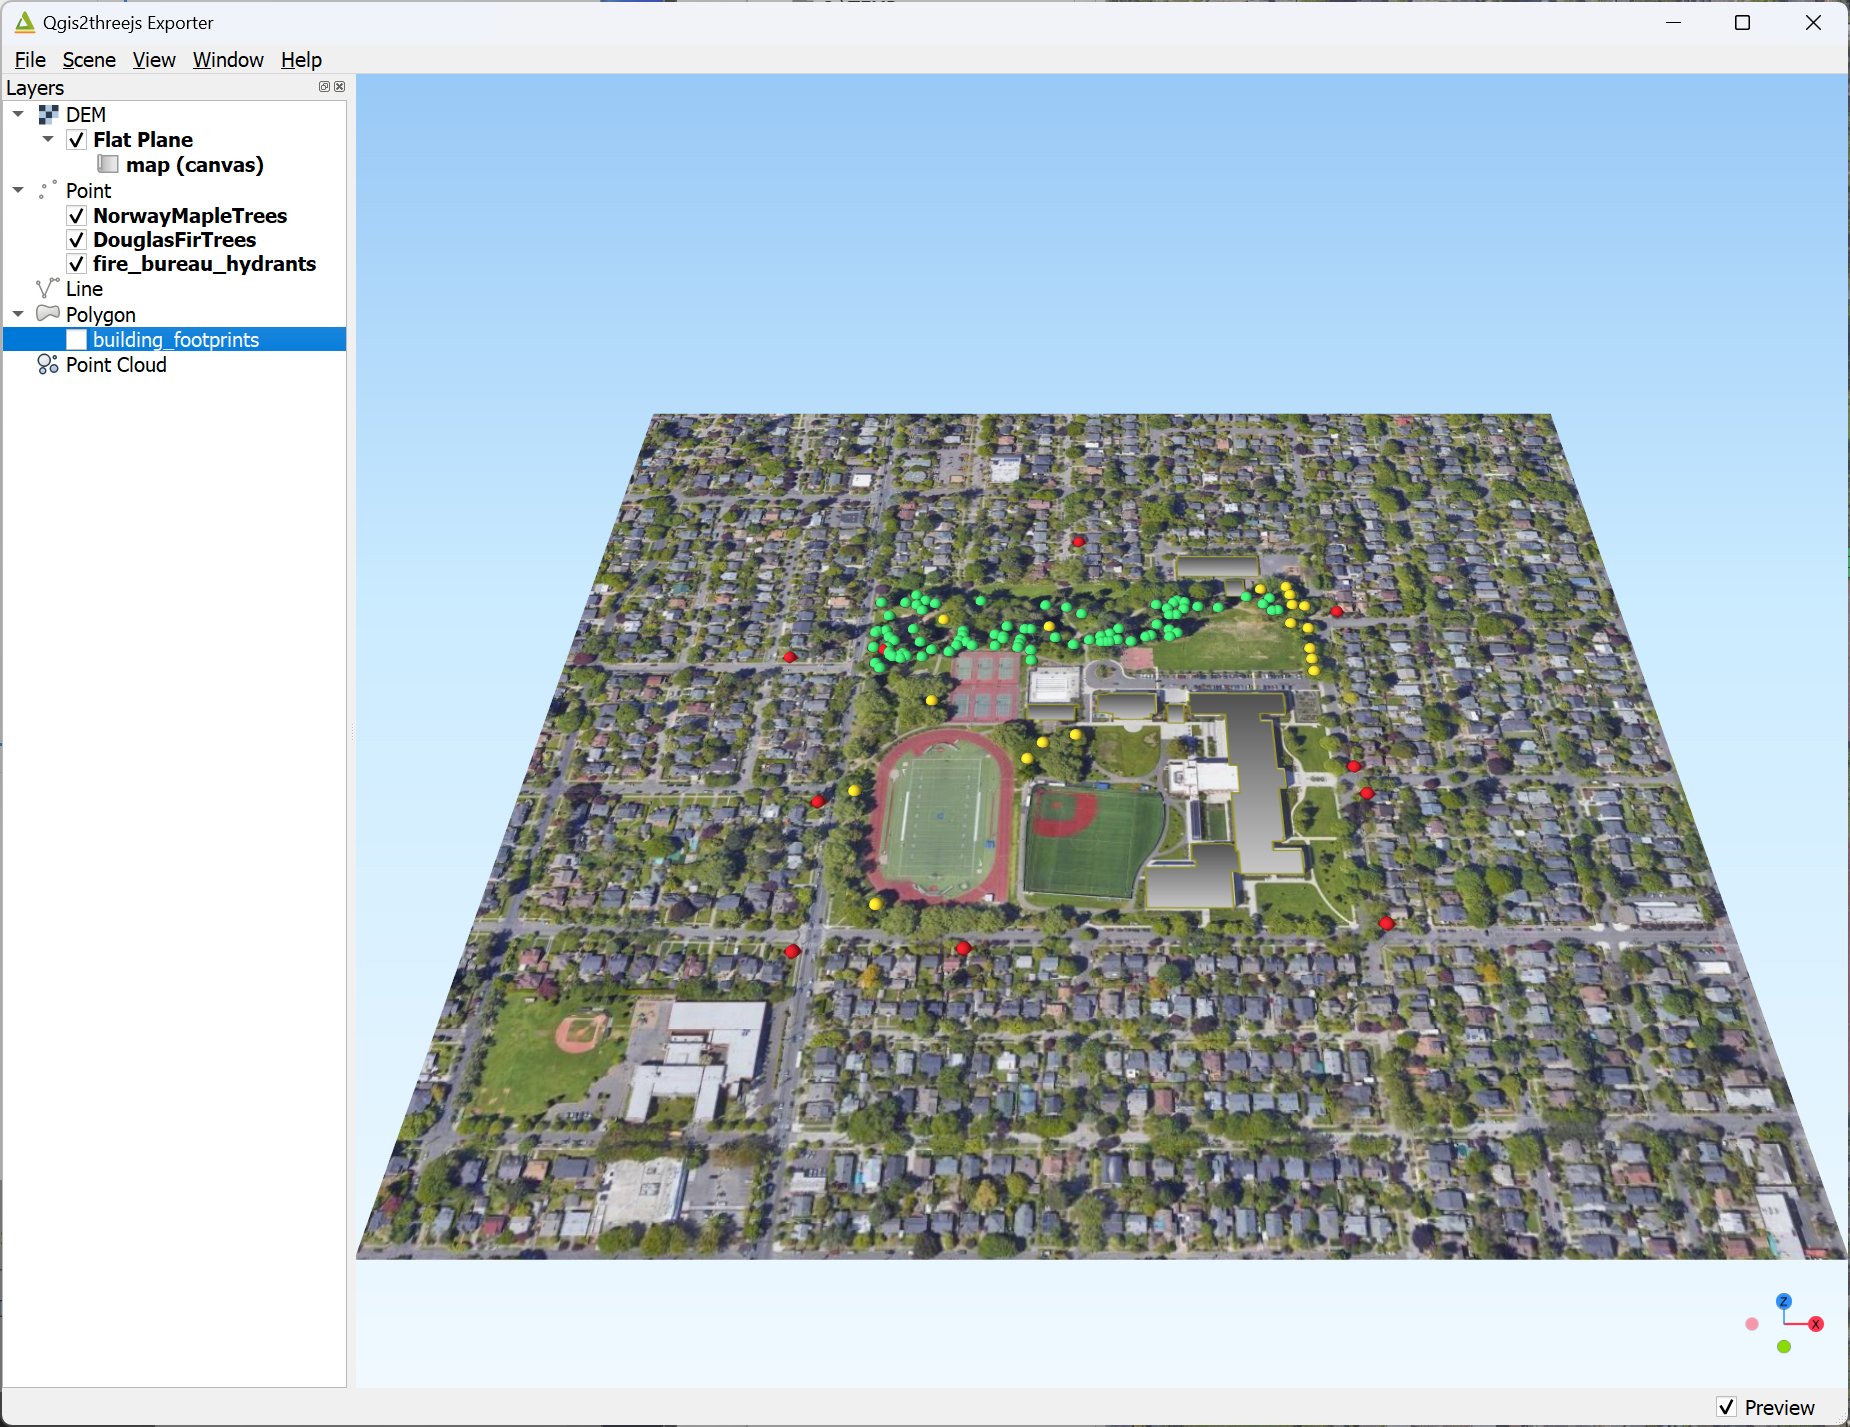
Open the Qgis2threejs Exporter window (or go to Web menu >> Qgis2threejs >> Qgis2threejs Exporter). You should have something that looks like this below.
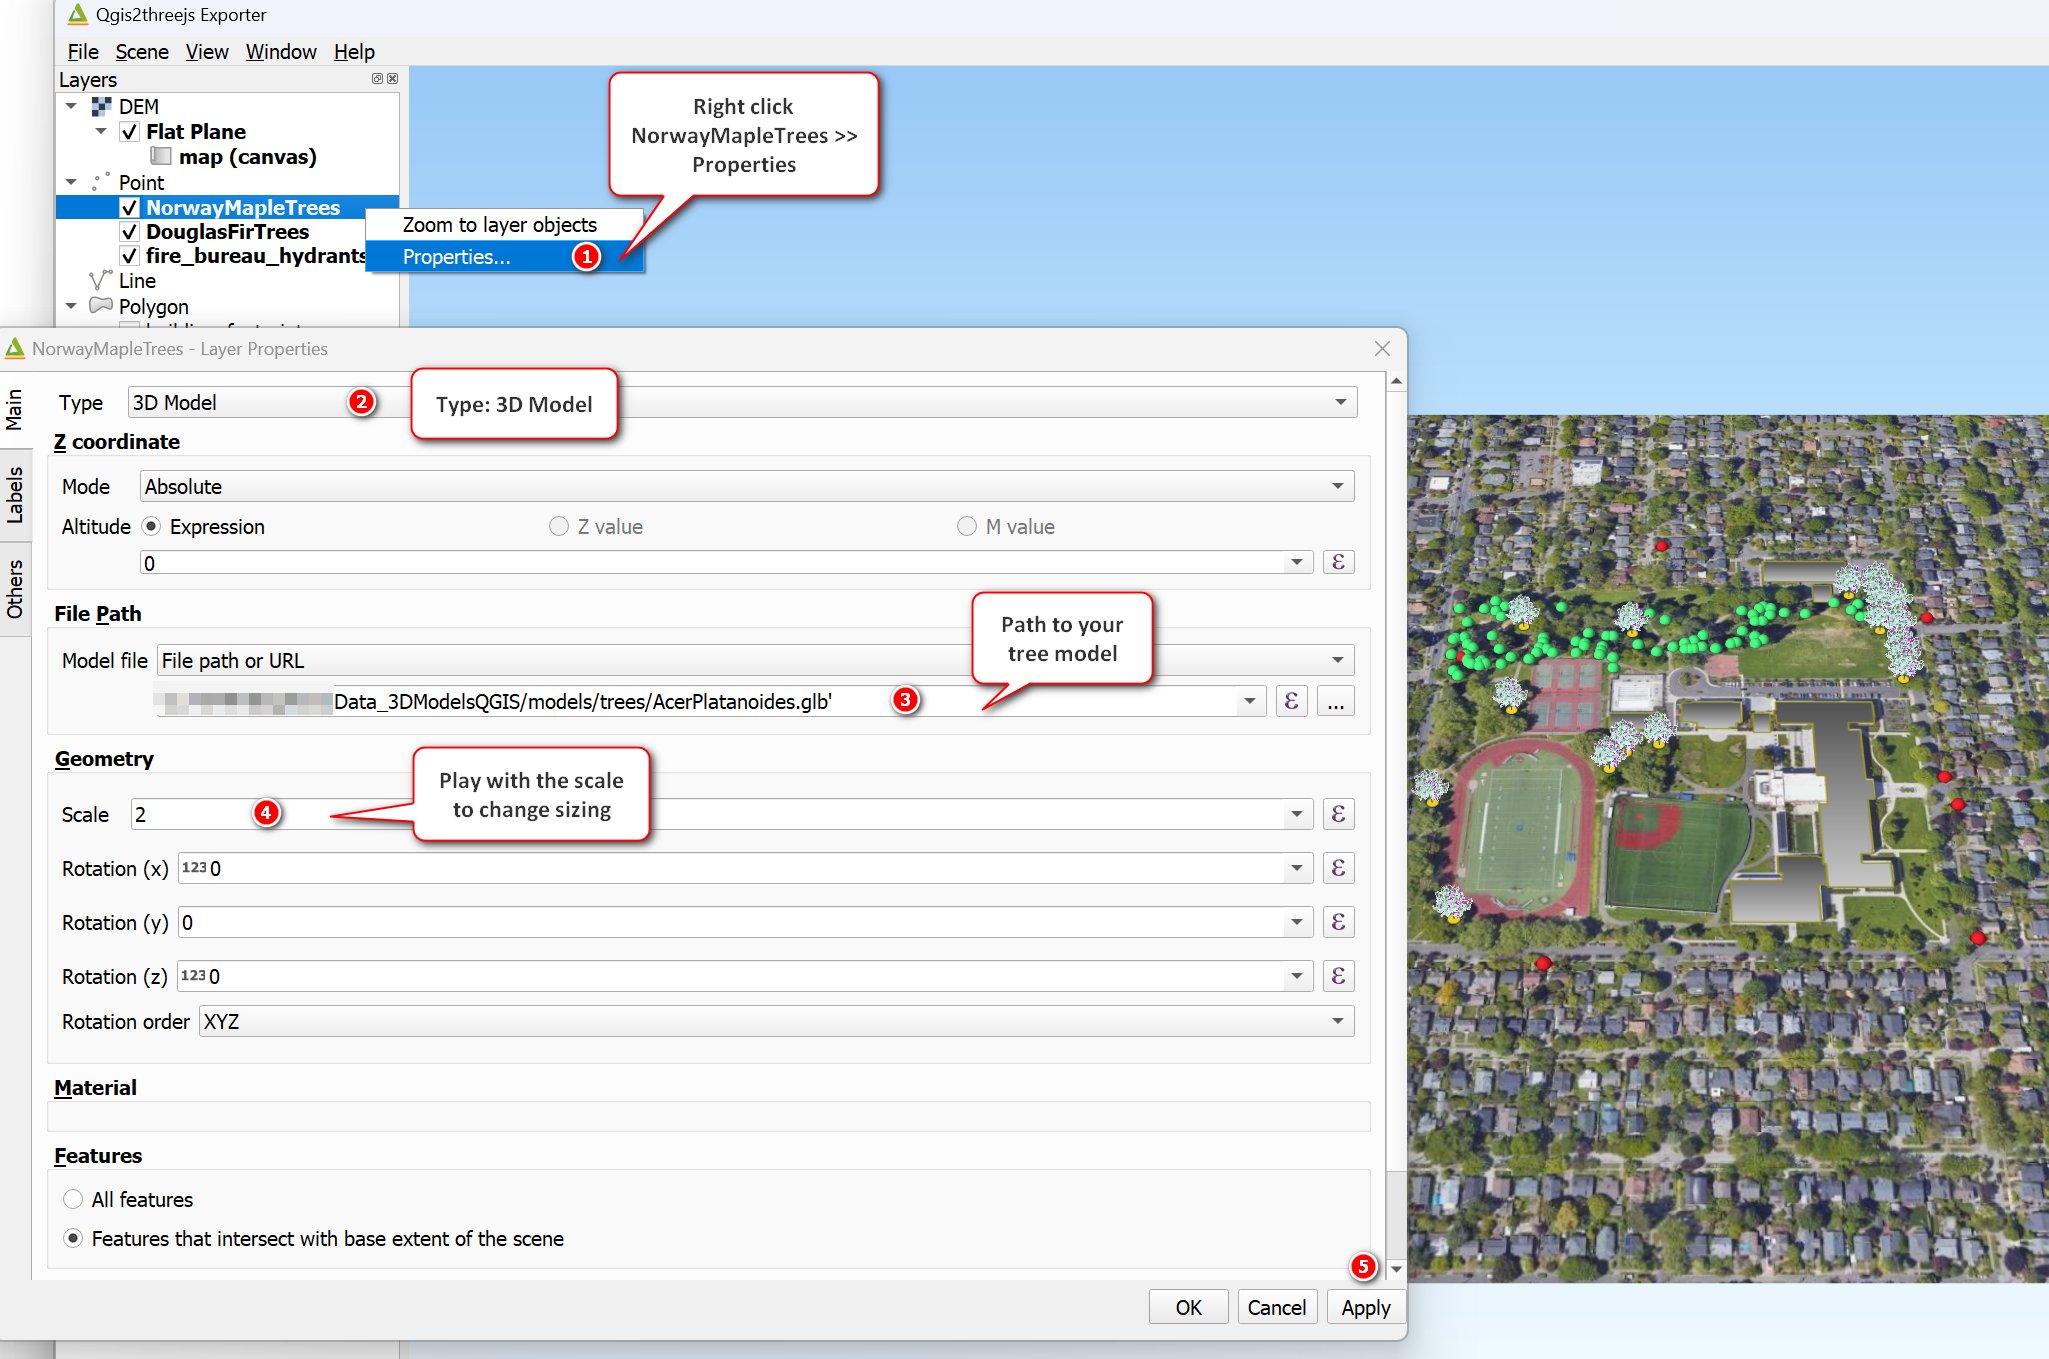
In the Qgis2threejs window - right click on Norway Maple Trees >> Properties.
In the Properties window:
Select Type: 3D Model
Model file: path to your Norway Maple Tree model
Scale: play around with the scale to get the size you want.
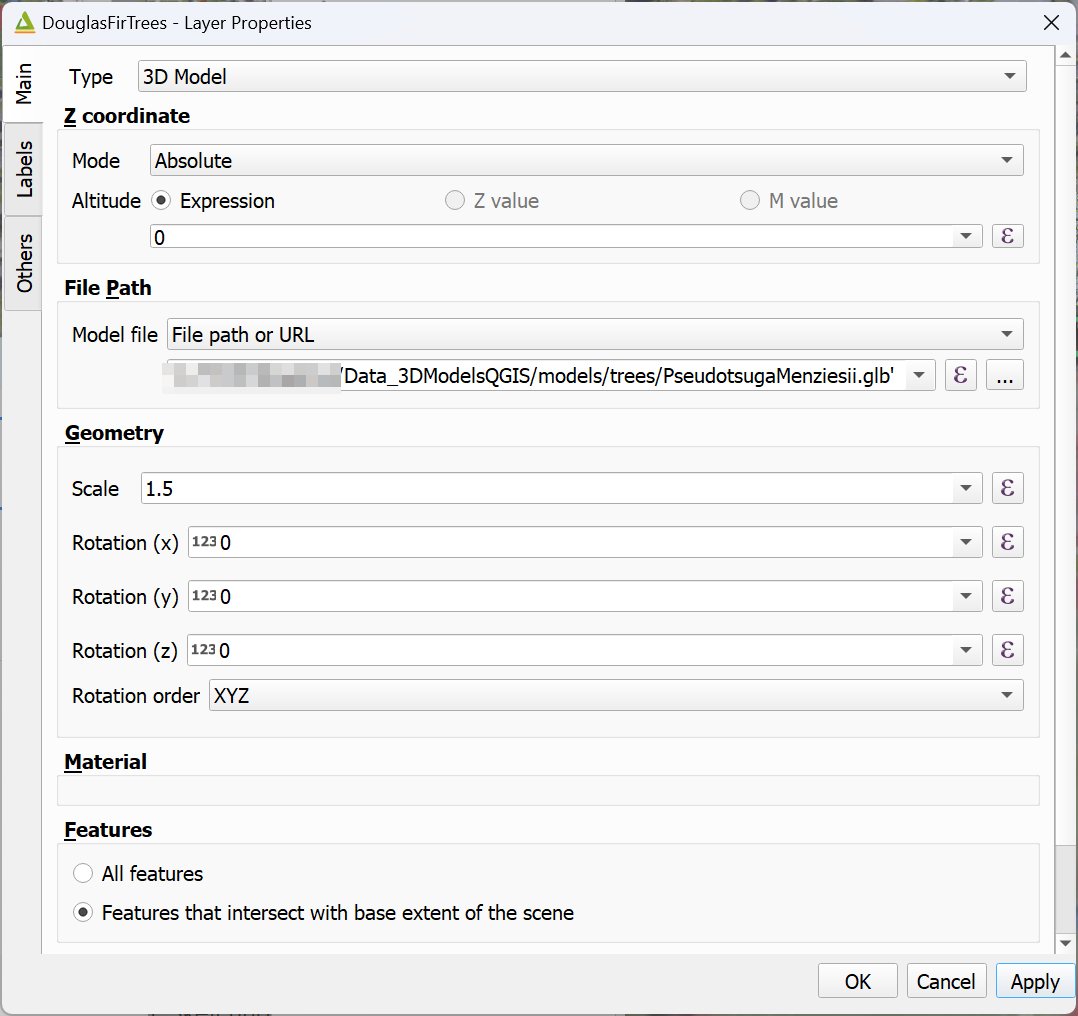
Insert the Douglas Fir tree model.
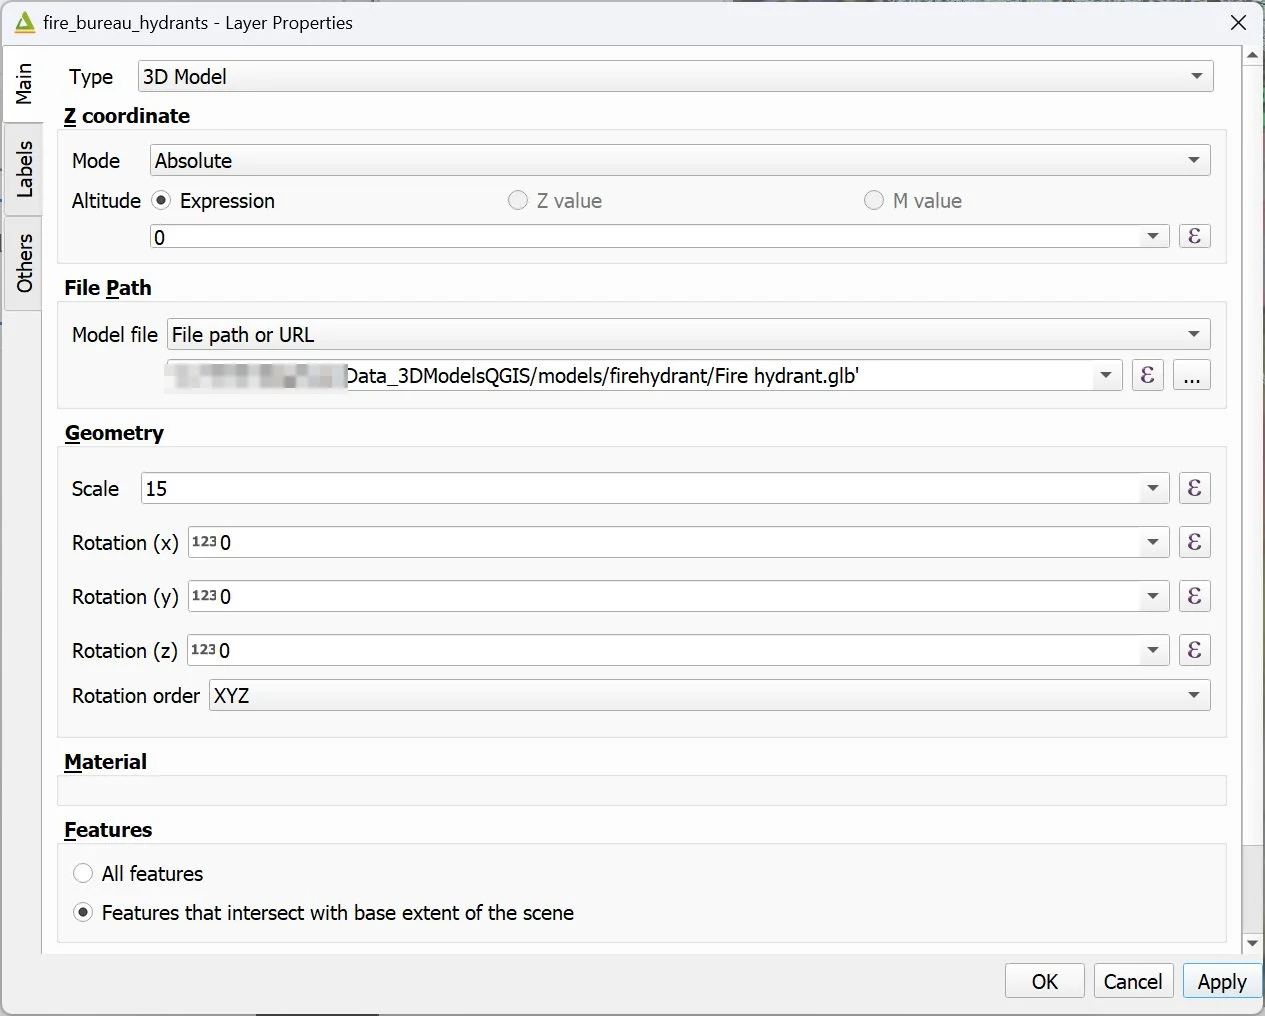
Do the same thing for the fire hydrants. The fire hydrant model is really small so you might have to scale the size up 15 to see it.
Extrude the building footprints to max height or average height.

If you don’t want to have the points and polygon layer displayed in your 3D scene - just turn them off in the QGIS Table of Contents (TOC).
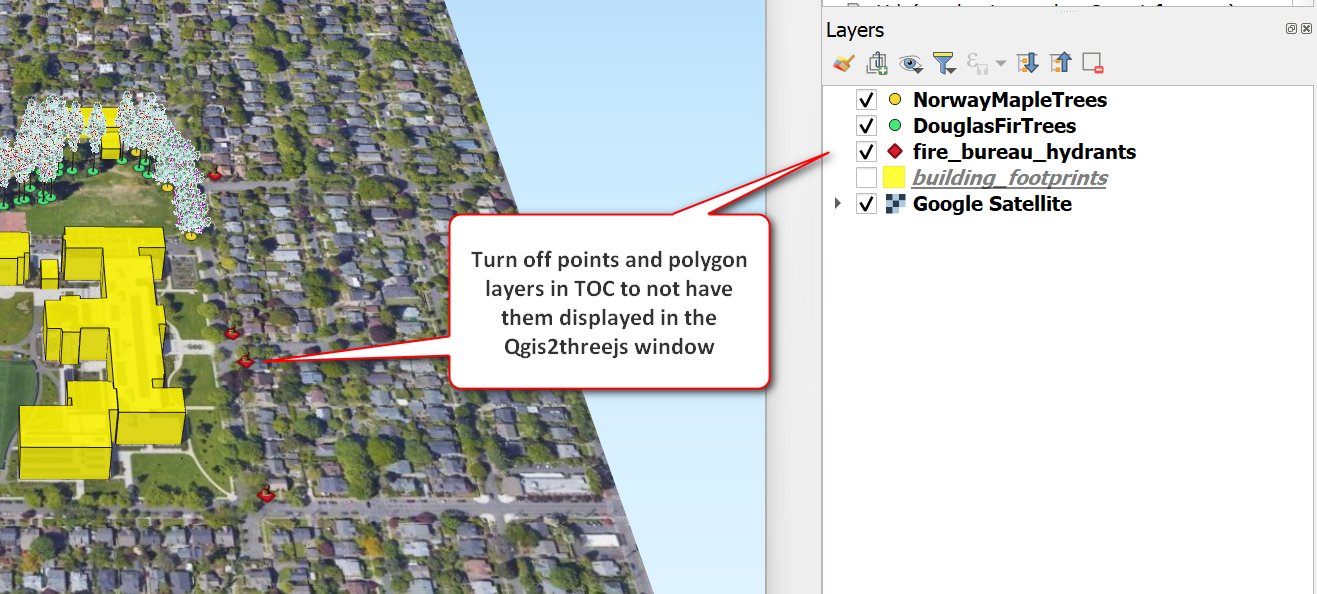
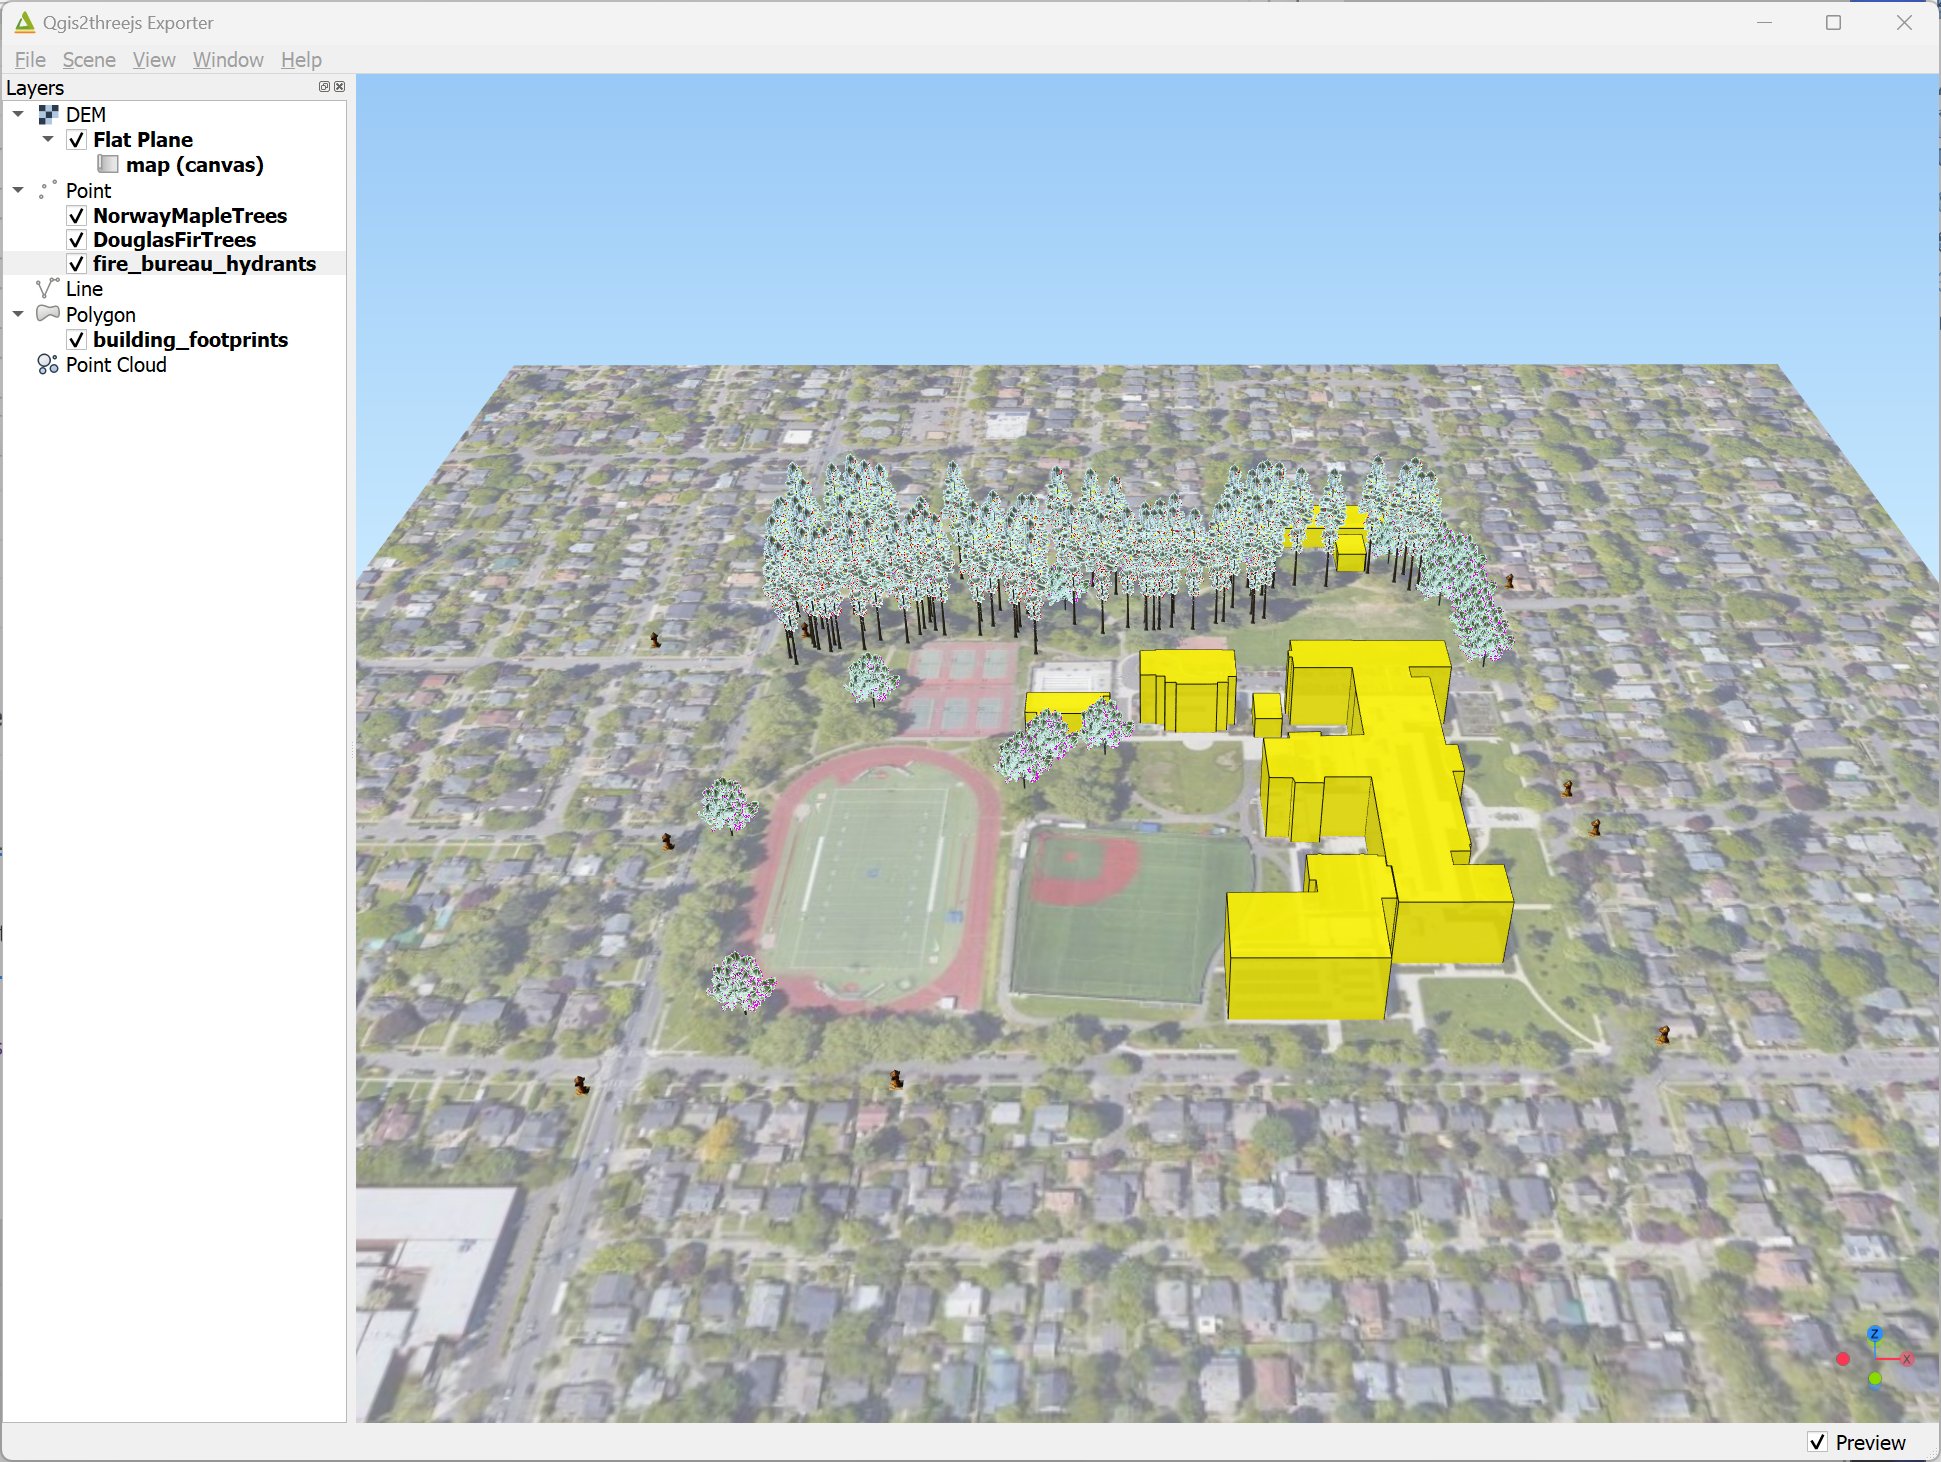
This what my 3D scene in Qgis2threejs window looks like.
Export 3D Scene to Web
This part is optional. If you want to export the 3D scene to the web. Go to File menu >> Export to Web >> Select your export options.
Note: Enable the viewer to run locally should be checked. See Qgis2threejs documentation for more info. If checked, export all scene data to a .js file to avoid web browser’s same origin policy security restrictions (i.e. COR error).

After exporting is done. You can just copy the output folder to a web server.
Optional - Inserting a 3D Building Model
This part is optional and is only viewable within the Qgis2threejs Exporter window. You will NOT be able to export it to the web. I’ve tried it and it doesn’t work. For buildings to be exportable to the web, they need to be polygons that are extruded.
To do this, first I’m only to create a temporary point layer (scratch layer) that will be the “center” of my building footprint. Then I’m going use this point to place my 3D building.
Create Temporary Scratch Layer
Go to Layer menu >> Create Layer >> New Temporary Scratch Layer

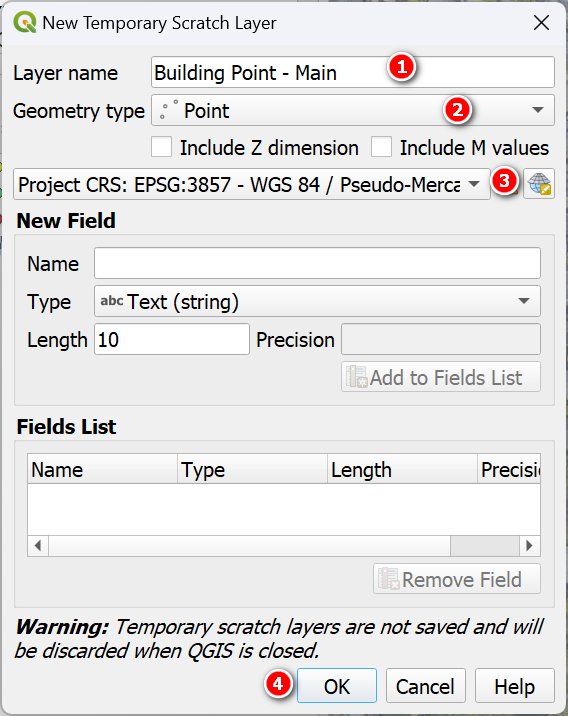
In the Scratch Layer window: Give it a name and use Point as Geometry type
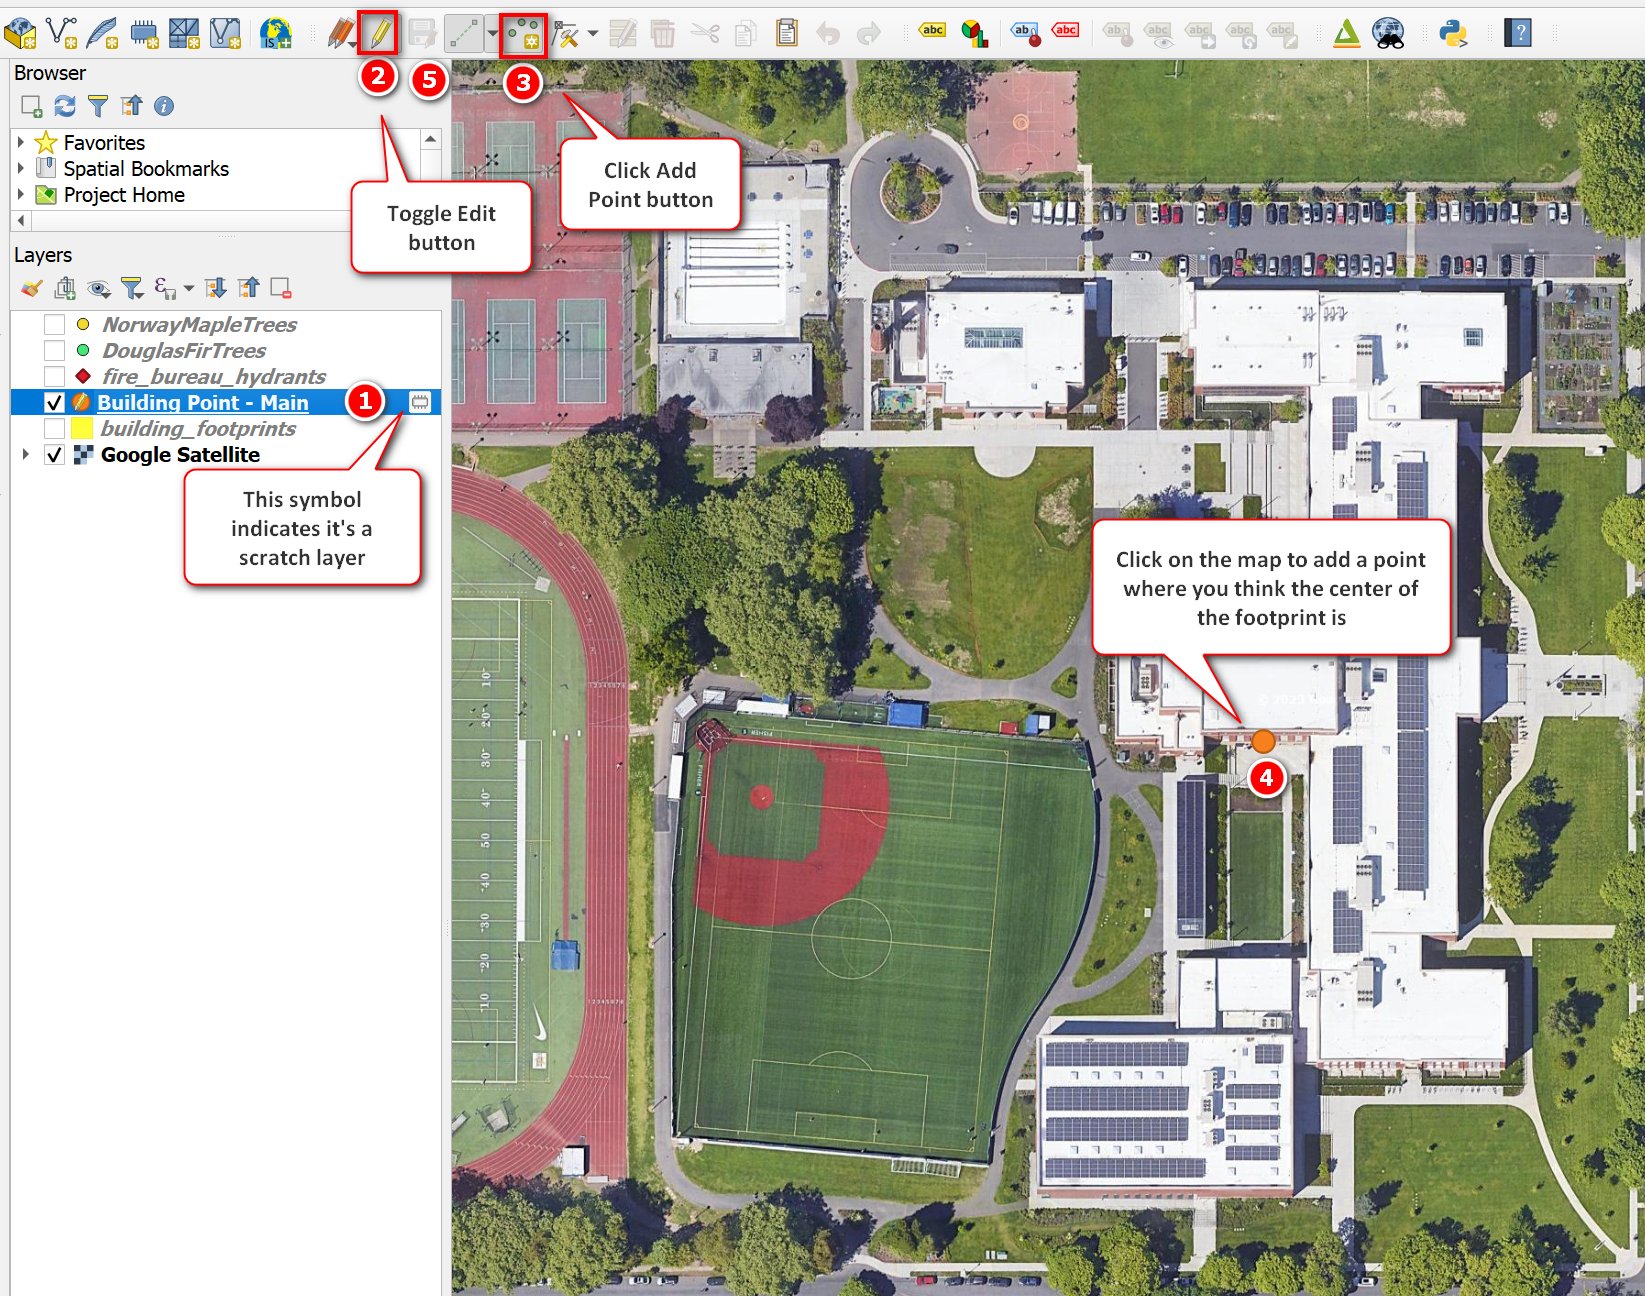
Add a point on the map where you think the center of the building footprint is.
Toggle the Edit button to start editing the Building Point - Main layer
Click the Add Point button
On the map, place your point
Save your edits
Toggle the Edit button again to stop editing
In the Qgis2threejs window: Add the 3D building model to the temporary building point layer you just created.
Note: You may need to adjust your building point several times in depending on the how the 3D building is placed.
Tip 3: If you have a 3D model that is georeferenced - you can exported it as KMZ file to retain its location coordinates. Just extract the KMZ file and use the *.dae file for the model.

Here is the 3D building modeling model as viewed in Qgis2threejs viewer. It does NOT export out to the web though. You can export the view as an image though.

That’s it for this tutorial. I hope you it useful. Until next time, and thanks as always for reading.