
Hello OGL readers! I am back from taking a long hiatus, but I'm happy to be sharing on my blog again. This post is about how to convert KML/KMZ files to a GIS layer (i.e. shapefile or feature class) without losing information that's contained in the HTML popup. Often times I want the information from the KMZ popup as separate fields in my GIS attribute table. I work a lot with KML/KMZ files and sometimes getting what I need out of the KMZ files into GIS (ArcGIS Pro in my case) is not always straightforward.
When I convert KMZ files to a GIS layer, I usually try one of these 3 tools. The first two are using ArcGIS Pro since it is what I use primarily for work. the third option is using QGIS and the KML tool plugin.
Note: Both ArcGIS Pro and QGIS can read/view KML/KMZ files.
ArcGIS Pro Options:
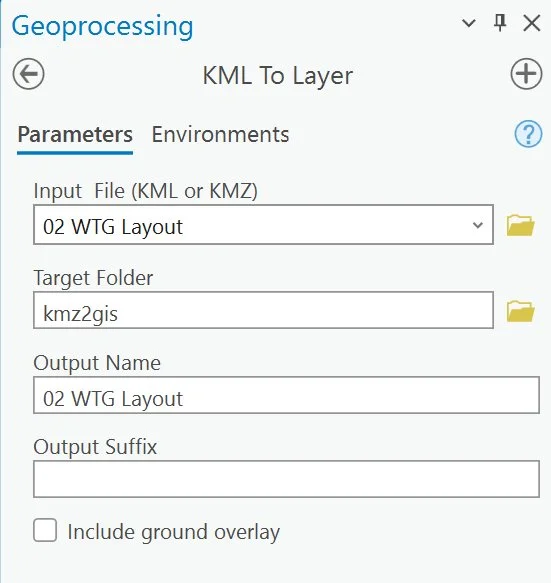
Option 1: KML to Layer Tool: This is the easiest way to convert KML/KMZ files. The tool is available with a Standard or Advance license (Basic license has limited function).
Here is an example kmz file as viewed in Google Earth (left) and as viewed in ArcGIS Pro (right). Notice how the information is displayed in the popup.

Example KMZ file viewed in Google Earth (left) and as viewed in ArcGIS Pro (right)
I want the info in the popup box to be attributes (fields) in my GIS layer. Using the KML to Layer tool, I can convert the KMZ file to a feature class so I can work with it.
This is the converted KMZ file viewed in ArcGIS Pro. I will have to say though, that sometimes this tool will work and sometimes it won’t - I’m not sure why but I think it might have to do with how the KMZ file was created. So, it looks like the KMZ to Layer tool didn’t write out the popup info to the layer attribute table. If this first option doesn’t work, then you can the second option Quick Import.
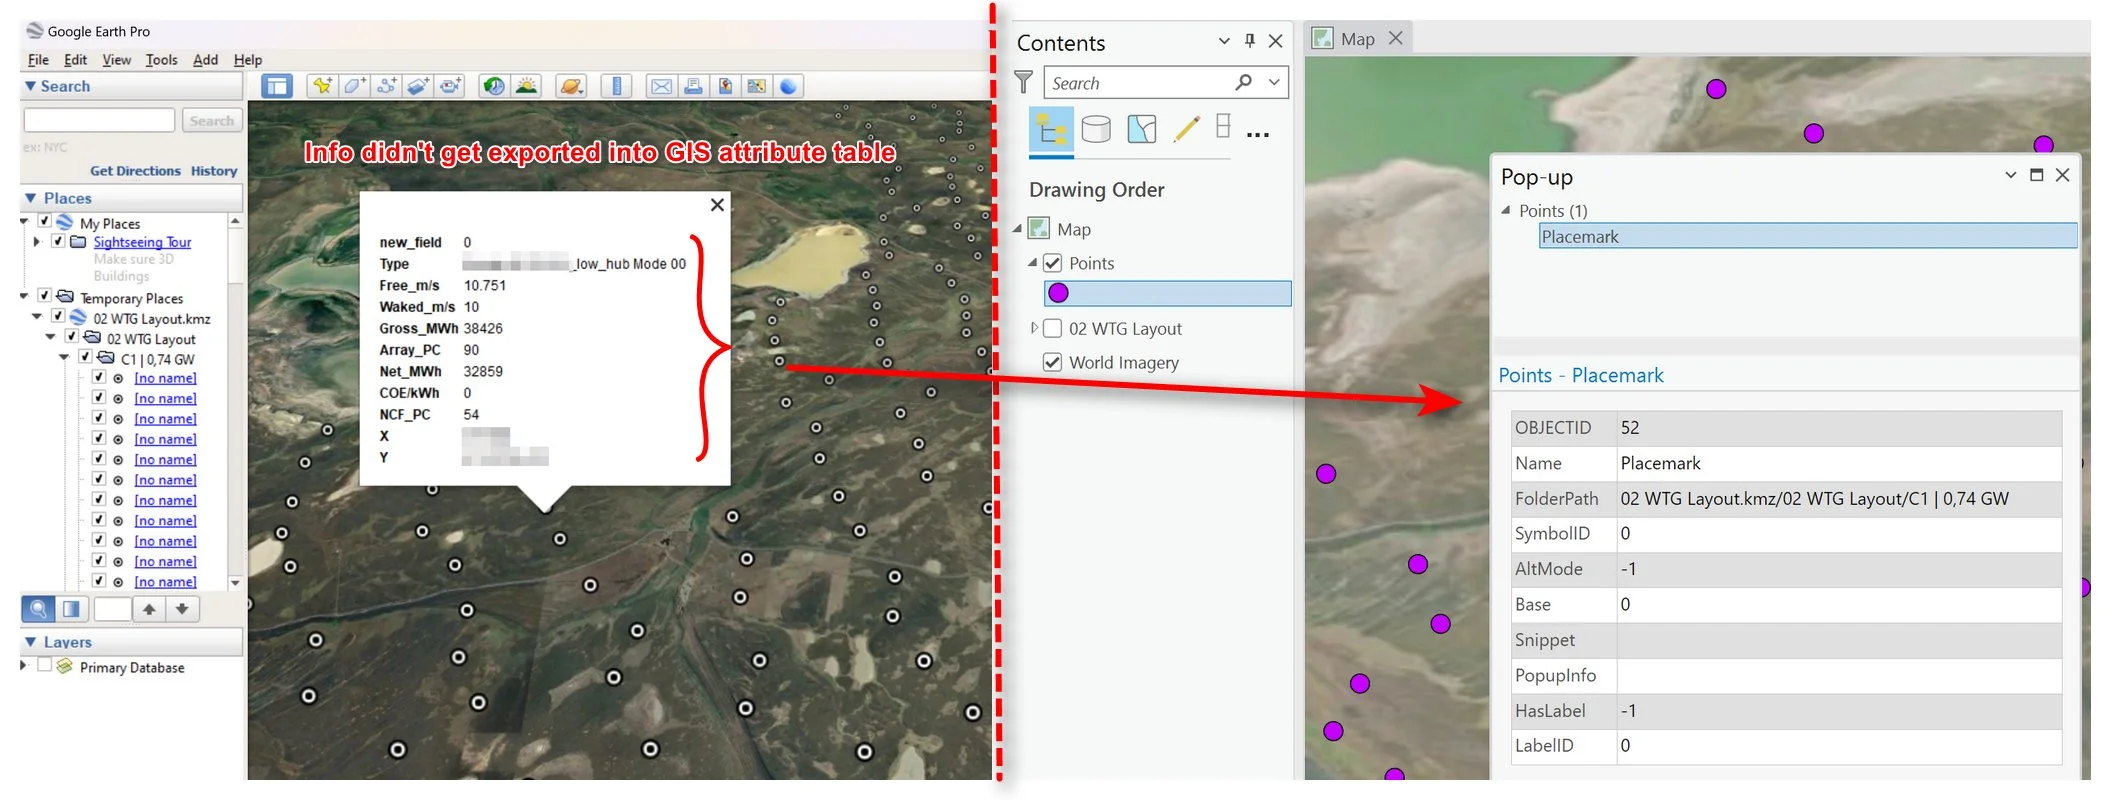
KMZ file viewed in Google Earth (left) with popup info, and KML to Layer tool converted layer’s popup.
Option 2: Quick Import - this tool requires the Data Interoperability extension.
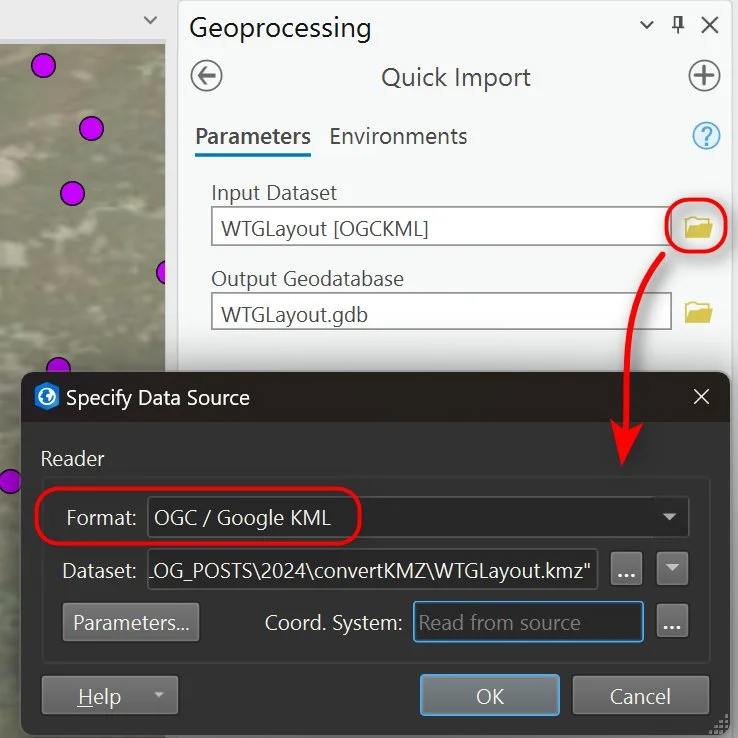
Notice that the Quick Import tool gives you more options for how you want to convert the KMZ file to a GIS layer. Here is the converted file viewed in ArcGIS Pro. Note that Quick Import also converted the KMZ as 3 separate point files as shown in the original KMZ file, where as the KML to Layer tool converted all everything in the original KMZ as a single point layer. The Quick Import tool also converted the popup into into the layer’s attribute table.
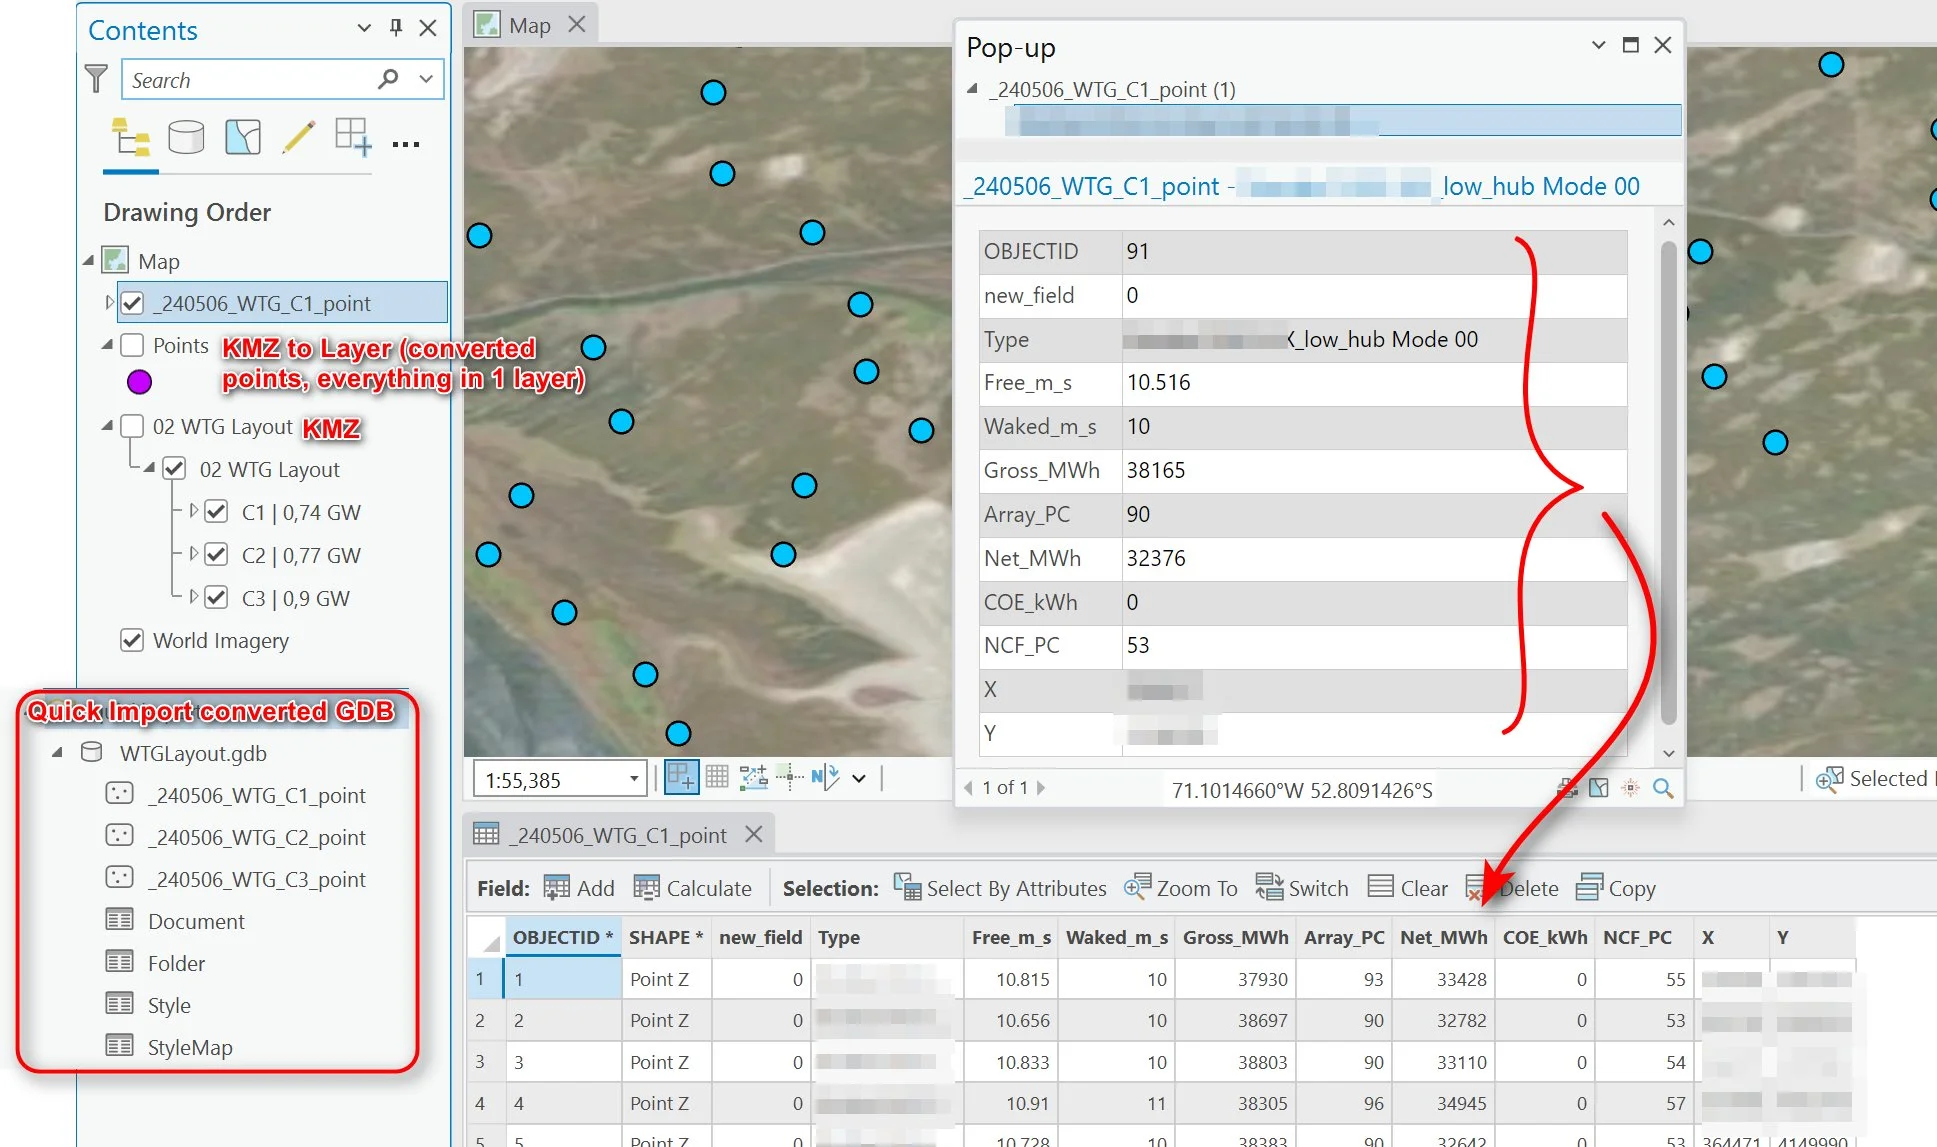
Quick Import tool results
Ok, so what if you don’t have ArcGIS Pro and/or the Data Interoperability extension? You can try the third option, which is to use QGIS and the KML Tool plugin.
QGIS Option
Option 3: QGIS + KML Tool Plugin
This options requires using QGIS and having the KML Tools plug in installed.
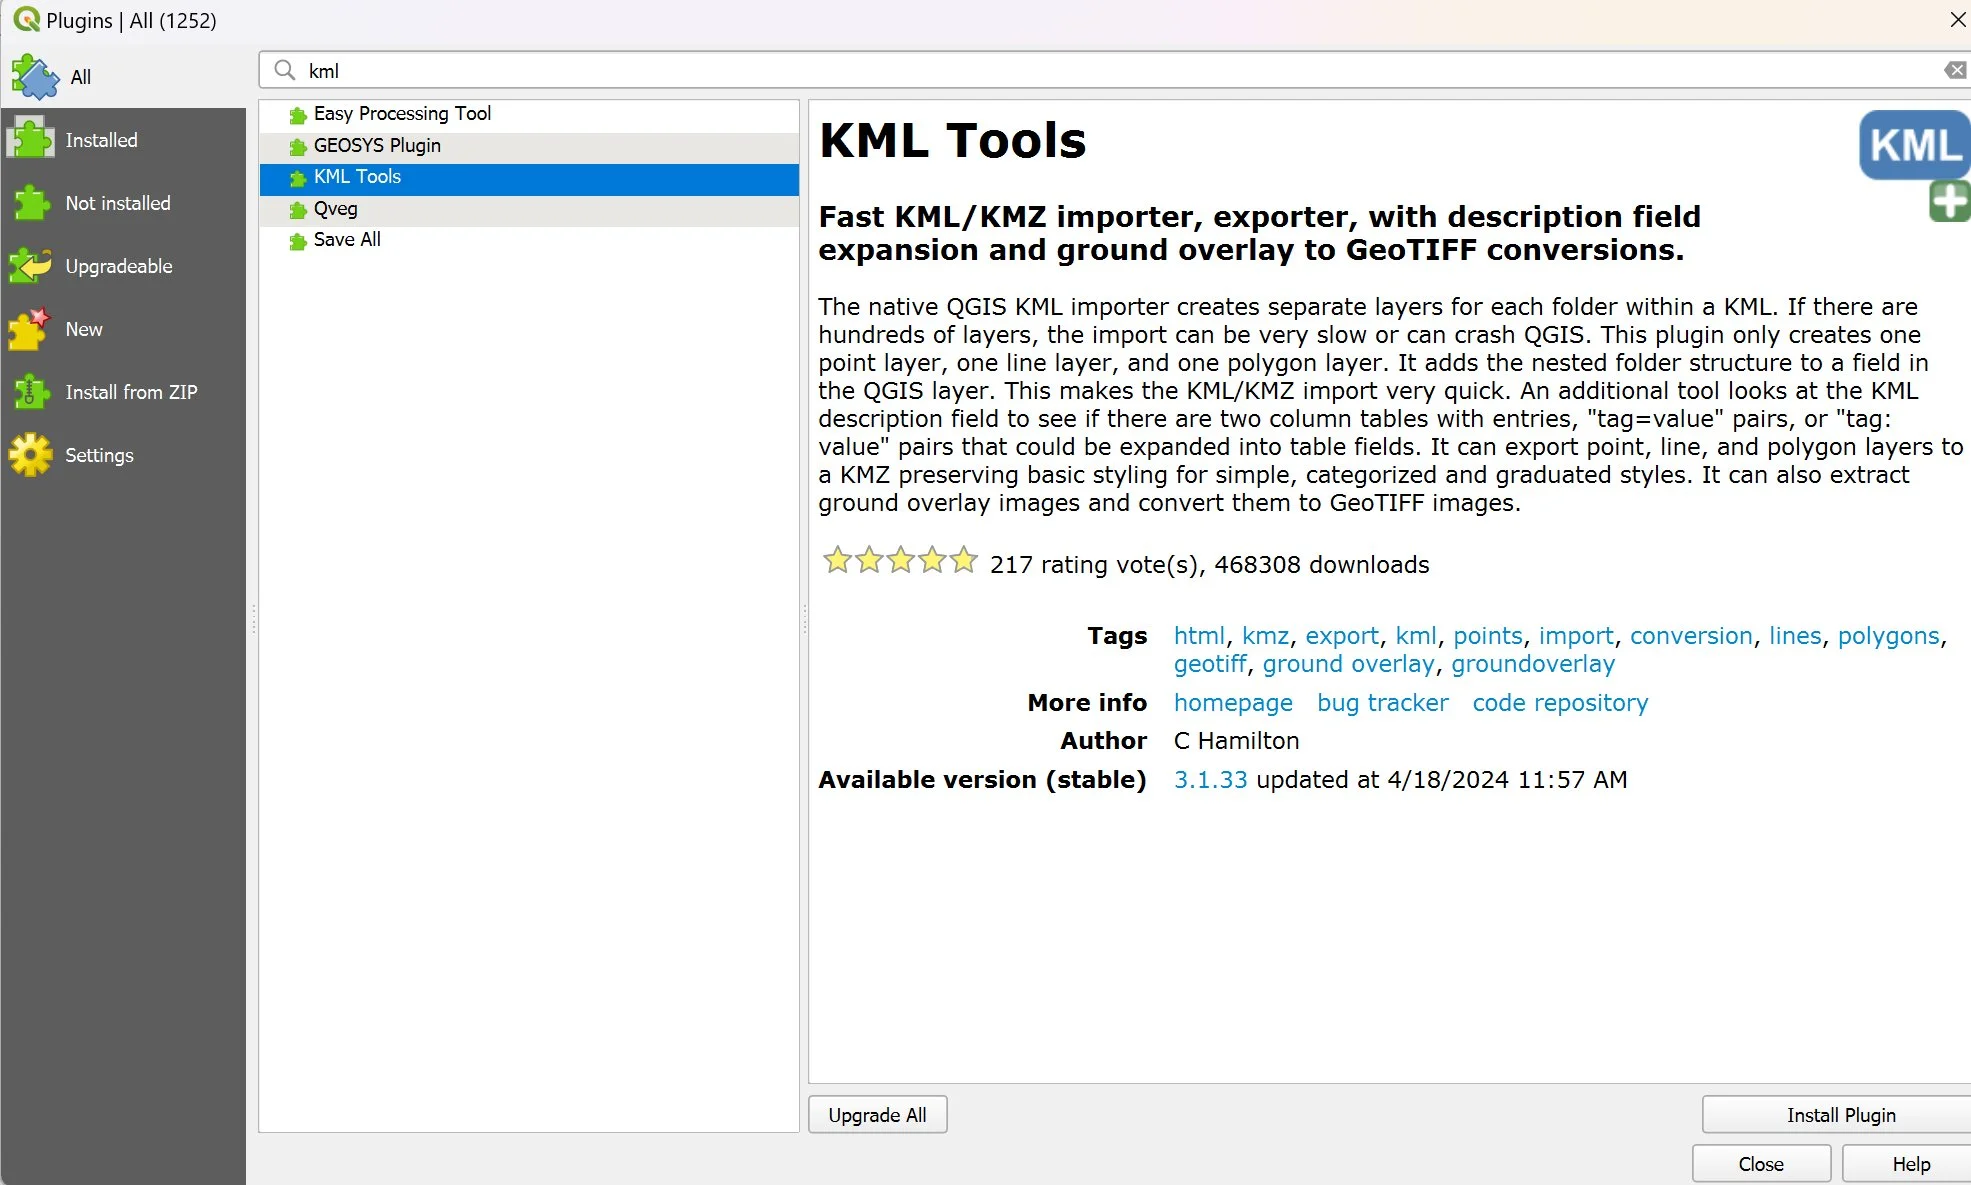
KML Tools plugin for QGIS
Once you have the KML Tools plugin installed, either use the tool to import the KMZ file into QGIS or just drag and drop the KMZ into the map canvas.
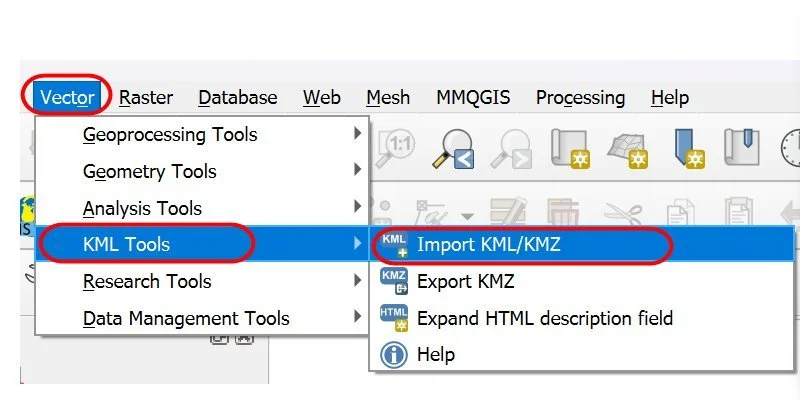
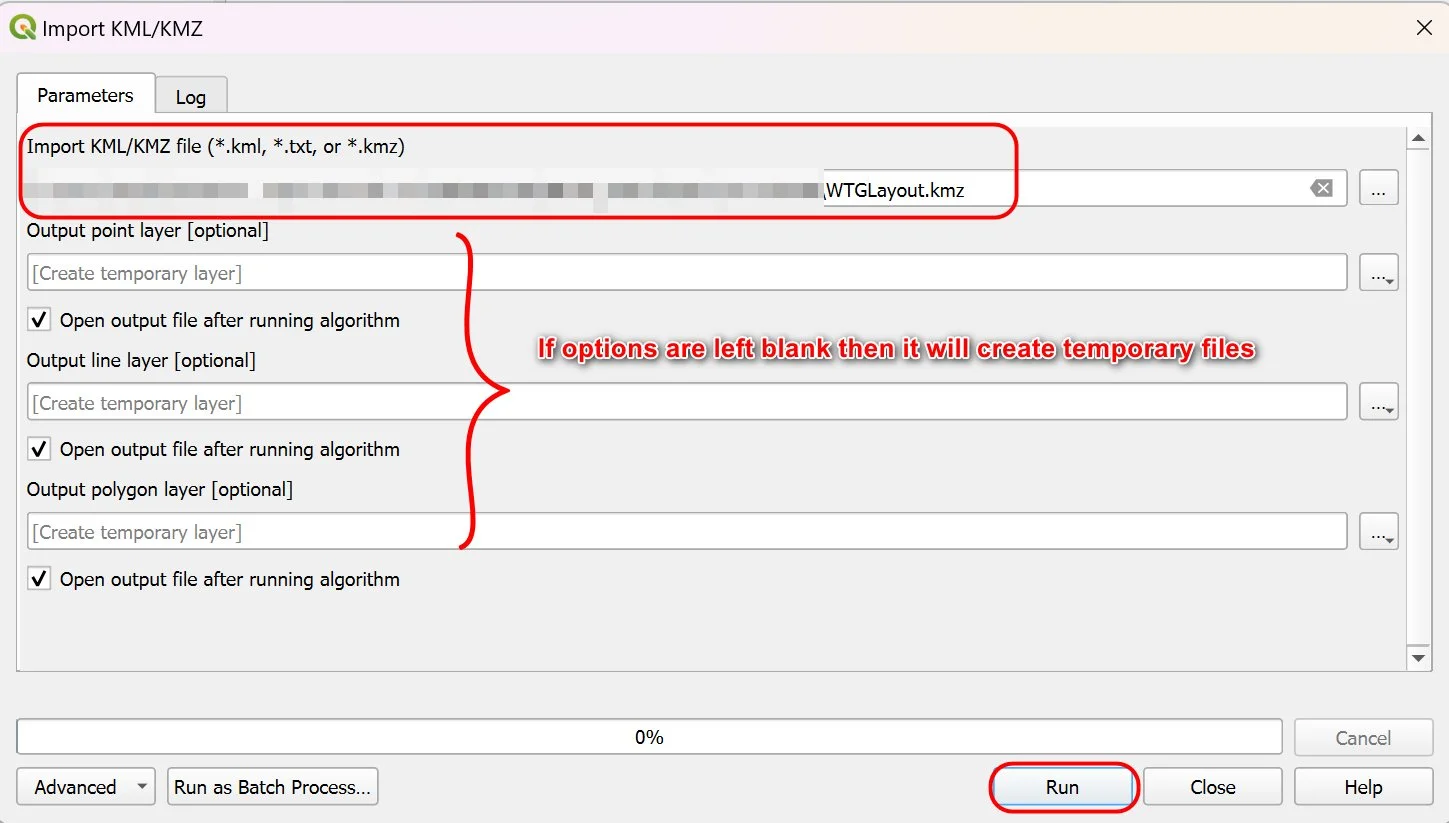
Import KML/KMZ tool option (if drag and drop doesn’t work)
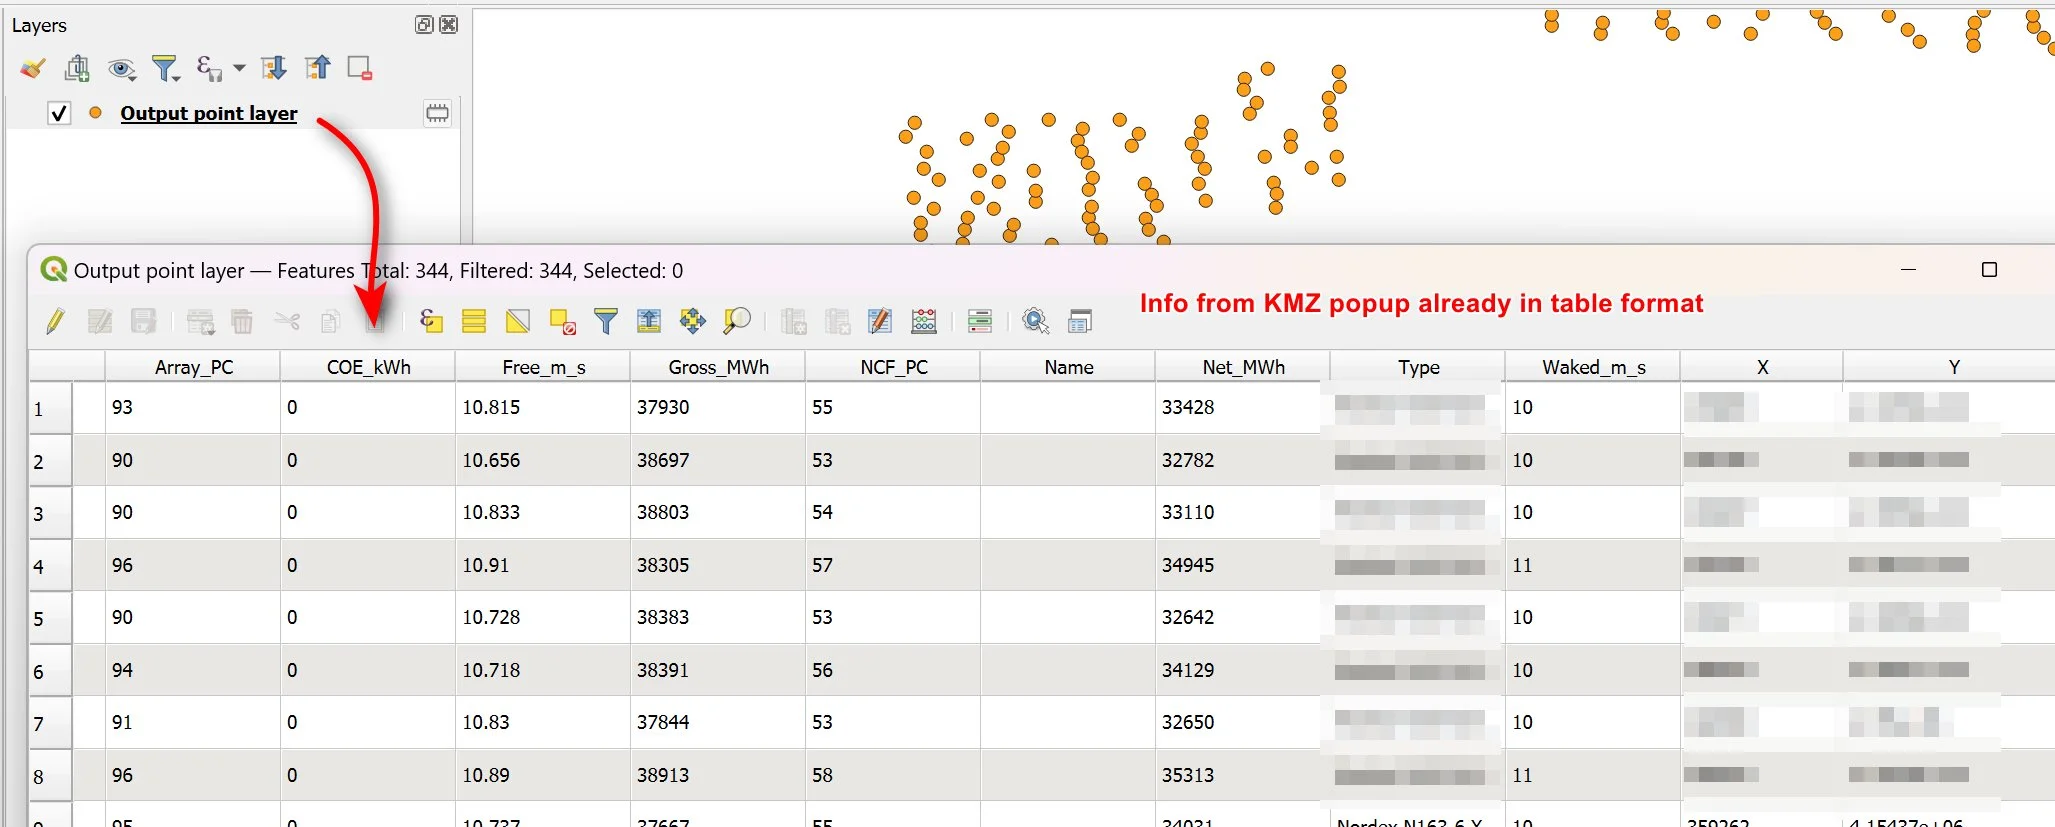
You can check to see if the imported KMZ file already has the popup info written out to tabular form by opening the attribute table and checking. If so, then you can just export the KMZ file a GIS layer format of your choice.
Here is an example of a KMZ file that has the popup info in a single description field. In this case then you can use the Expand HTML Description Field tool.
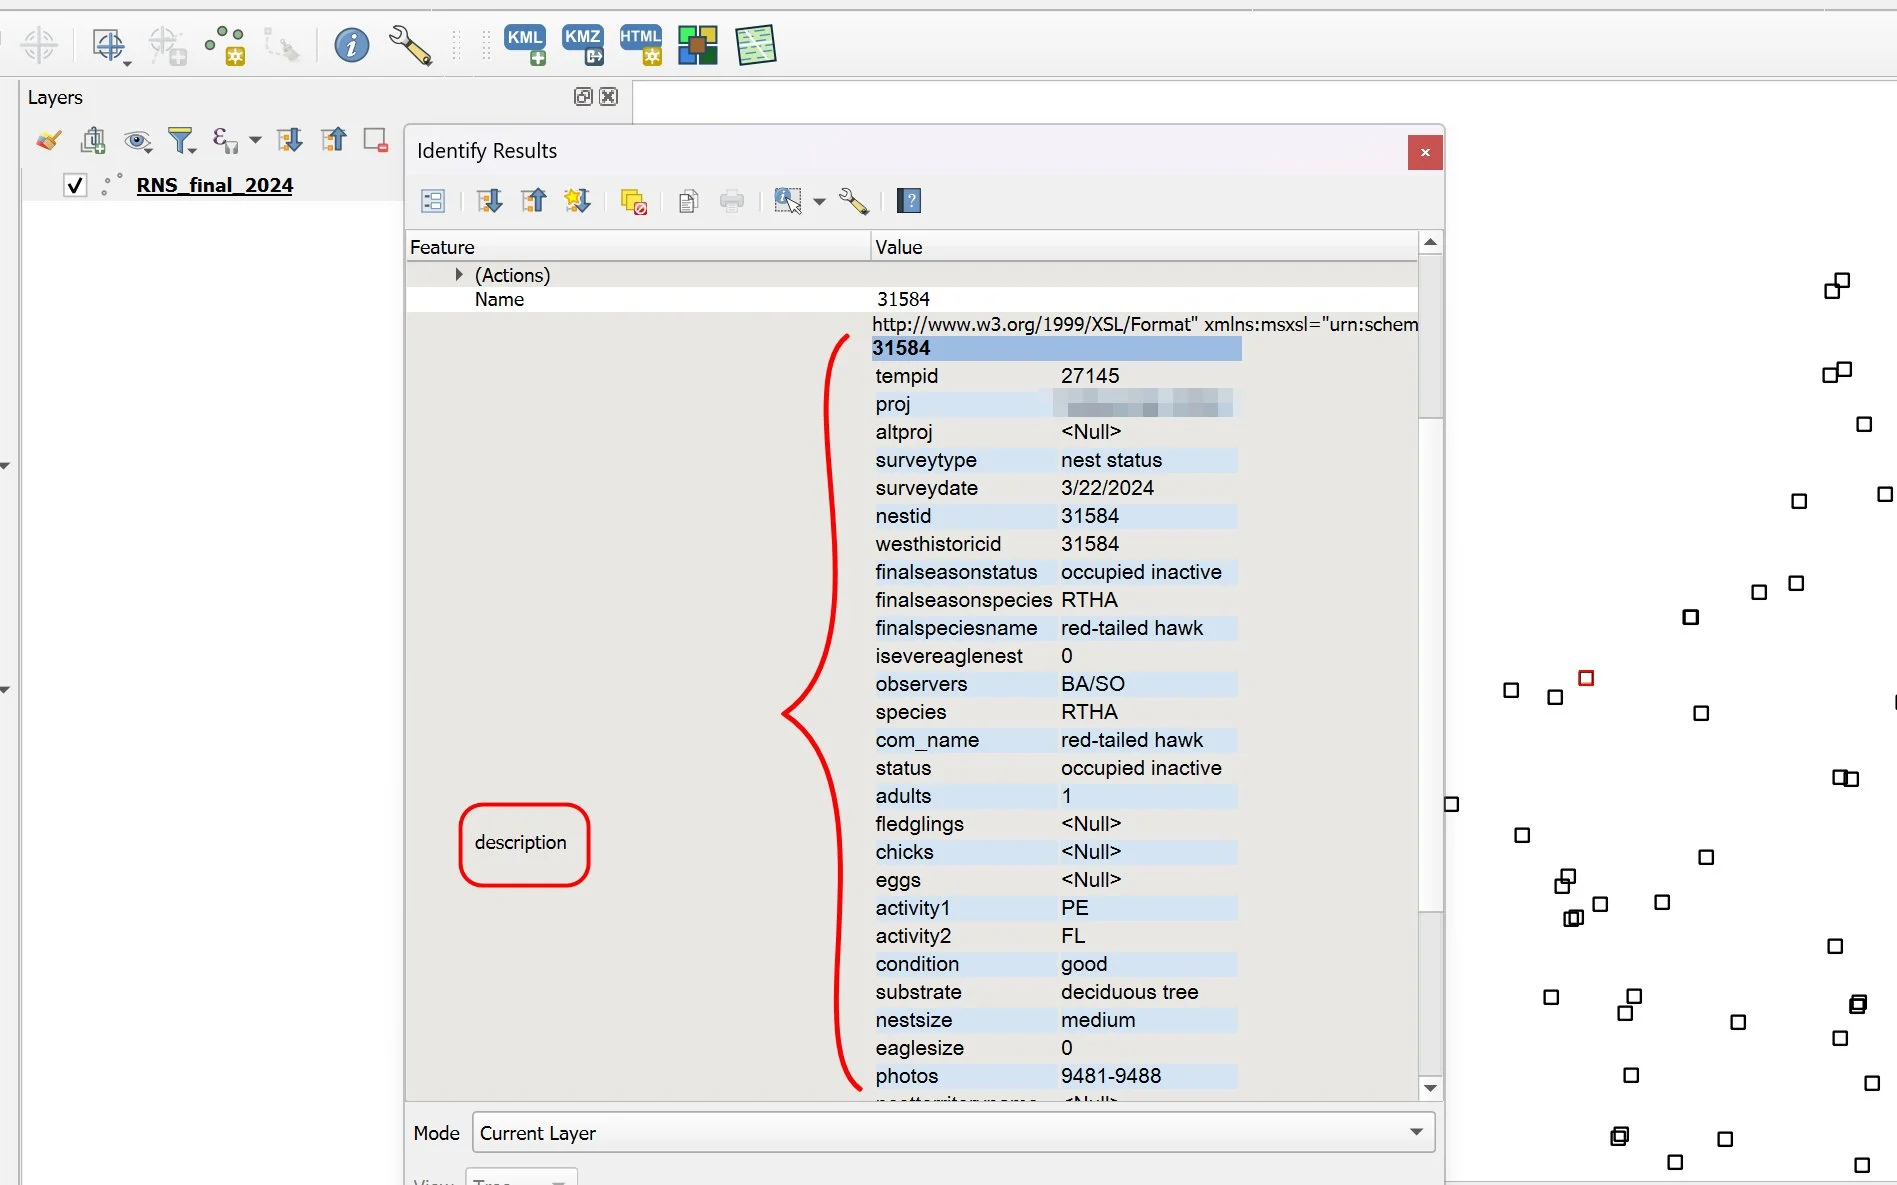
KMZ file with popup info in a single description field
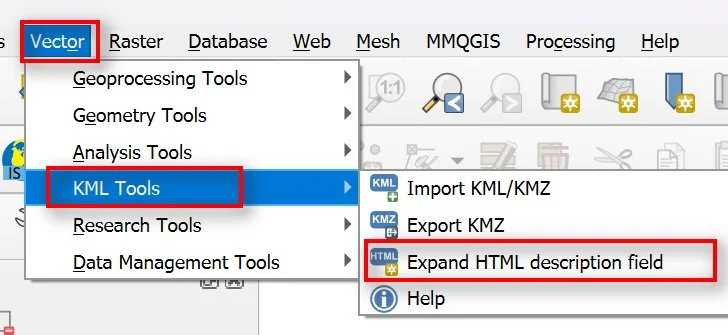
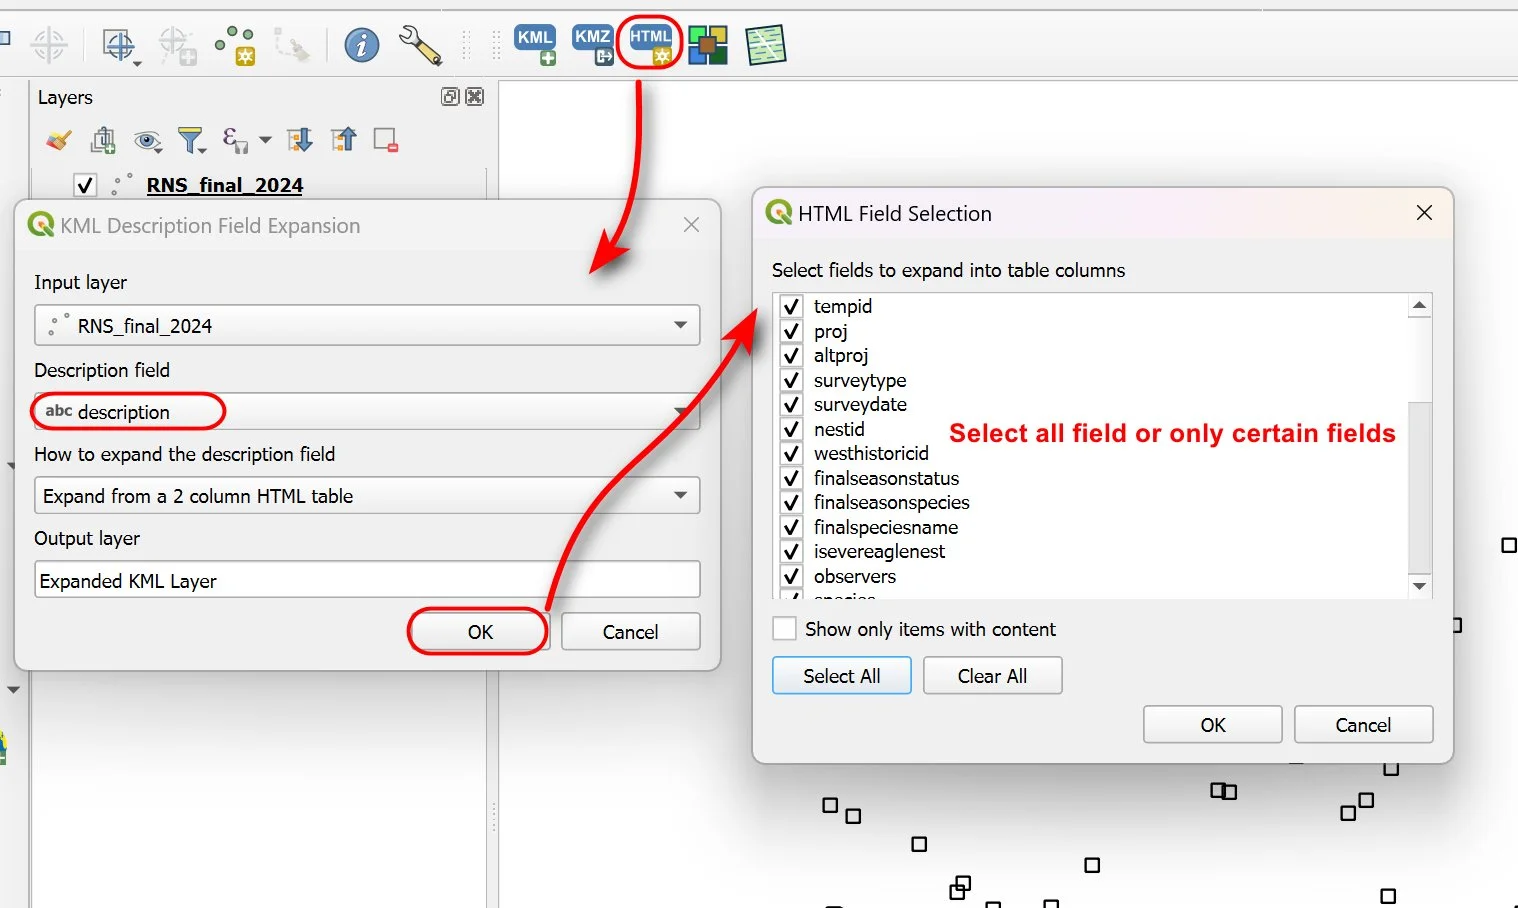
Use the Expand HTML Description tool to put the information into a tabular form.
Open the temporary file and check the attribute table to see if your selected HTML fields have been written. If so, then you can export or make the temporary file permanent.
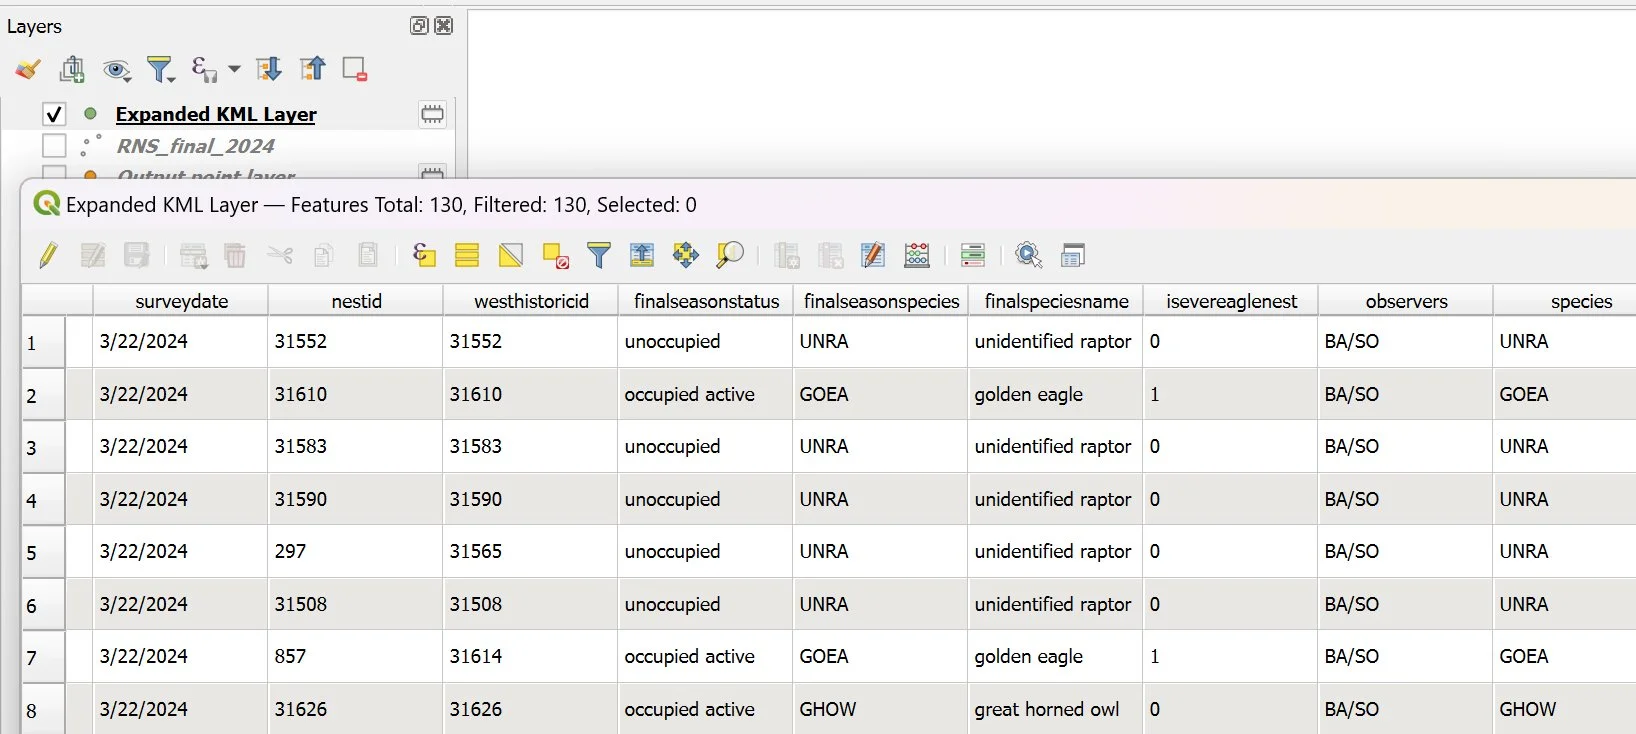
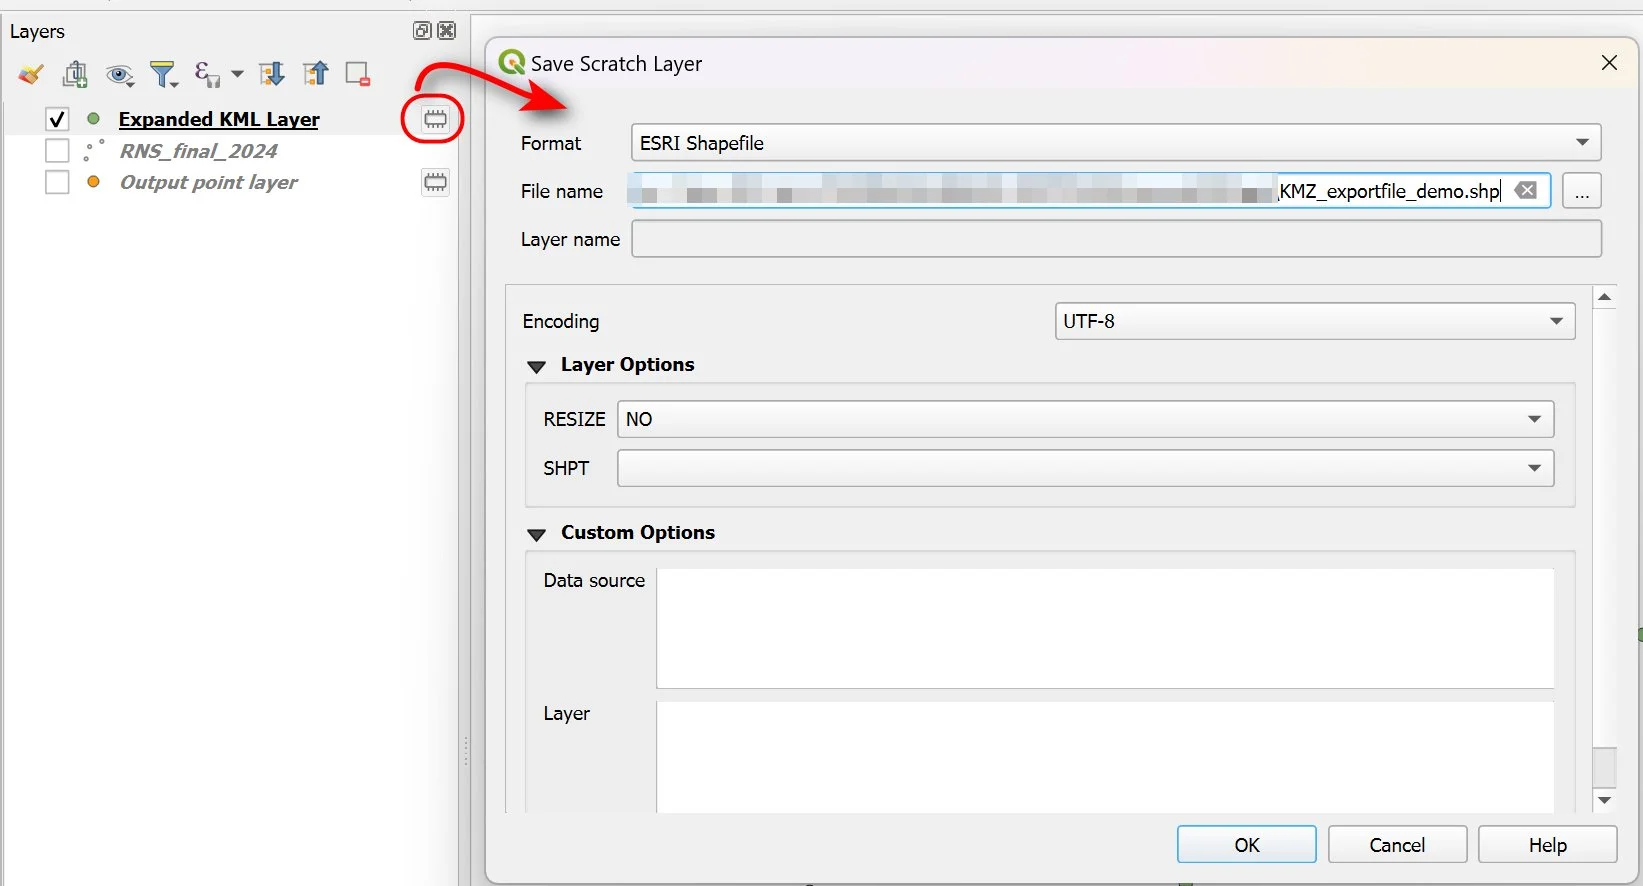
Make your temporary file a permanent GIS layer
And there you have it. Three different ways to convert a KMZ file with full popup info written out to the attribute table of a GIS layer format.
Thanks for reading and I hope you find these tips helpful. Until next time :)