
Authenticating AGOL for use in QGIS - Part 2
This is part 2 of ArcGIS authentication for use in QGIS. In this post, I will go over how to set up OAuth2 authentication which can then be used to securely connect to your AGOL content/resources in QGIS.
AGOL OAuth2 Authentication
Create new Application
Note: Requires an AGOL account with administrator privledges
Log into your AGOL account.
Go to the Content tab >> Click + New Item >> Select Application
3. In New Item:
Application Type: Select Mobile
URL: Type in a URL — this URL can be anything (e.g. https://qgis.org)
Click Next
Title: Give your application a name
Folder: select a folder where you want to save the new item
Tags and Summary are optional
Click Save to finish creating the application item


Registering the Application
Once saved, you’ll see the overview page. Go to Settings
In Settings, scroll down until you see the Credentials section >> Click Register Application
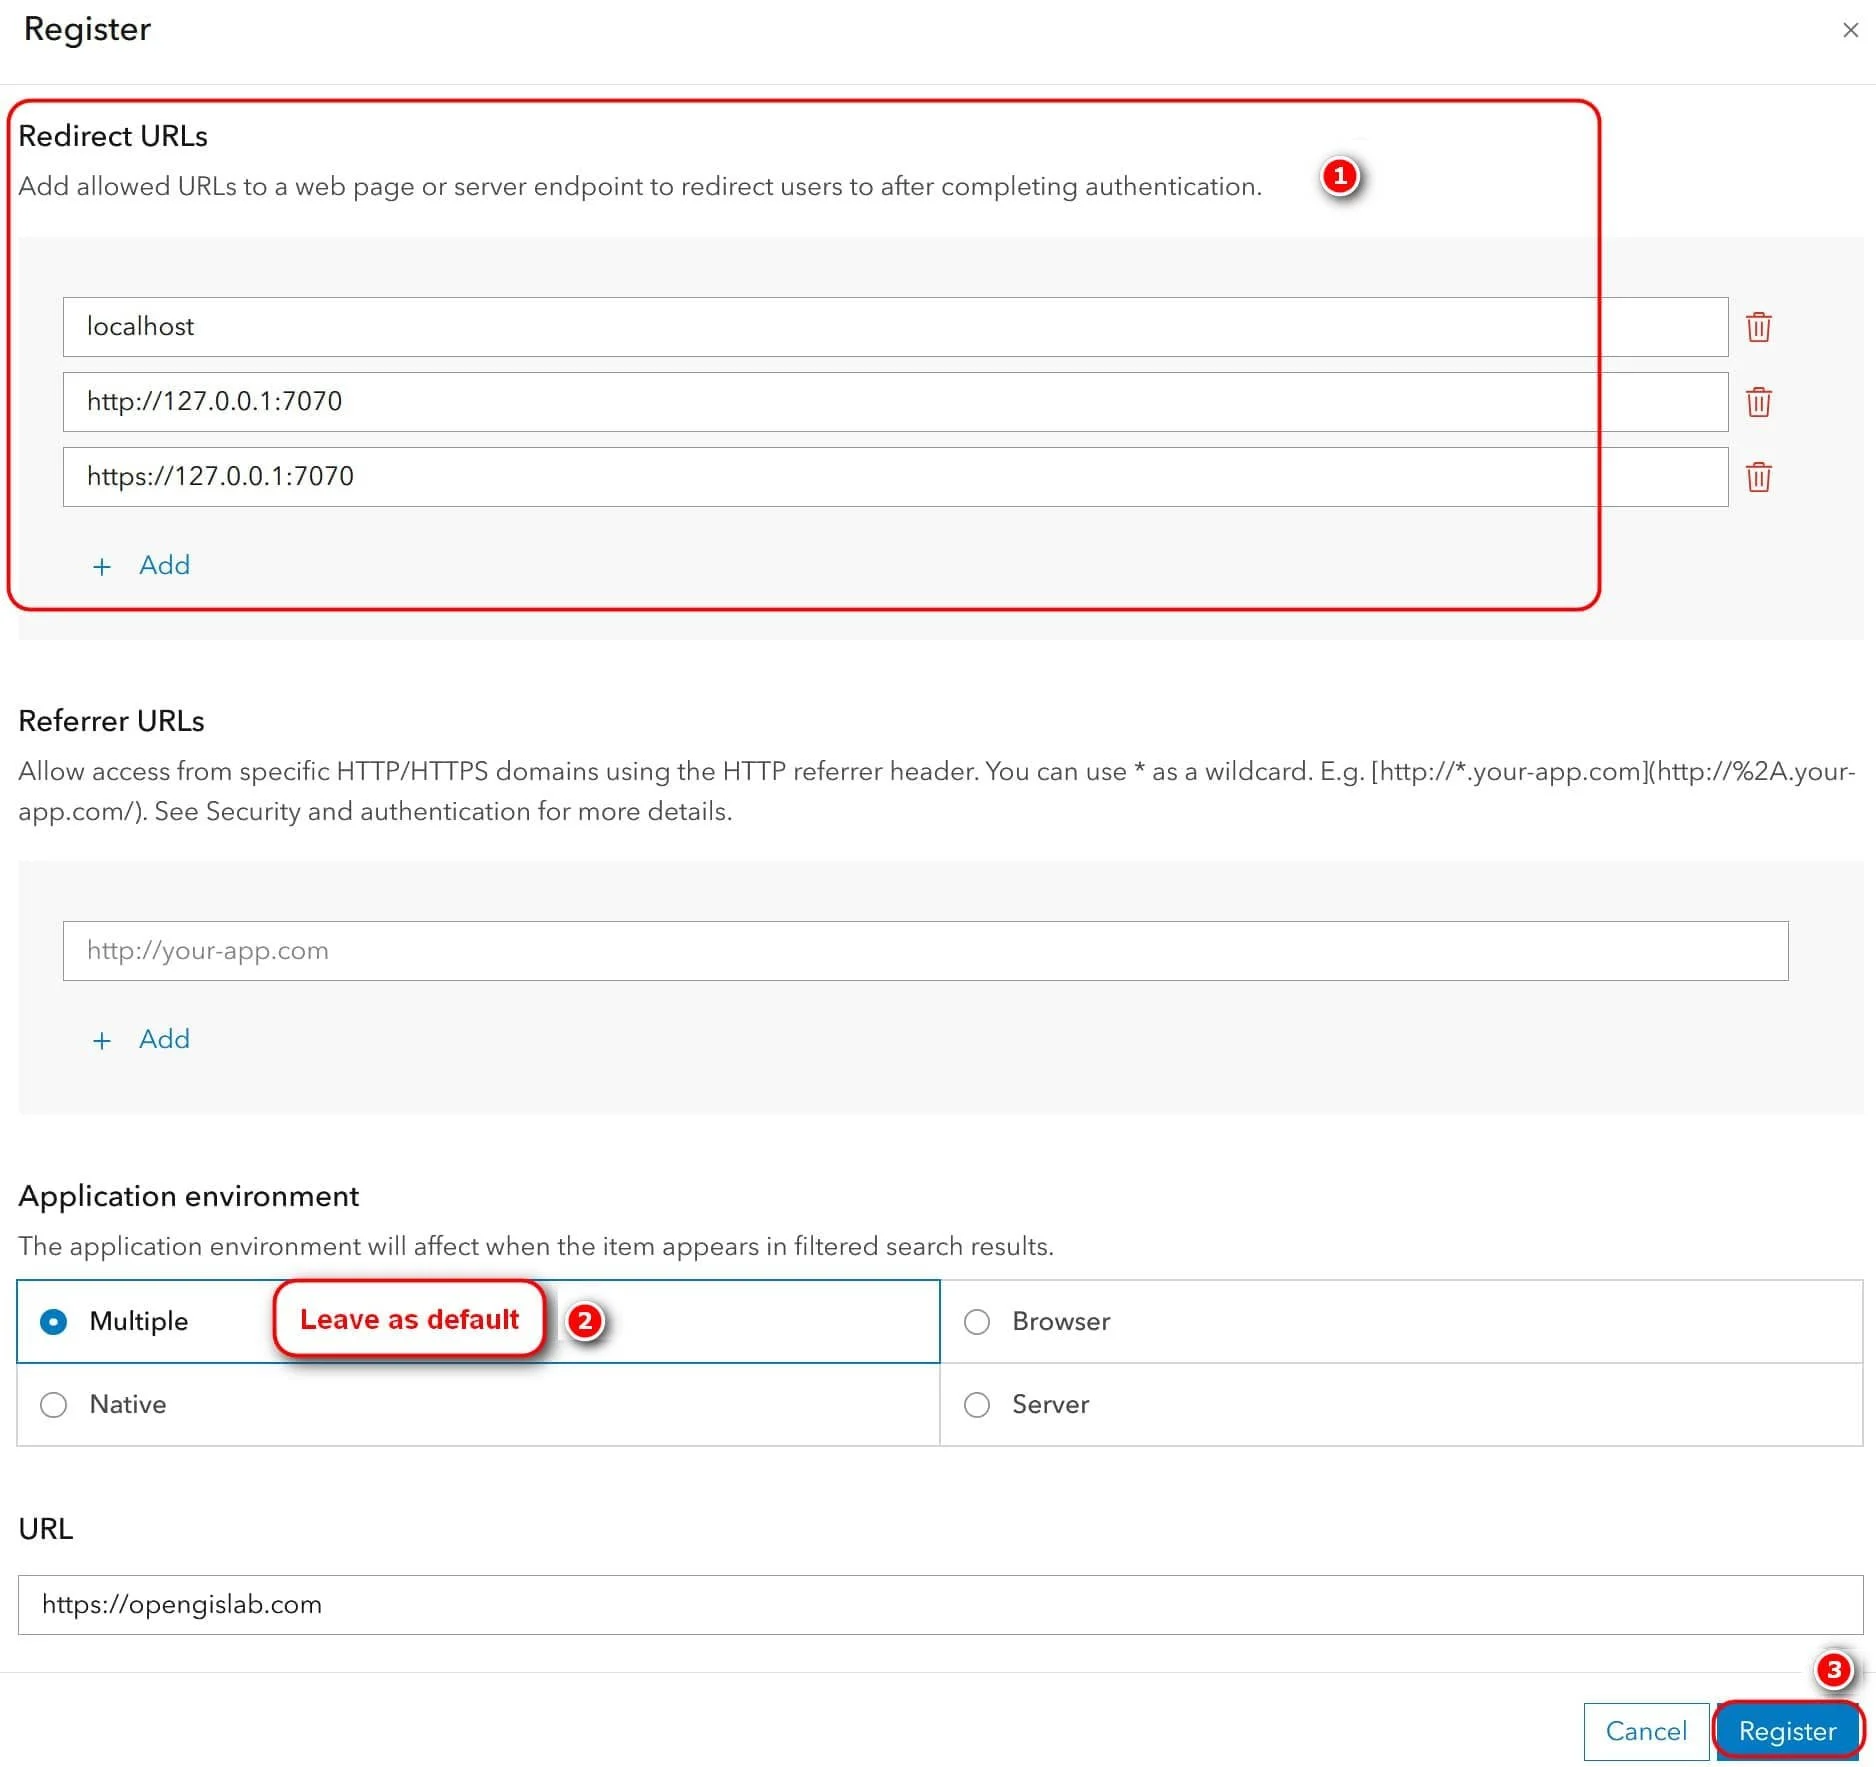
In Register window:
Redirect URLs:
localhost
http://127.0.0.1:7070
https://127.0.0.1:7070
Application Environment: Leave as default
Click Register
Once the registration is complete, you will see the application credentials. Locate the two fields: Client ID and Client Secret. You will need these values in the next step for setting up a QGIS Authentication configuration.

Creating QGIS Authentication Configuration
Open QGIS, go to Settings >> Options >> Authentications
Click Add new Authentication Configuration
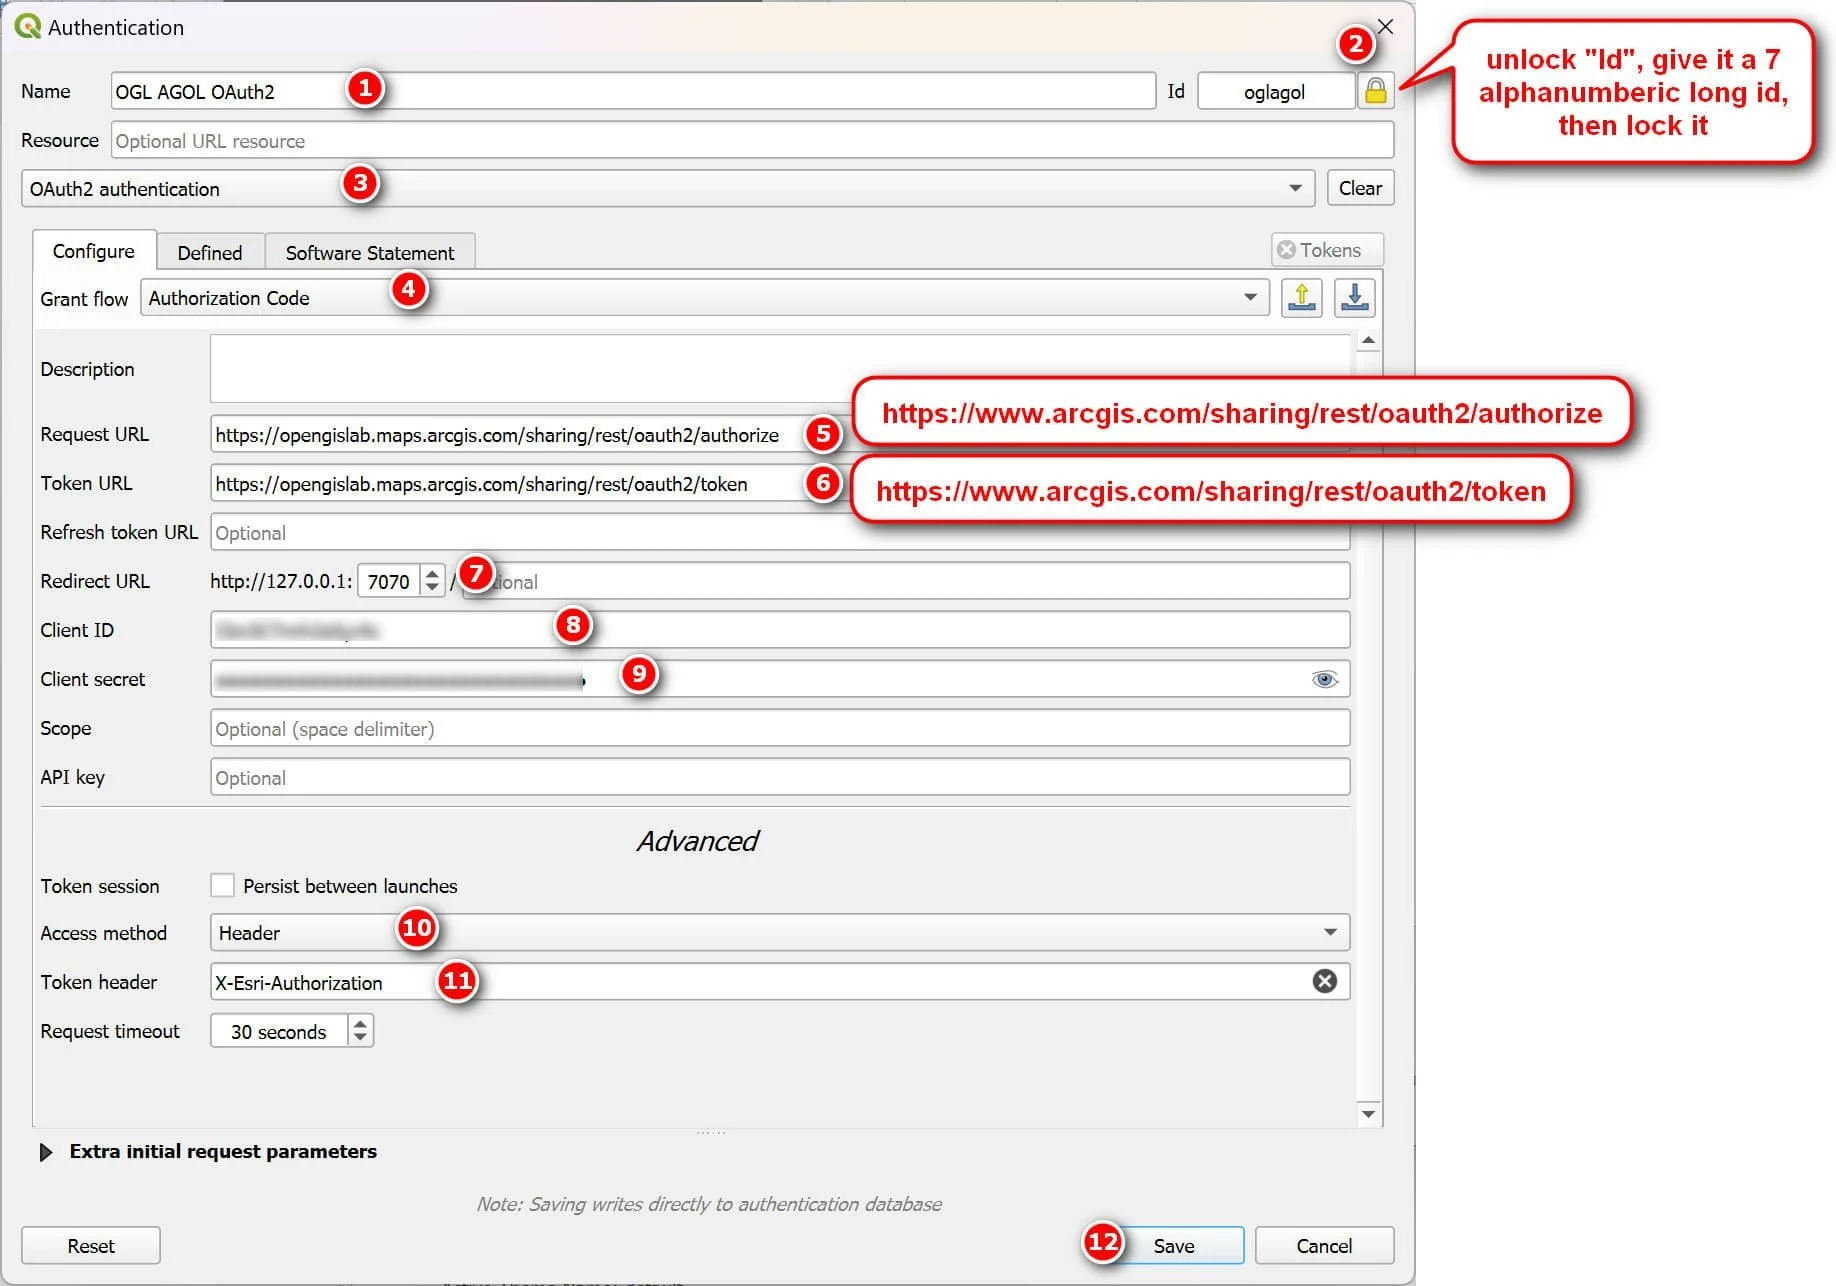
In the Authentication window:
Name: type in a new for your authenticaiton configuration
ID: unlock the “Id” field by clicking the little padlock icon, and then enter a standard ID that is a 7 alphanumberic character long (e.g. oglagol). Lock the “id” field once done.
Authentication Type: Select OAuth2 Authentication
Grant Flow: Select Authorization Code
Request URL: https://www.arcgis.com/sharing/rest/oauth2/authorize (could also be your own AGOL, mine is https://opengislab.maps.arcgis.com/sharing/rest/oauth2/authorize)
Token URL: https://www.arcgis.com/sharing/rest/oauth2/token
Redirect URL: leave as the default http://127.0.0.1:7070
Client ID: enter your Client ID from earlier
Client Secret: enter your Client Secret from earlier
Access Method: leave as default Header
Token Header: X-Esri-Authorization
Click Save and close out of Settings Options window
Connect Securely to AGOL server
In QGIS, add a new ArcGIS REST server connection via the Browser panel (right click ArcGIS REST Servers>> new Connection) or via the Data Source Manager ( Layer >> Data Source Manager >> ArcGIS Rest Server >> New)
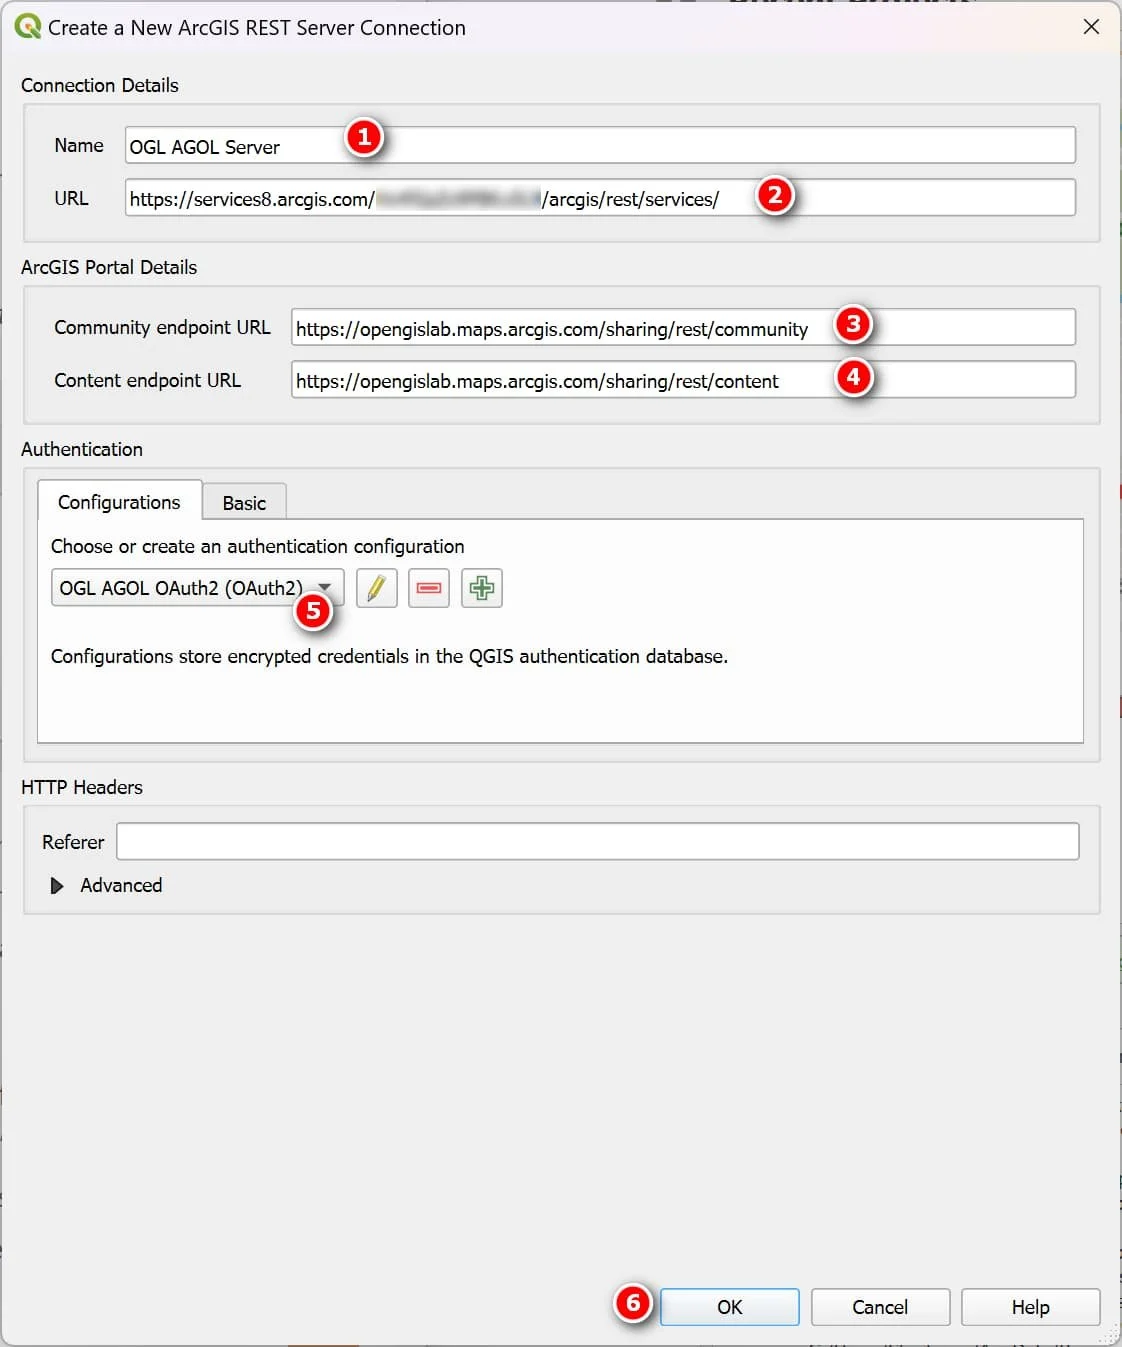
In the New Server Connection window:
Name: give a give to your server connection
URL: enter your AGOL Server Rest endpoint
Community endpoint URL: https://www.arcgis.com/sharing/rest/community or could use your own (e.g. https://opengislab.maps.arcgis.com/sharing/rest/community)
Content endpoint URL: https://www.arcgis.com/sharing/rest/content or could use your own (e.g. https://opengislab.maps.arcgis.com/sharing/rest/content)
Configurations: Select the authentication configuration file you created earlier (e.g. OGL AGOL OAuth2)
Click OK
Once you connection is successful, you can see your AGOL Server in the QGIS Browser Panel. If you expand the Connection, you should see “Groups” and “Services".
Clicking on either Groups or Services will bring up the AGOL sign in page in a web browser
Sign in to your AGOL

NOTE: If you get a timeout error when trying to sign in to your AGOL. Quit and Re-open QGIS and try again.
NOTE: You may get a “Request for Permission” popup. If you do, click Allow.
You should now be able to see and work with your AGOL Groups and Services. Remember that what you can access on the ArcGIS REST server in QGIS is based on your AGOL user account role/privileges.
Here’s is what mine example looks like:

That’s it for this post. As always, thanks for reading. Until next time. :)