This tutorial shows you how to convert USGS geoPDF topo maps to geoTiffs using GDAL. It assumes that you have: 1) downloaded some USGS geopdfs, 2) a pdf reader such as Adobe Acrobat, and 3) GDAL installed on your computer. Below are the steps I used in converting USGS topo maps from geopdfs to geotiffs with GDAL. I am accessing GDAL using OSGeo4W Shell utility. The OSGeo4W installer bundles a set of open source geospatial software (e.g. QGIS, GDAL/OGR, GRASS, etc.) for the Windows OS environment. For more information, see website at https://trac.osgeo.org/osgeo4w/.
The USGS has a good, detailed document on how to convert GeoPDF to Geottiffs using GDAL and other software. It can be found here at http://nationalmap.gov/ustopo/documents/ustopo2gtif_current.pdf.
The steps below is the workflow I used to convert a USGS geopdf topo map to geotiff. For a more detailed, step-by-step instruction see the pdf tutorial, How to Convert GeoPDF to GeoTIFF Using GDAL. The method shown here will not create a collarless geotiff image. It will convert a geodpf to geotiff without the collar information but will not actually clip the collar off.
Step 1: Open OSGeo4W Shell and PDF Layer Names
Open the OSGeo4W Shell. It should look something like the image below.
Figure 1: OSGeo4W Shell
Navigate to your drive and directory where your GeoPDFs are stored, by using the cd or change directory command and inputting your own parameters where denoted by < >.
cd <your drive letter>:\<path to directory>
To get a list of files in the directory, type in dir
To get information about your pdf, including coordinate system and pdf layer names, type in gdalinfo <GeoPDF filename> -mdd layers
Step 2: Convert a single geoPDF to geoTIFF
To convert a single geopdf to geotiff, use the gdal_translate command and input your own parameters where denoted by < >. You can use gdal_translate with or without optional parameters.
Option 1: gdal_translate <geopdf filename> <output geotiff filename> -of GTiff
Example: gdal_translate HI_Honolulu_20130410_TM_geo.pdf HonoluluTopo.tif -of GTiff
Note: This option will convert all pdf layers to a geotiff at 96dpi. It can take a long time to process and the resulting tiff can be really large especially when including the orthoimagery and shaded terrain. I did a test on the Honolulu quad and it took maybe 3-4 hours with the resulting tiff being ~955MB.
Option 2: Gdal_translate <GeoPDF filename> <Output Geotiff Filename> -of GTiff
--config gdal_pdf_layers_off “<pdf layername 1>,<pdf layername 2>,<pdf layername 3>” –-config gdal_pdf_dpi <output dpi>
Example: gdal_translate HI_Honolulu_20130410_TM_geo.pdf HonoluluTopo.tif -of GTiff --config GDAL_PDF_LAYERS_OFF “Map_Collar, Map_Frame.Projections_and_Grids, Map_Frame.Terrain.Shaded_Relief, Images.Orthoimage” --config GDAL_PDF_DPI 100
Step 3: Convert multiple geopdfs to geotiffs using batch file
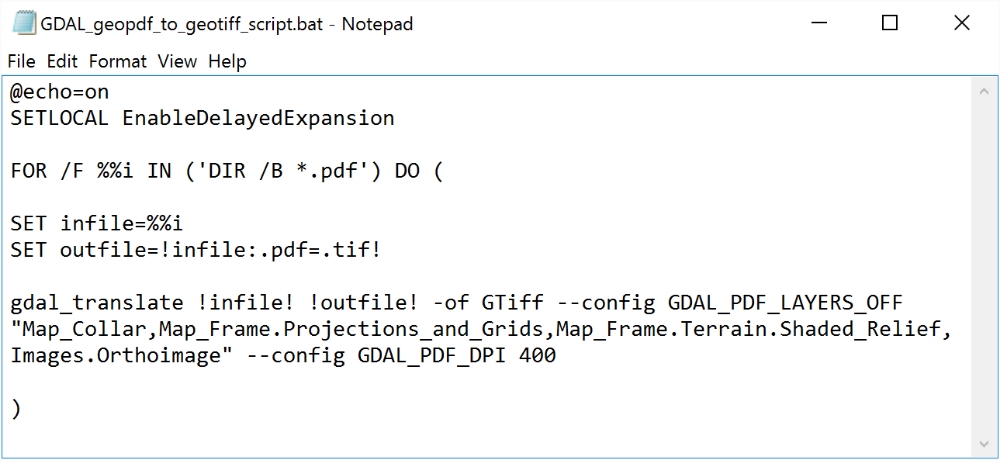
Create a batch file to convert multiple geopdfs to geotiffs. You'll need a text editor such as Notepad. Enter the following into Notepad and save as a *.bat file.
@echo=on
SETLOCAL EnableDelayedExpansion
FOR /F %%i IN (‘DIR /B *.pdf’) DO (
SET infile=%%i
SET outfile=!infile:.pdf=.tif!
Gdal_translate <GeoPDF filename> <Output Geotiff Filename> -of GTiff
--config gdal_pdf_layers_off “<pdf layername 1>,<pdf layername 2>,<pdf layername 3>” –-config gdal_pdf_dpi <output dpi>
)
Example: Notepad file saved as *.bat
Step 4: Run the batch file in oSGeo4W Shell
Open up the OSGeo4W Shell and navigate to your directory where your geopdfs and the batch file are stored. Then use the TAB key to scroll through the files in your directory to select the batch (*.bat) file. Hit ENTER key when you the *.bat file selected. This will loop through all the geopdfs in the folder and convert them to geotiffs.
After the conversion process you can then clip the geotiffs with its corresponding USGS 7.5 minute grid cells either in ArcGIS, QGIS or another GIS software. Make sure the grid cell layer is in the same coordinate system as your geotiffs before you do the clipping procedure.
The images below show examples of the Honolulu and Koko Head topo quads as they are viewed in QGIS after having the collars clipped off.
Example of Honolulu and Koko Head topo quad geotiffs with the corresponding USGS 7.5 minute grid cells as displayed in QGIS.
Example of Honolulu and Koko Head topo quad geotiffs without the USGS 7.5 minute grid cells as displayed in QGIS. Notice it is almost seamless -- you could get a seamless image by creating a mosaic and blending the edges.


