Setup QGIS Print Layout to use Inch Instead of Millimeter

I’m in the process of migrating as much of my workflow from ArcGIS to QGIS as possible. As part of my migration, I’m creating Layout templates to make the process of map making a bit easier. One of the questions I get all the time is how to set the units used in Layout to be in inches instead of millimeter. If you’re a QGIS user, you’ll noticed that you can change the Layout page size to be in inches (e.g. 8.5x11” Letter Portrait), however, the unit for the Ruler in Layout is hard coded in QGIS to be in millimeter - this causes a lot of confusion/frustration for users since the page size and Ruler units don’t match. This is

the workflow that I use to create a print layout template in QIGS that sets the units of the Ruler and the page size to be in inches. Note, I’m using the latest version of QGIS 3.14 Pi.

1. Open QGIS. Go to Project Menu >> New Print Layout

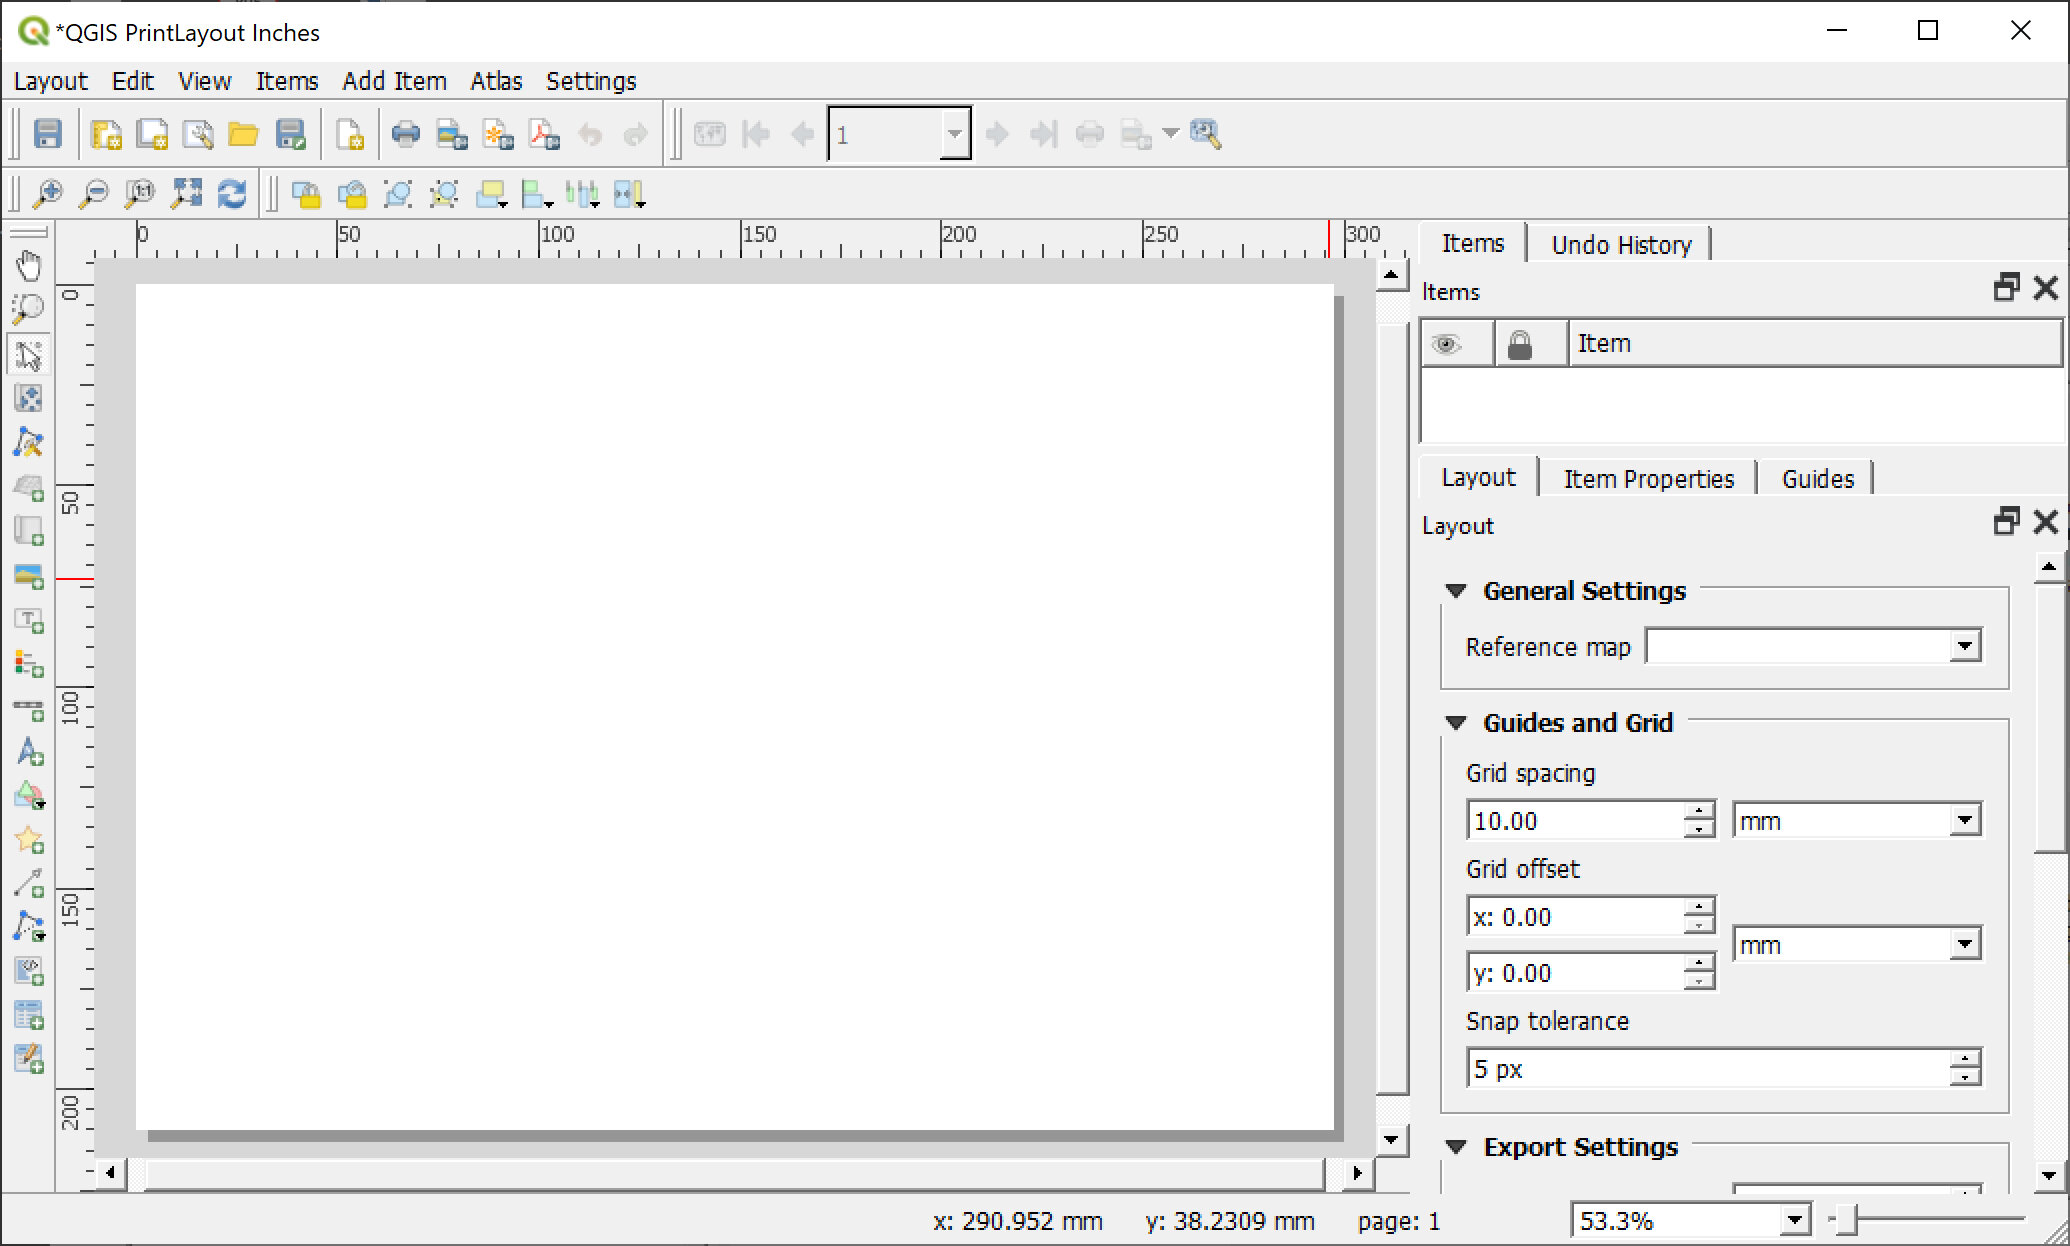
2. Give your new print layout a name (e.g QGIS PrintLayout Inches)

The default QGIS Layout looks like this:

Fig0002.jpg

3. Change page size via Page Properties, which is sort of hidden (its not in the menus). Right click anywhere within the Layout >> Page Properties.

Change your settings on the Page Properties to whatever you want. Here I’m changing my page size to 8.5x11 inches Portrait

Note: You may get either the Unit or Orientation grayed out depending on what page size you choose. Notice in the snapshot below, when Custom is selected the Orientation field i s grayed out, and when selecting Letter the unit is grayed out. I find this weird and don’t know if this a bug or not. But to work around it I first use Custom as my page size to input the width and height and change the unit to inches. Then switch to Letter size and change my orientation to Portrait.

Notice when Custom is selected the Orientation field is grayed out, and when selecting Letter the unit is grayed out.

Notice when Custom is selected the Orientation field is grayed out, and when selecting Letter the unit is grayed out.

4. Change the units for the Guides and Grid as needed (e.g. Inches)

Fig0007.jpg

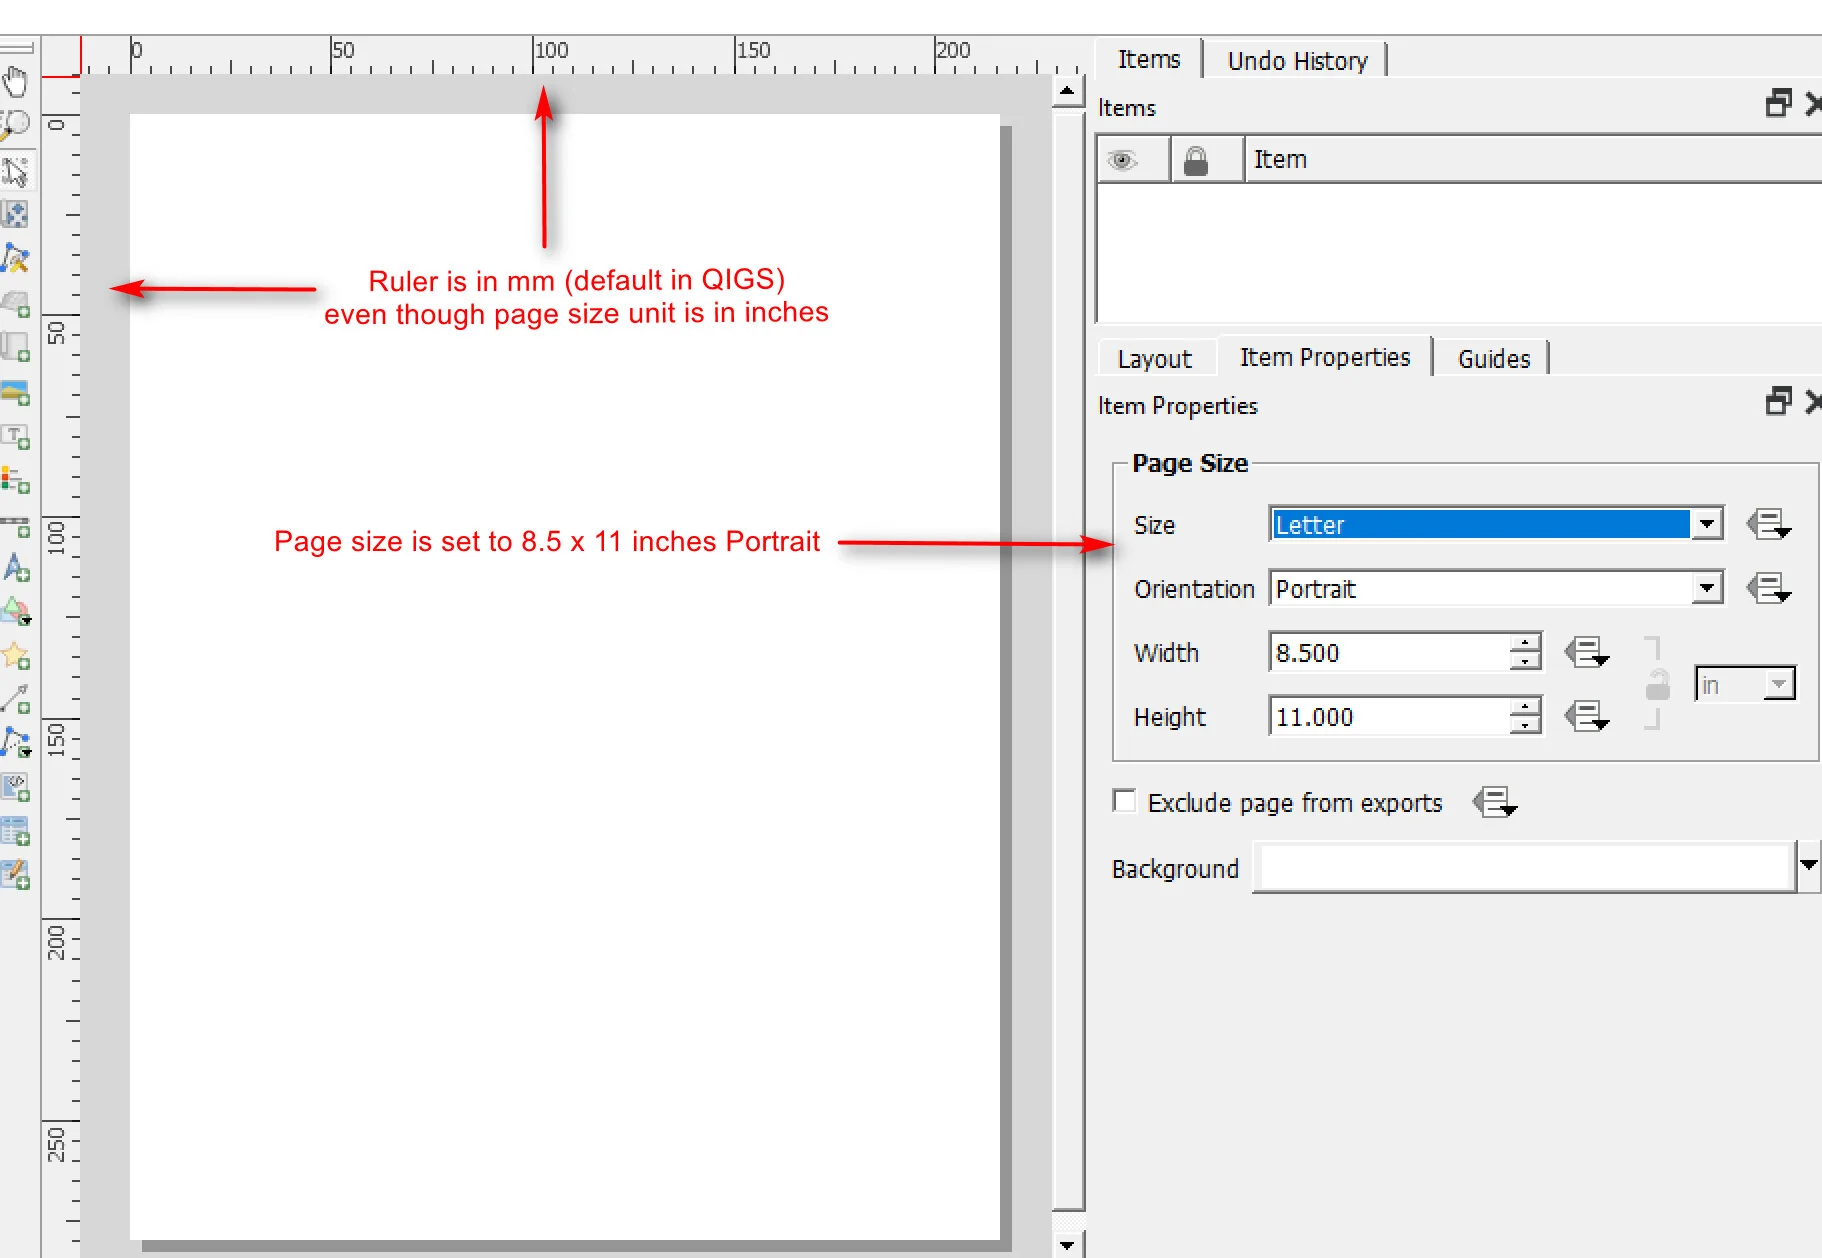
This is how my layout looks like now. Notice that even though my page size is set to 8.5x11 inches Portrait the Ruler unit is still in mm (this is the default unit in QGIS and built into the core software).

Fig0008.jpg

At this point, you can add other map elements (e.g. Logo, map title, scale bar, etc) that you want to include in your template.

5. Save the print layout as a *.qpt template file (e.g.QGIS_Layout_inhces.qpt). Go to the Layout Menu >> Save as Template

6. Open and edit the layout template (.qpt) that you just saved. Here, I’m using Notepad++ as my text editor. Find and replace “mm” to “in” the qpt file. Save the file when done editing.

Fig0010.jpg

7. Go to Layout Menu >> Layout Manager. Open your print template.

  • Under New from Template: Select Specific

  • Navigate to your print layout template (the one you just edited above in step 6).

  • Create a new layout using the specified template

Fig0011.jpg

 Now the Ruler unit and Page Size unit match. Both should be in inches.

Fig0013.jpg

8. Optional – you can add the path to your layout templates in the Layout Settings so that QGIS will know to look for your templates.

Fig0014.jpg


That’s it for this session. I hope you find it useful. Print Layout templates is a great way to standardize map making and share them with others inside or outside your company.

Thanks for reading :)


Viewing ESRI Basemaps in Google Earth Web and Pro

Did you know you can view/use ESRI basemaps in Google Earth Web and Pro? I had forgotten about ESRI’s KML/KMZ map service capabilities until someone asked me if it was possible to use/view USGS topo maps in Google Earth. Many people are familiar with Google Earth and want to have other basemap options to use. This is a short post on how to bring in ESRI basemaps in Google Earth Pro (desktop) and Google Earth Web.

I’m using Google Earth Pro version 7.3.2.5776 on my laptop. The Google Earth Web is of course the browser version and works best in Chrome. Google Earth Web also works with Firefox (v. 73.0.1) and the new Microsoft Edge browser (released Jan. 2020) but not the older Edge Legacy browser. If you are using Google Earth Pro then I assume that you already have it installed on your machine.

Go to ESRI Basemap REST Services Page

https://services.arcgisonline.com/arcgis/rest/services

Here you’ll see a list of available map services. Click on a map service of interest - it will open in a new tab. Then click on ArcGIS Earth option to download/save the kmz file.

ArcGIS Online Basemap Services

Here I’m looking at the USA_Topo_Maps Map Server Service. If you look further down the page, you’ll see that there an option to Generate KML - I find this option to not produce very good resolution when used - at least not with these map services. So I recommend using the ArcGIS Earth option. To find out more about about KML output and operations from ArcGIS REST API, see this link here.

ArcGIS REST Service Map Server

ESRI KMZ Basemaps in Google Earth Pro

After saving the KMZ file, double click on it to open it in Google Earth Pro. In GE Pro it will add the MKZ to your temporary places. If you want to save the KMZ file to “My Places” then right click on the KMZ file and Save to”My Places”.

Here’s an example of what it looks like in GE Pro.

Fig0008.png

Below is a snapshot of the USA_Topo_Maps KMZ as seen in GE Pro. The resolution looks great.

USGS Topo basemap Google Earth Pro

ESRI KMZ Basemaps in Google Earth Web

For Google Earth Web, you don’t have to download anything. Just type in the following URL into the browser of your choice. Remember, that it works best in Chrome, but you can also use Firefox and the new Microsoft Edge (Canary).

Google Earth Web: https://earth.google.com/web/

You should see something like this. I haven’t had the chance to try out all the cool things you can do, but I really like the Google Earth Web version.

Google Earth Web

In Google Earth Web, you have to set up some options first before you can use/view the ESRI KMZ files. In the left hand panel, click the Menu button then go to Settings Options.

Fig0026.jpg

In the Settings options, switch on the option to Turn on KML File Import then Save the settings. You’ll get a pop up asking if you will allow earth.google.com to store data in persistent storage? — Click Allow.

Fig0030.png

Back in the Menu, go to Projects. Note you can also access Projects using the Projects button in the main menu panel. In the Projects panel, click the Open button and select one of the Import option based on where you saved the ESRI KMZ files you downloaded.

Fig0032.png

Here are two example of my ESRI basemap KMZ files. Note there are some display options available for the KMZ files.

Fig0020.png

There are also some map styling options you can set as well (under Map Styles when you click Menu button).

Fig0021.png

Here is a view of the ESRI USA_Topo_Maps KMZ file with the 3D building option turned on and viewed in 3D in Google Earth Web.

Fig0034.png

That’s it for this post. Thanks for reading…until next time.