
Customizing Esri Vector Basemaps using the Vector Tile Style Editor
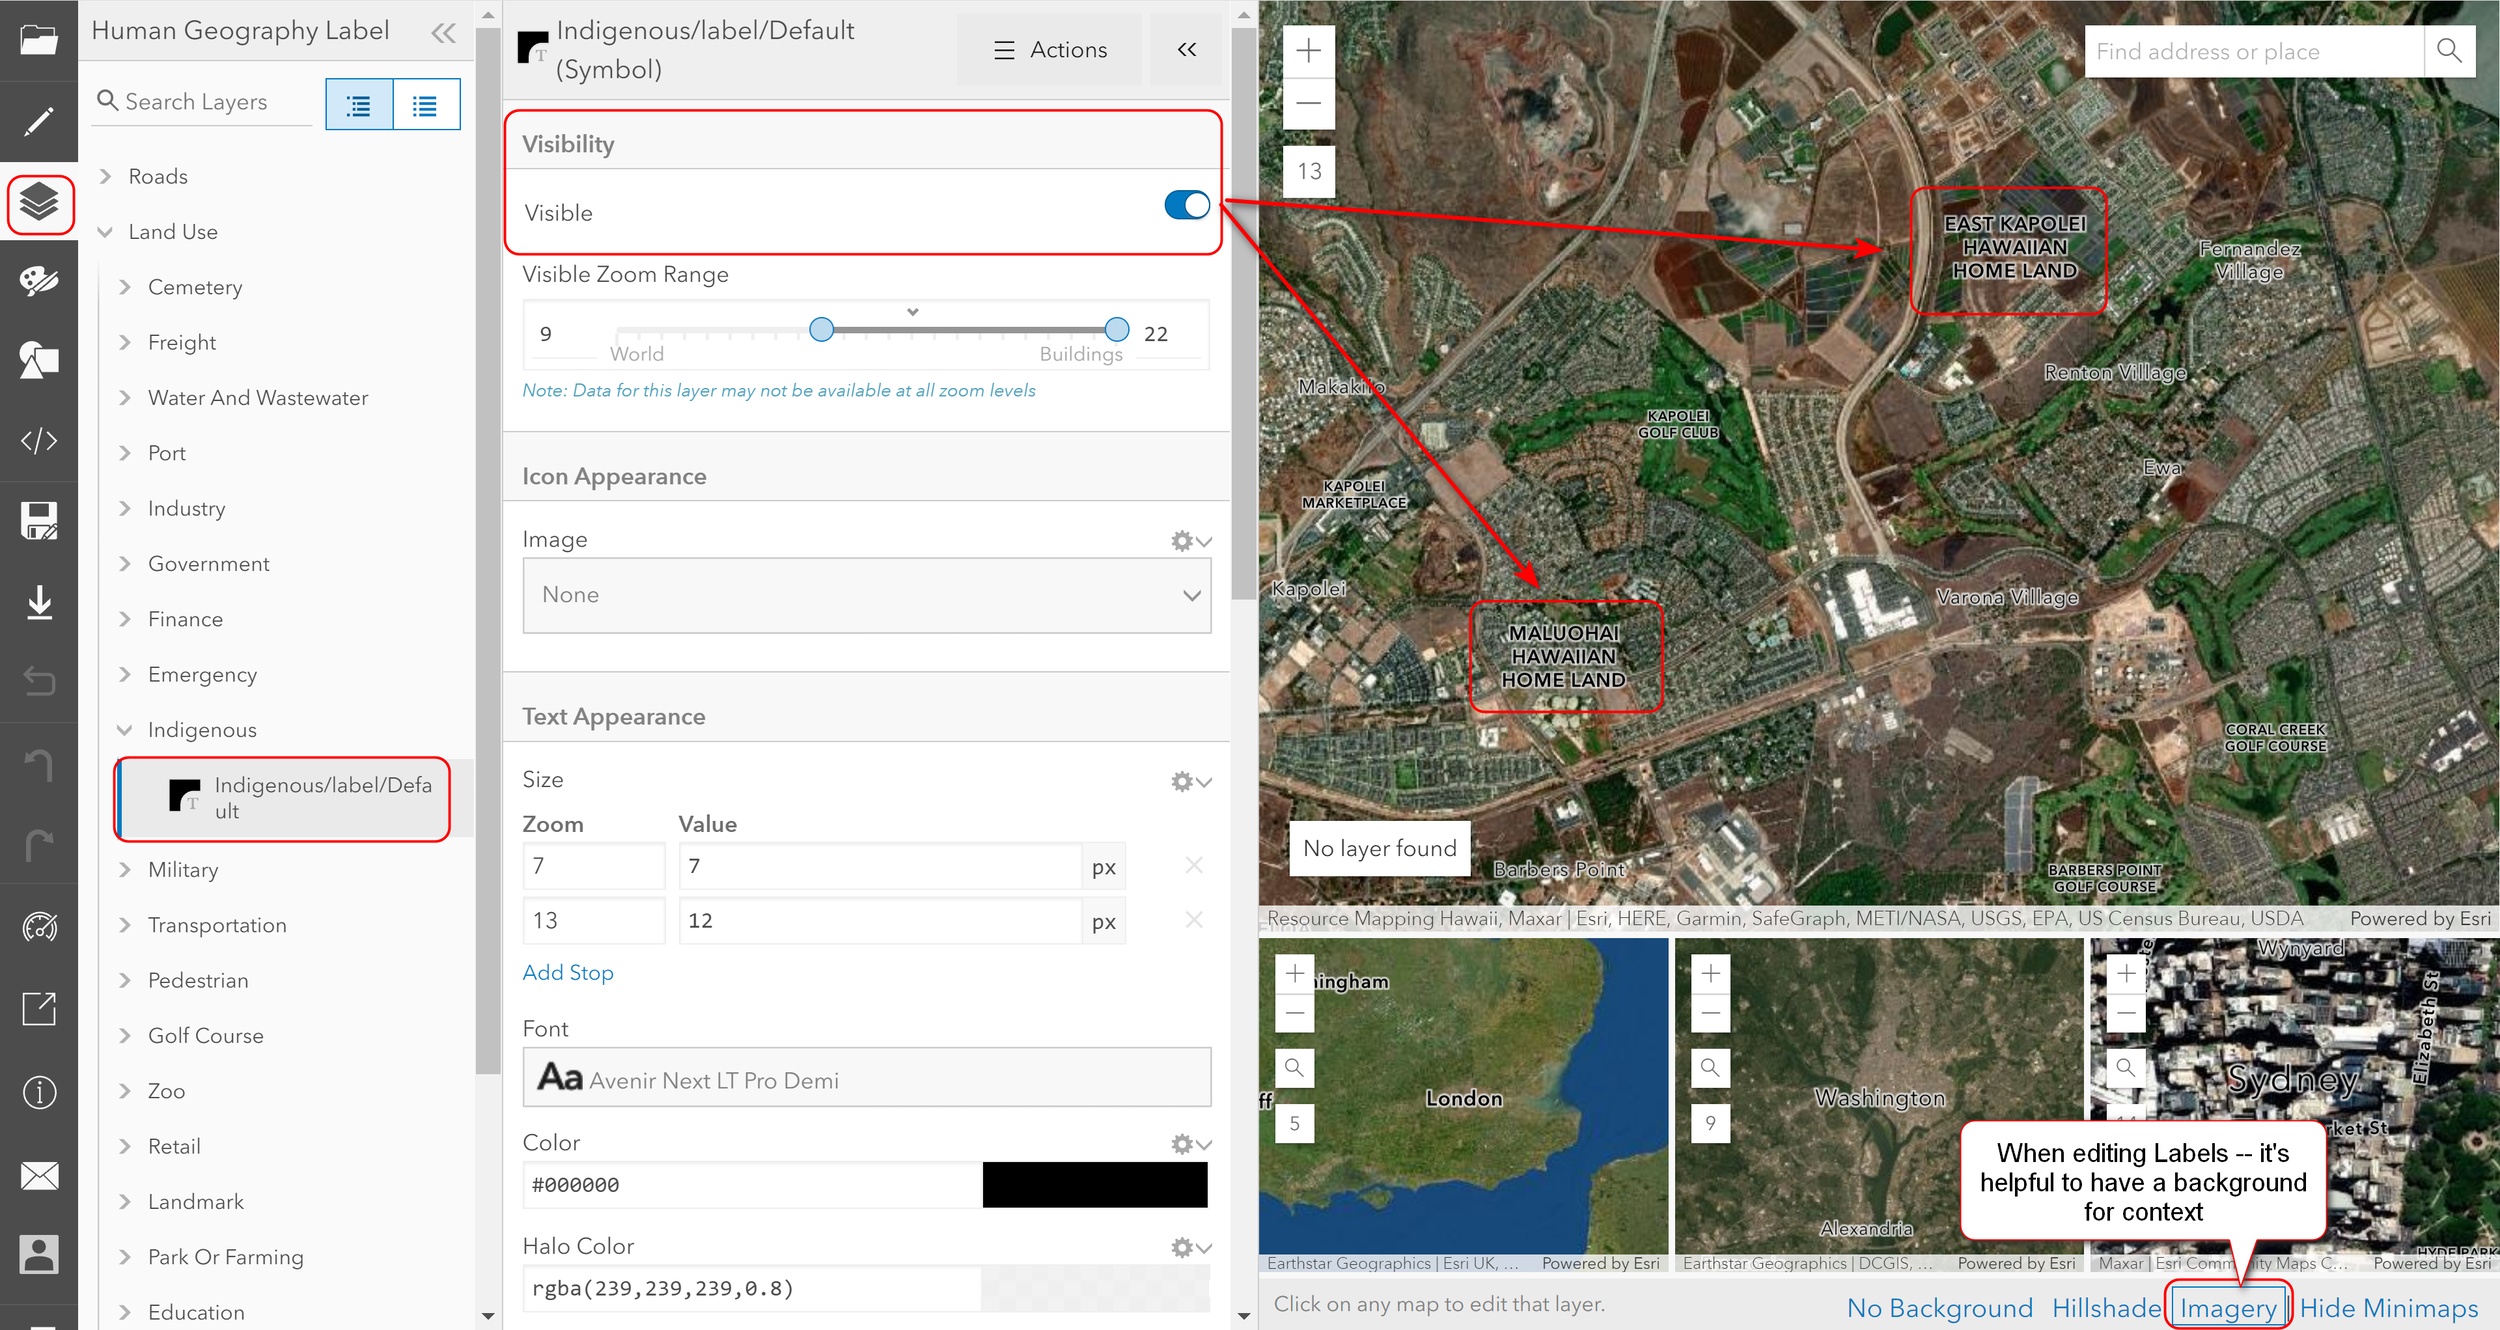
Have you ever worked on a mapping project and thought “oh, this basemap is great, except for…?” I had that thought just the other day while making some maps for a solar project. The basemap I was using had everything I wanted except I didn’t like how particular features were labeled – in my case here, it was the labels for Hawaiian Home Lands features. I wanted to remove the existing labels and replaced with my own labels with Hawaiian diacritics. Normally, if I’m using a raster tile basemap, then I wouldn’t be able to edit the basemap as the labels would be flattened and served as part of the raster. This had me to thinking about Vector Basemaps and the Vector Tile Style Editor; and how I can customize an existing ArcGIS basemap the way I need it for my purpose.
A well designed basemap takes a lot of time and effort to create from scratch, so it makes sense to edit an existing one if possible. This is where ArcGIS Vector Tile Style Editor (VTSE) comes in – you can use this handy editor app to customize Esri Vector Basemaps to meet your needs.
Anyway, in this posting I’m going to show you how I use the Vector Tile Style Editor to customize a couple existing Esri Vector basemaps. You can use this as a guide to make your own customized basemap.
What .are Vector Basemaps
A basemap is a map that is designed to provide a foundation or base (that’s why its called a basemap) for other additional (i.e. operational layers) information on your map. The basemap serves as a reference and provides a context for your map, and can “make or break” your map. Vector basemaps are maps that are delivered as vector tiles (PBF format) that are rendered client-side based on style files delivered with the layers. Vector data in these layers/tiles are retained, so unlike raster basemaps, they can adapt to the resolution of any display device and be restyled for multiple use purposes. You can change colors, fonts, line widths, etc. to make your own map style. You can also turn off layers or features you don’t want to show on the basemap. Vector tiles also have smaller file sizes than raster tiles, which translates to faster maps and better performance.
Vector basemaps are available in Map Viewer and Scene Viewer, ArcGIS Pro, and apps created using Web AppBuilder. They are not available in ArcGIS Desktop (i.e. ArcMap).
For more information on how vector basemaps are structured, see this Vector Basemaps Reference document. Also, see Vector Tile Style Editor documentation webpage.
Requirement
You need an ArcGIS Online (AGOL) Organizational account. I don’t know if a free public AGOL account would or not, but you can give it a try.
Two ways to customize
There are two ways you can go about customizing vector basemaps, depending on whether you want to work with the “no-coding, what you see is what you get” app or do some JSON coding.
Access the VTSE via AGOL Map Viewer or as a stand-alone app.
Via Vector Style JSON Editor (VSJE)
In this posting, I am going to use the VTSE – It’s more intuitive and just easier to use. But if you are confident in your ability to manipulate JSON codes, the VSJE gives your access to more sophisticated options, such as adding data layers to a particular style if it’s not already included.
Option 1: AGOL Map Viewer (Classic)
Note: I haven’t seen VTSE in the new Map Viewer - maybe it’s hasn’t been integrated yet. I’ve only been able to use the VTSE in the classic Map Viewer in AGOL.
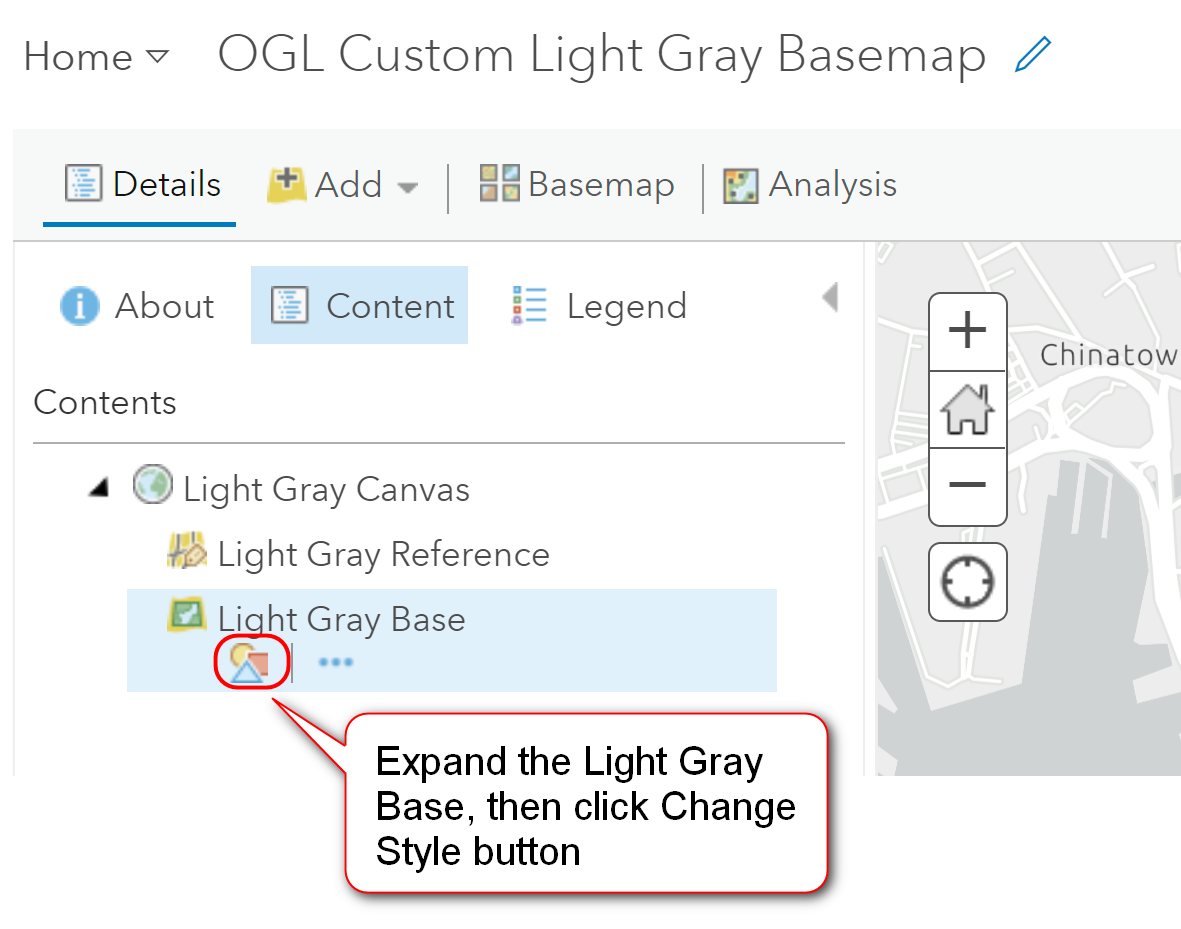
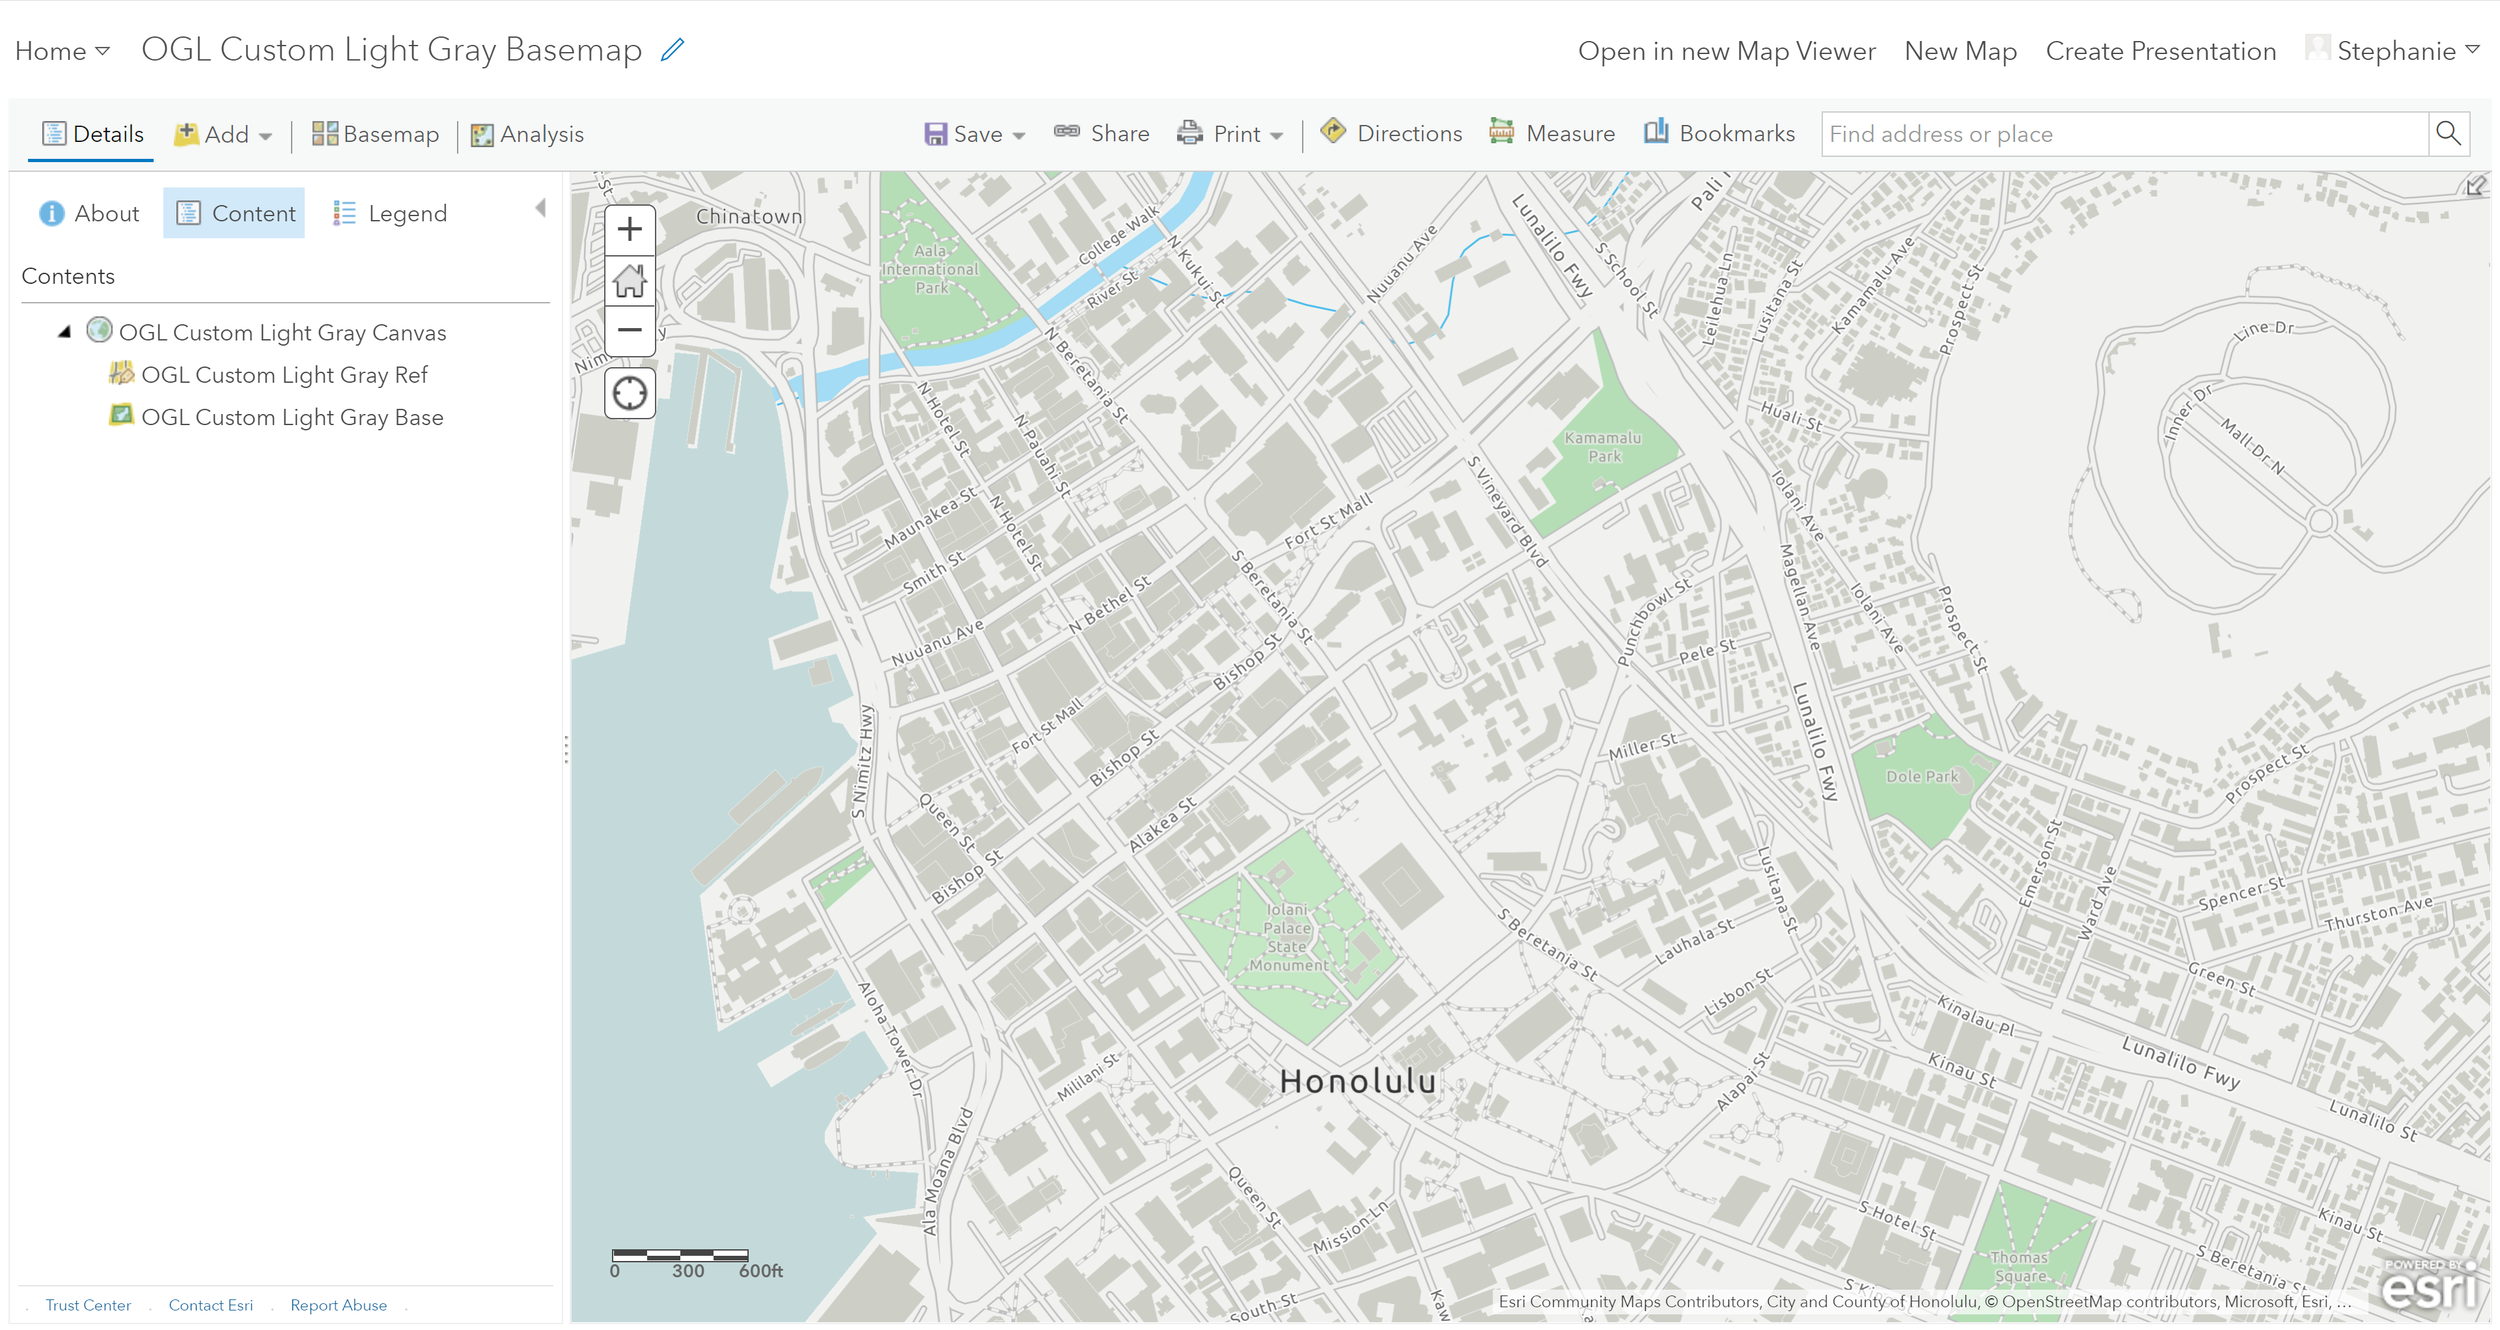
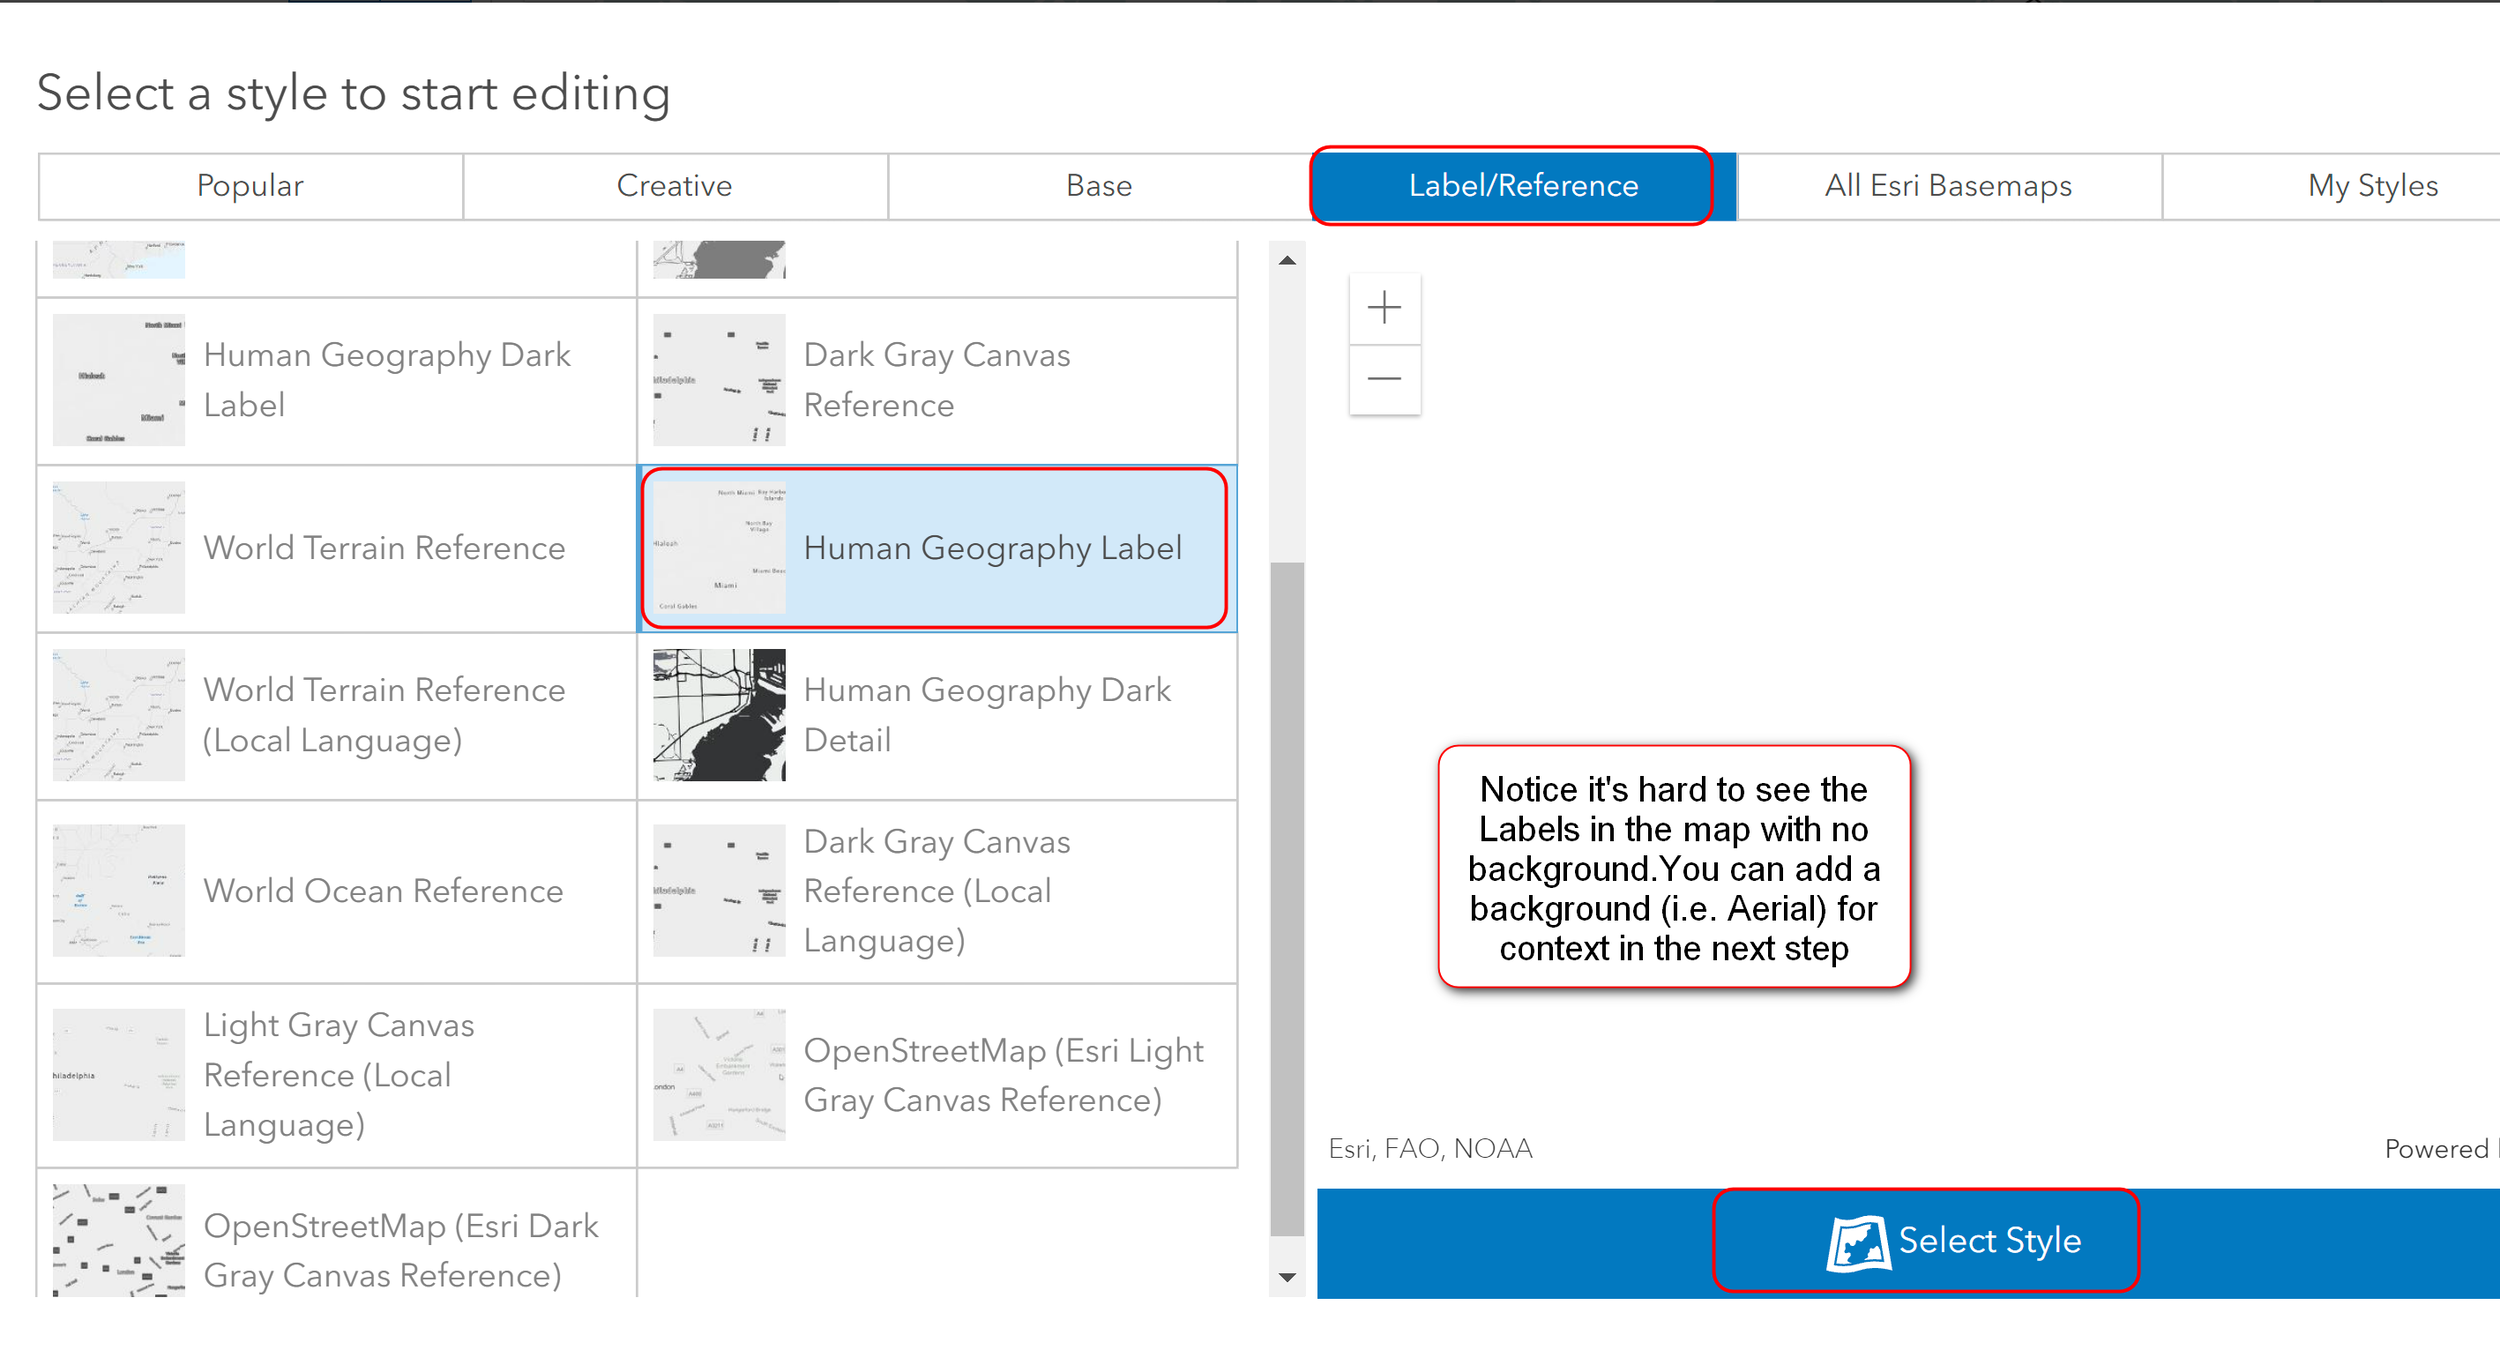
In this example, I am using the Light Gray Canvas basemap to create my own basemap version. The Light Gray Canvas basemap has a Reference (labels) and Base layers so I’m going to edit them separately.
Log into your AGOL organizational account
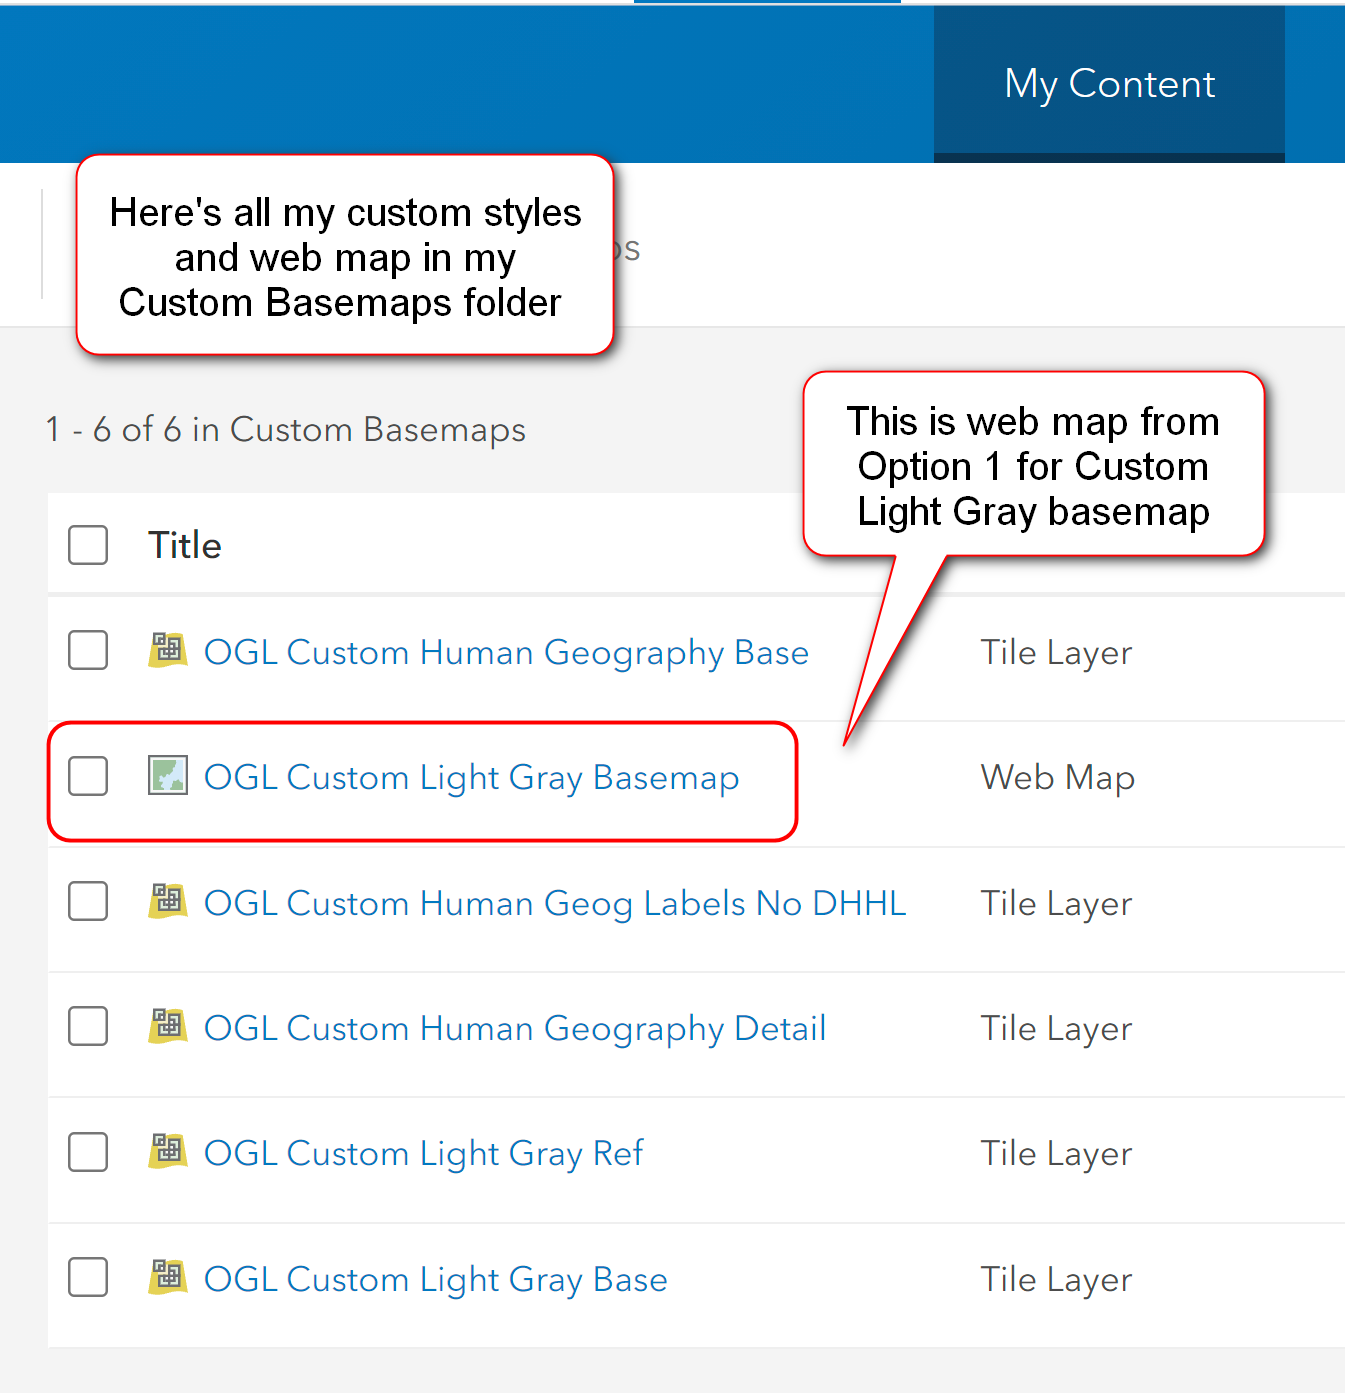
Optional - but good idea to create a folder to store your custom basemaps
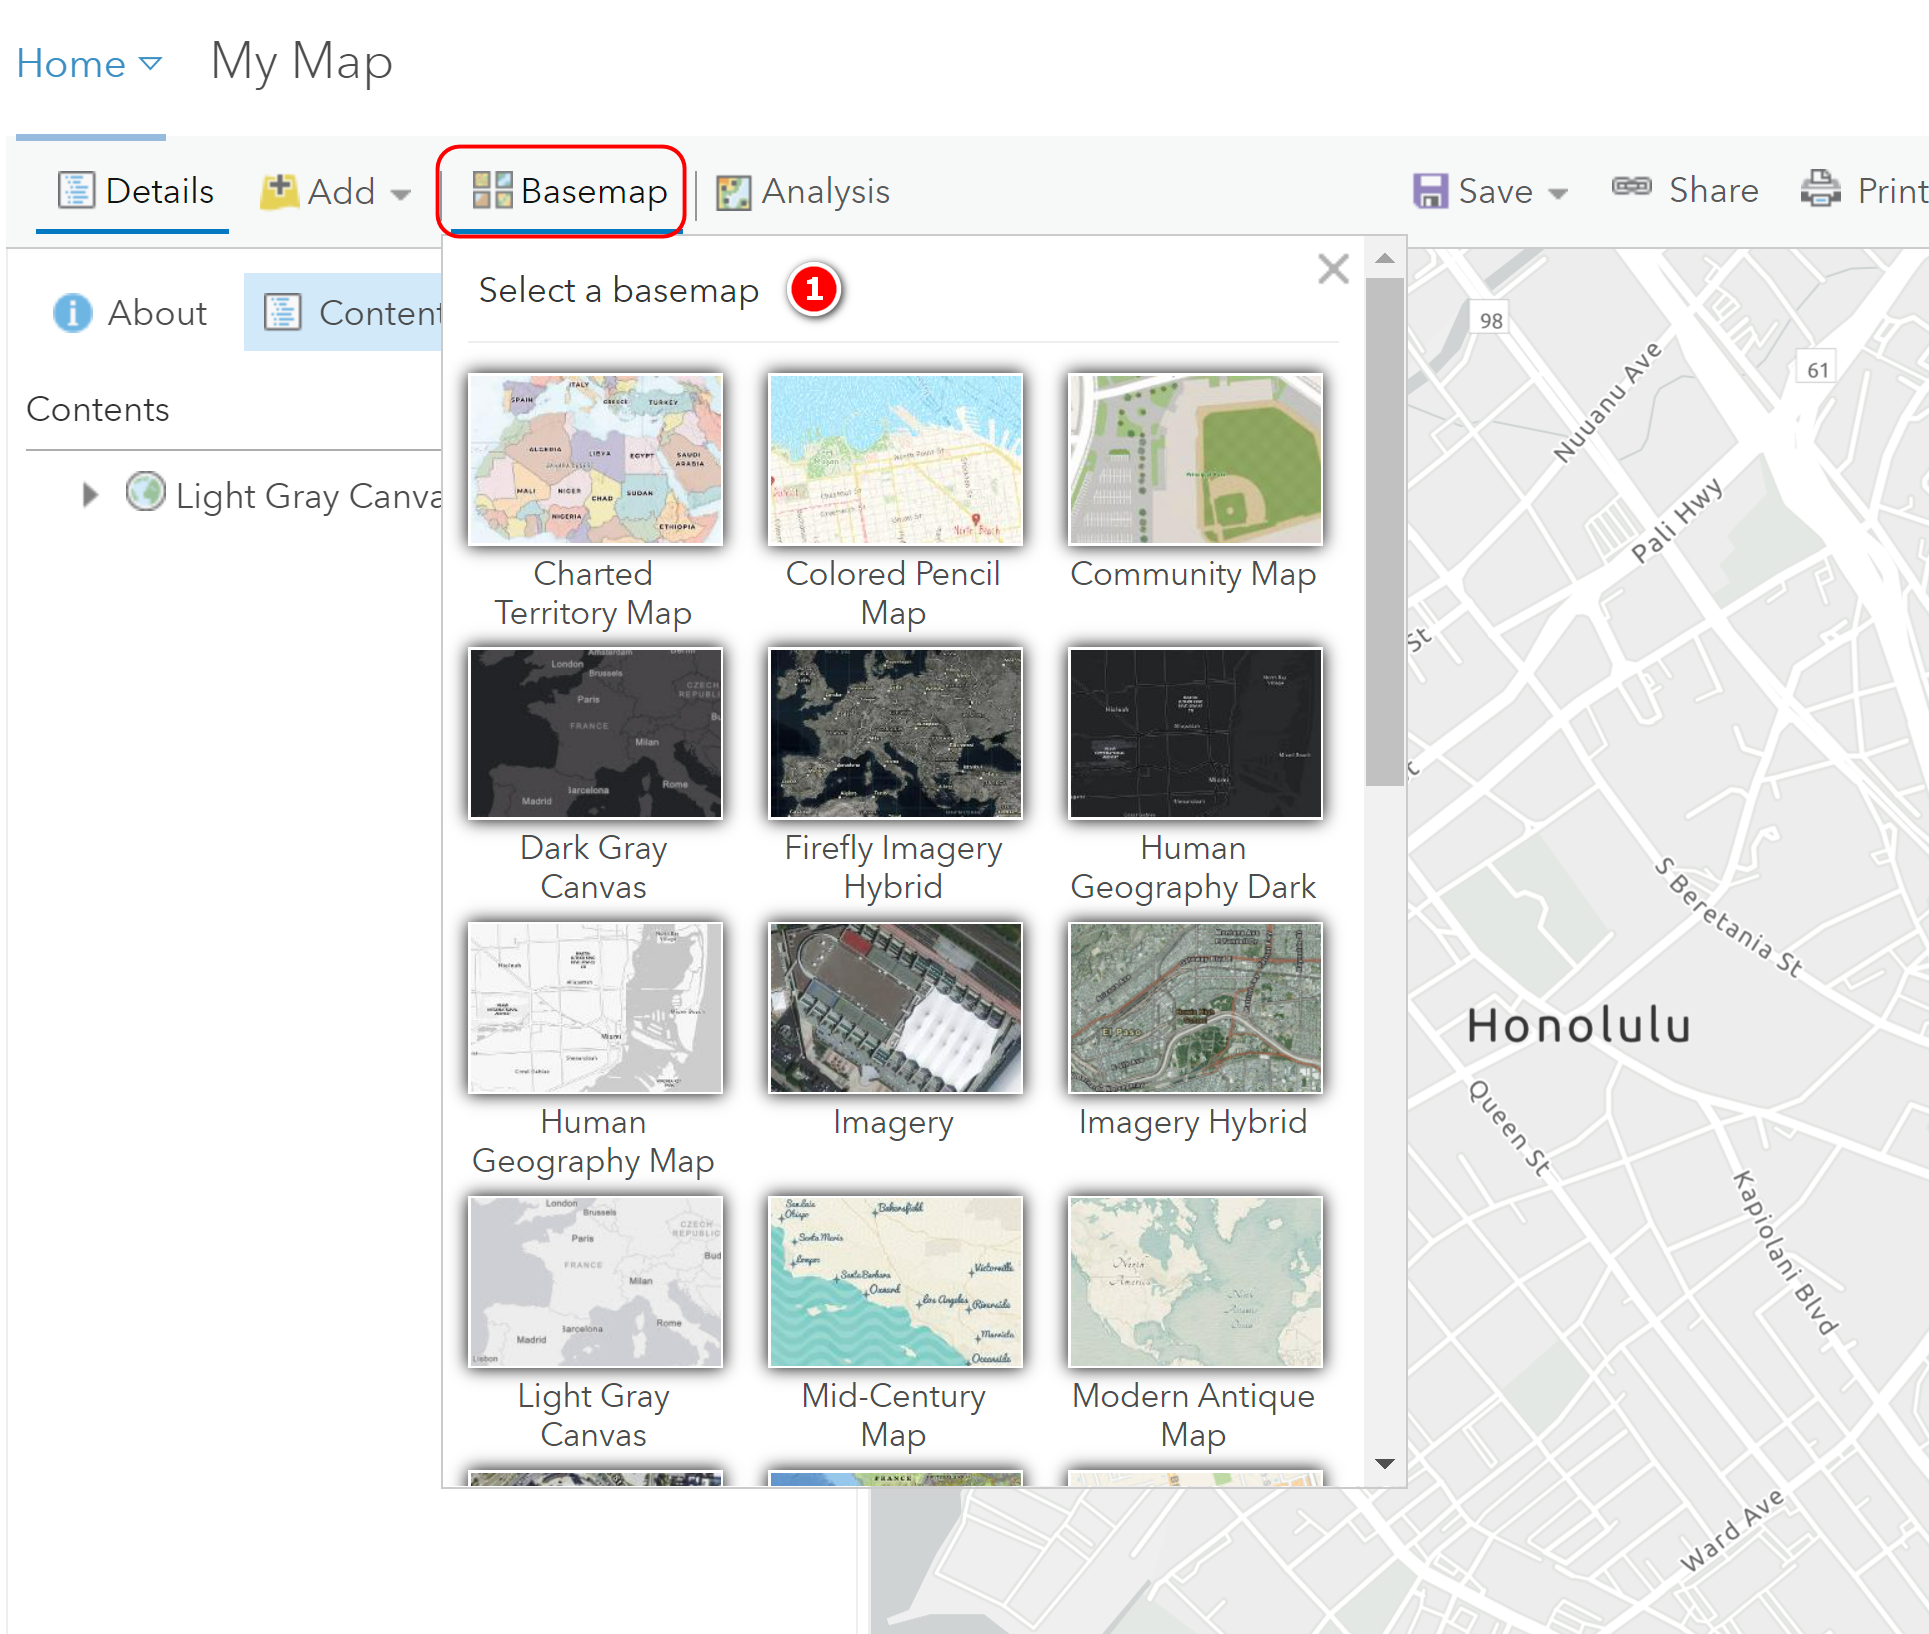
Start a new Map by clicking the Map tab, then add a basemap of your choosing from the Basemap Gallery or use the Add button and add a basemap from the Living Atlas. (e.g. Light Gray Canvas)
Save your map before customizing — your saved web map can become your new basemap and be added to the Basemap Gallery (I will show you how to do this at the end)
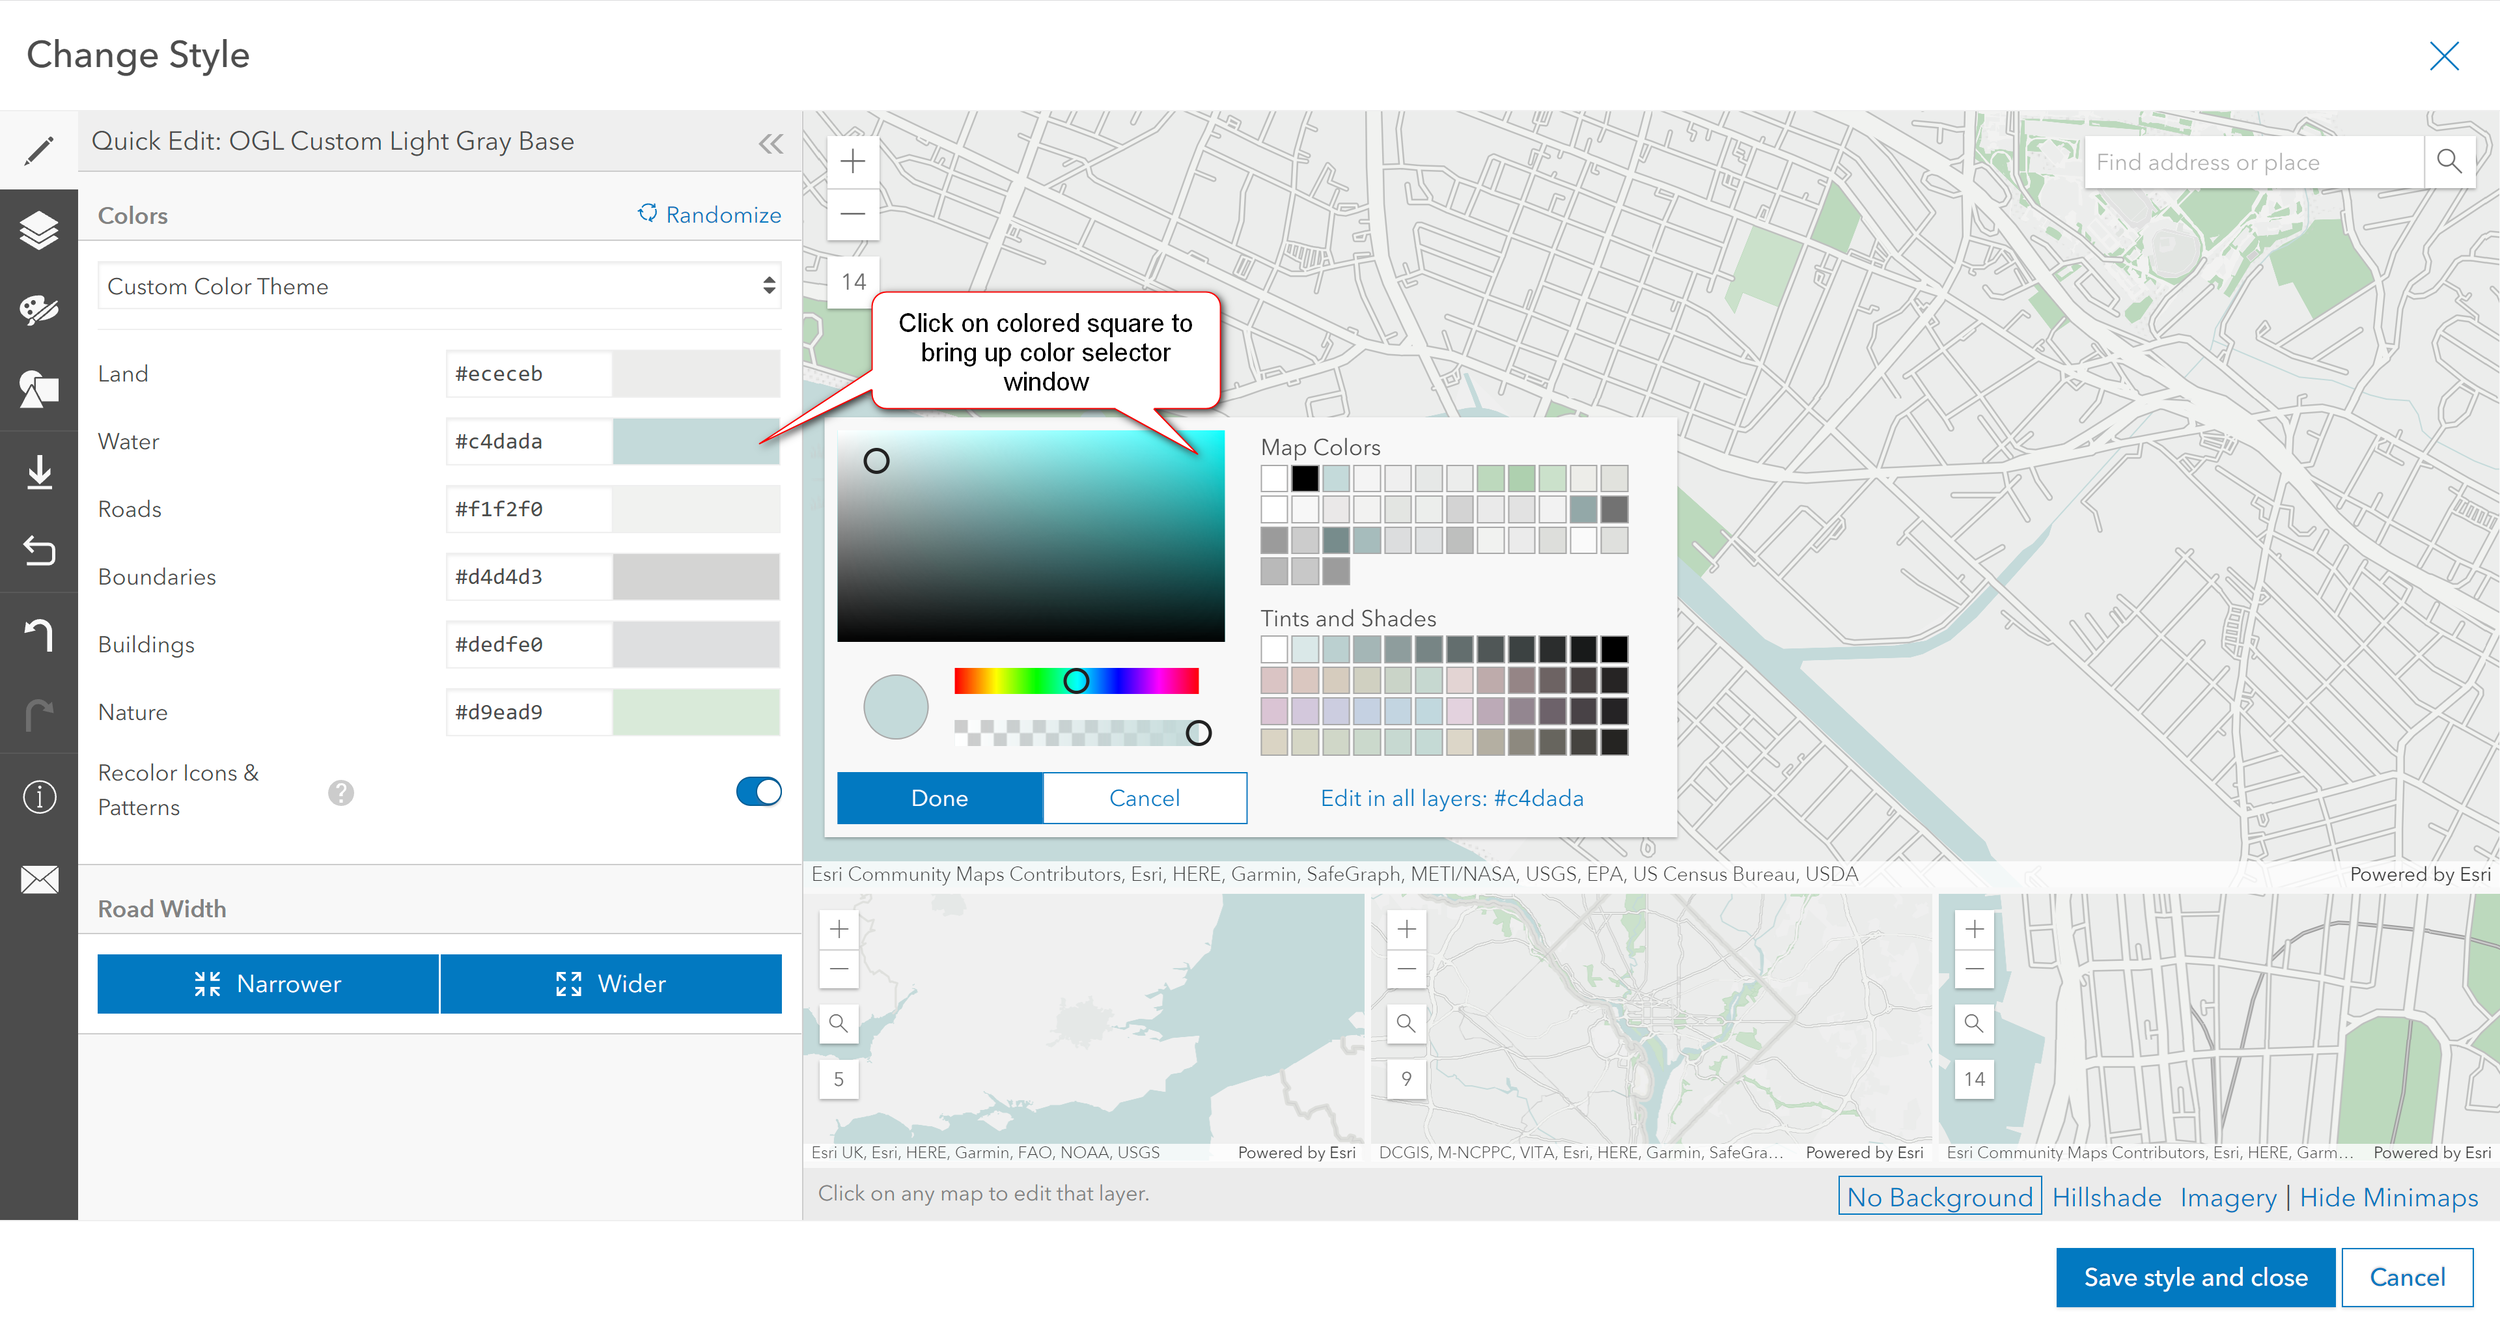
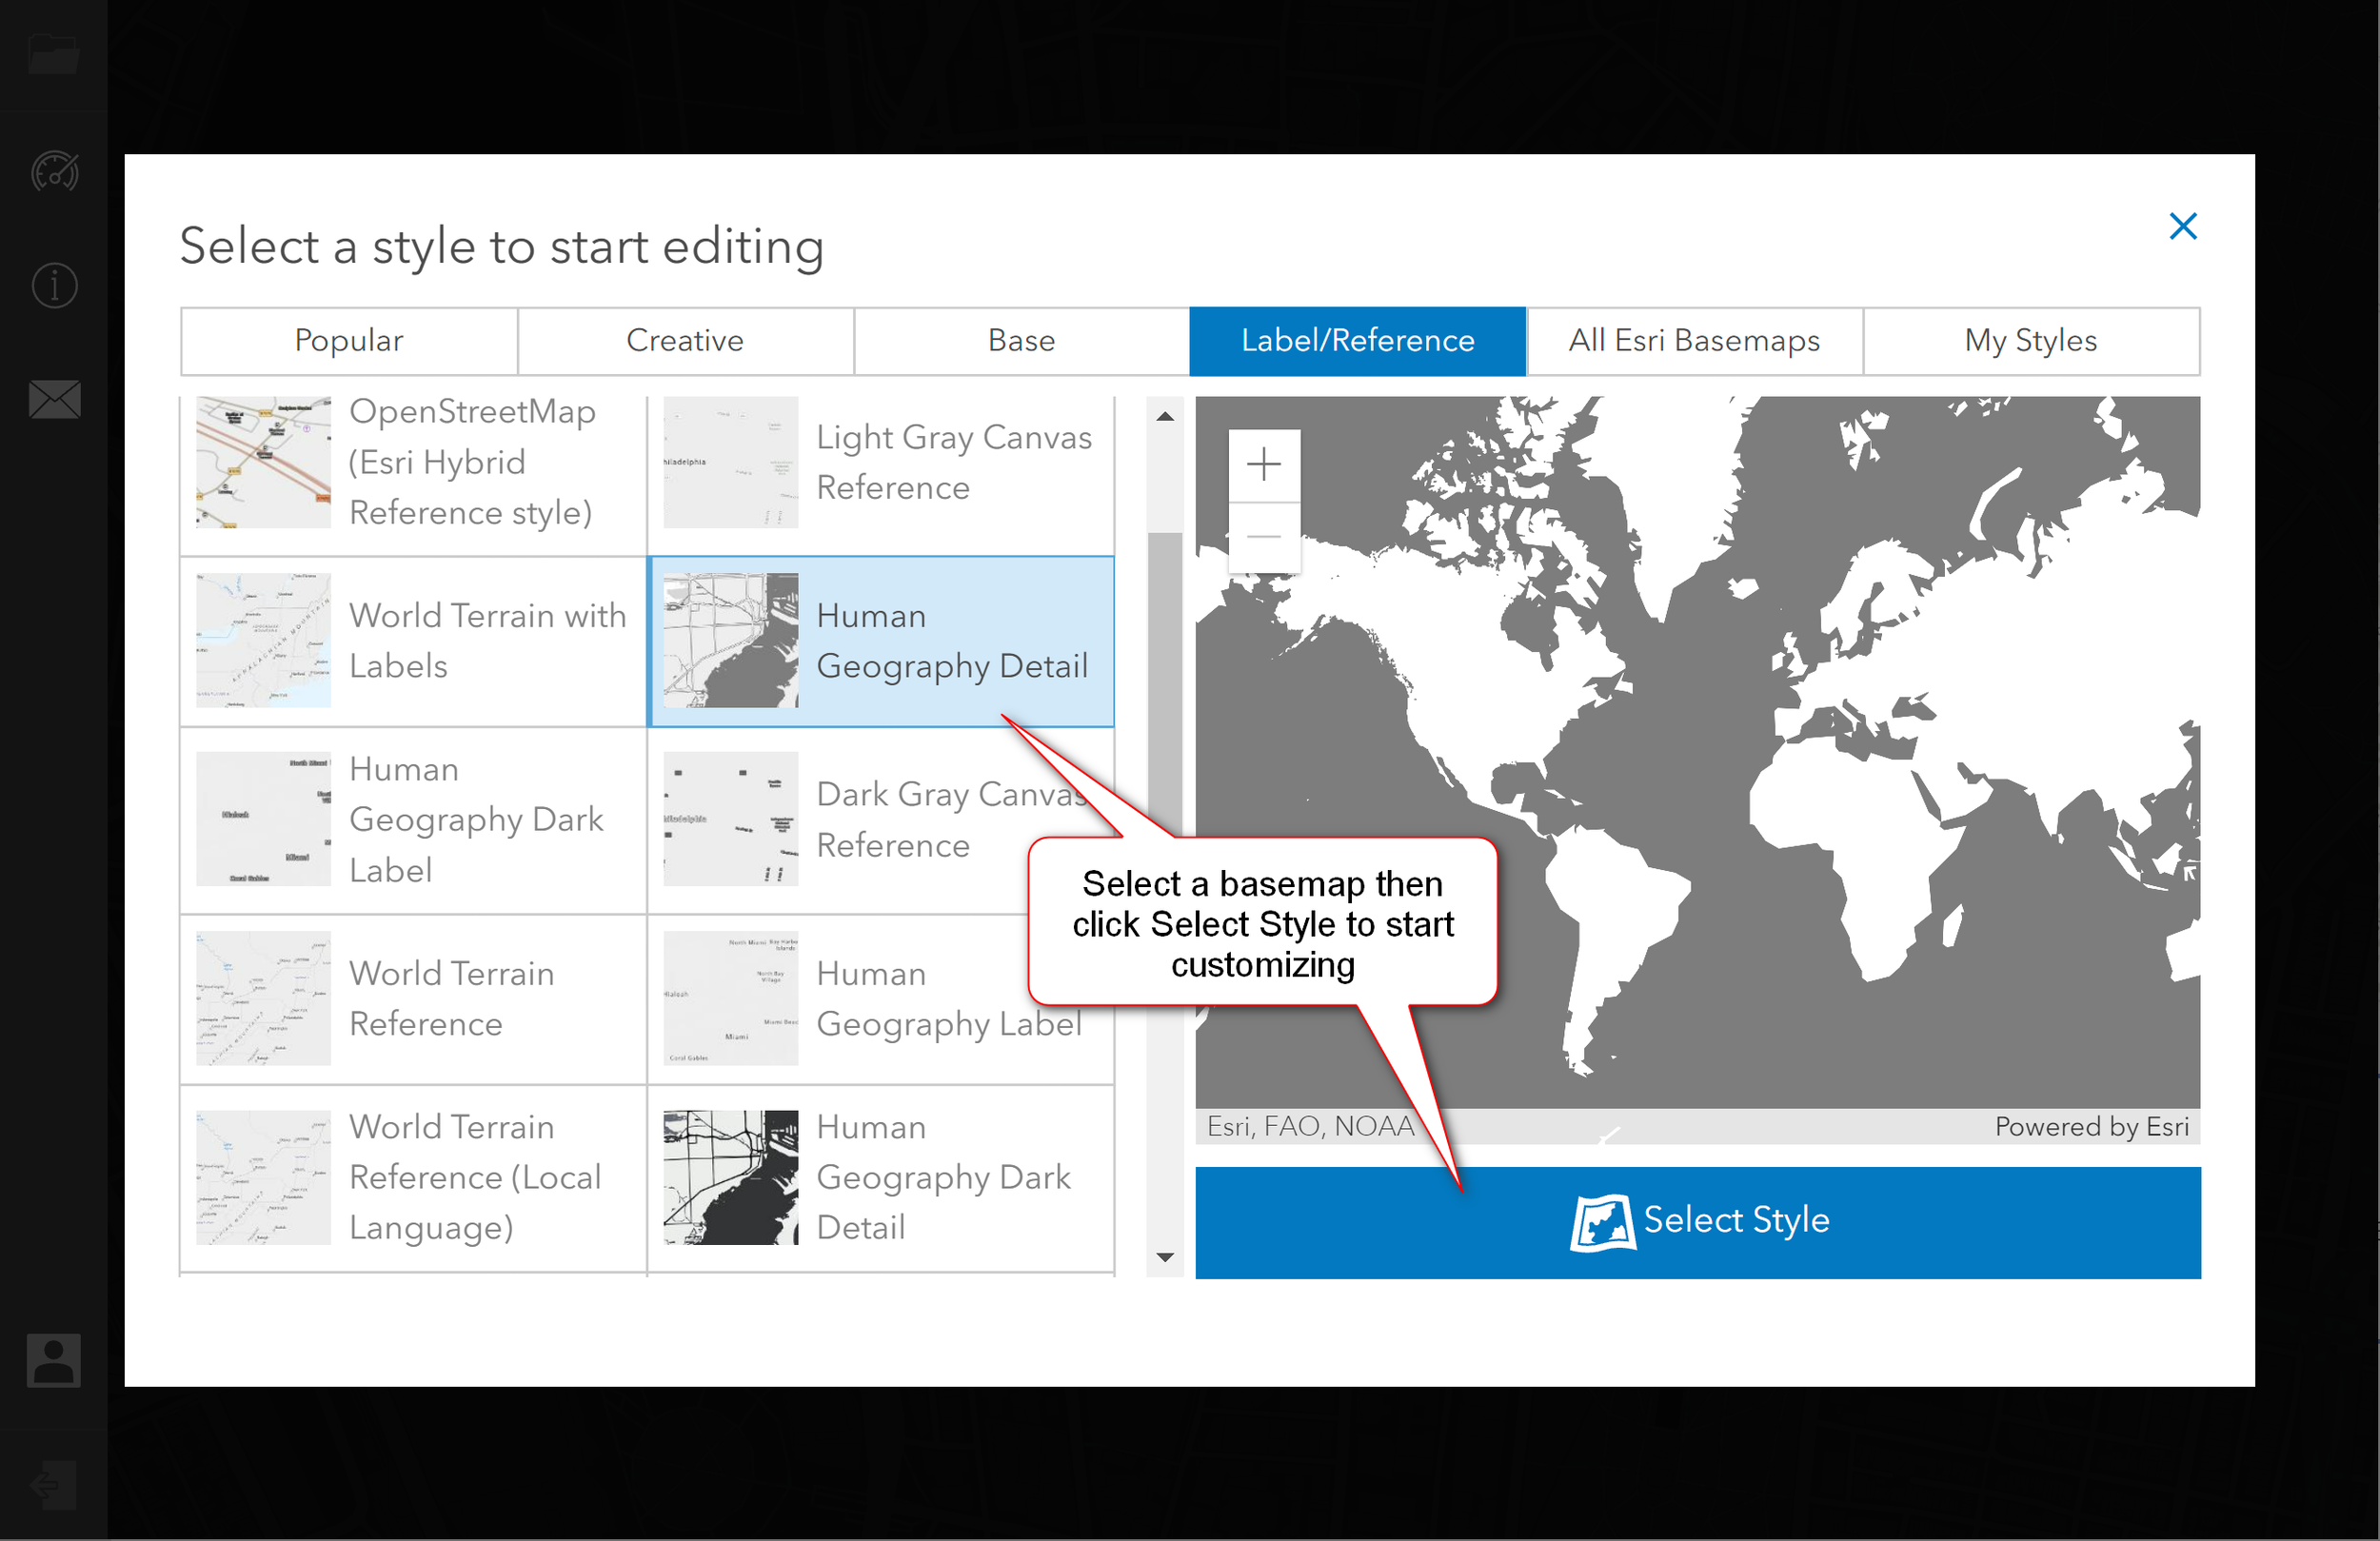
In the Contents Panel, click the basemap layer then click the Change Style button. This will allow you to make save a copy of the existing basemap for your use.
Make a copy of the existing vector basemap. I like to work with the Light Gray Canvas or the Human Geography basemap. Make sure to name your basemap copy to something that makes sense (e.g. OGL Custom Light Gray Base). Depending on the Vector Basemap you are using you can customize both the Reference (e.g. Light Gray Reference) and Base (Light Gray Base).
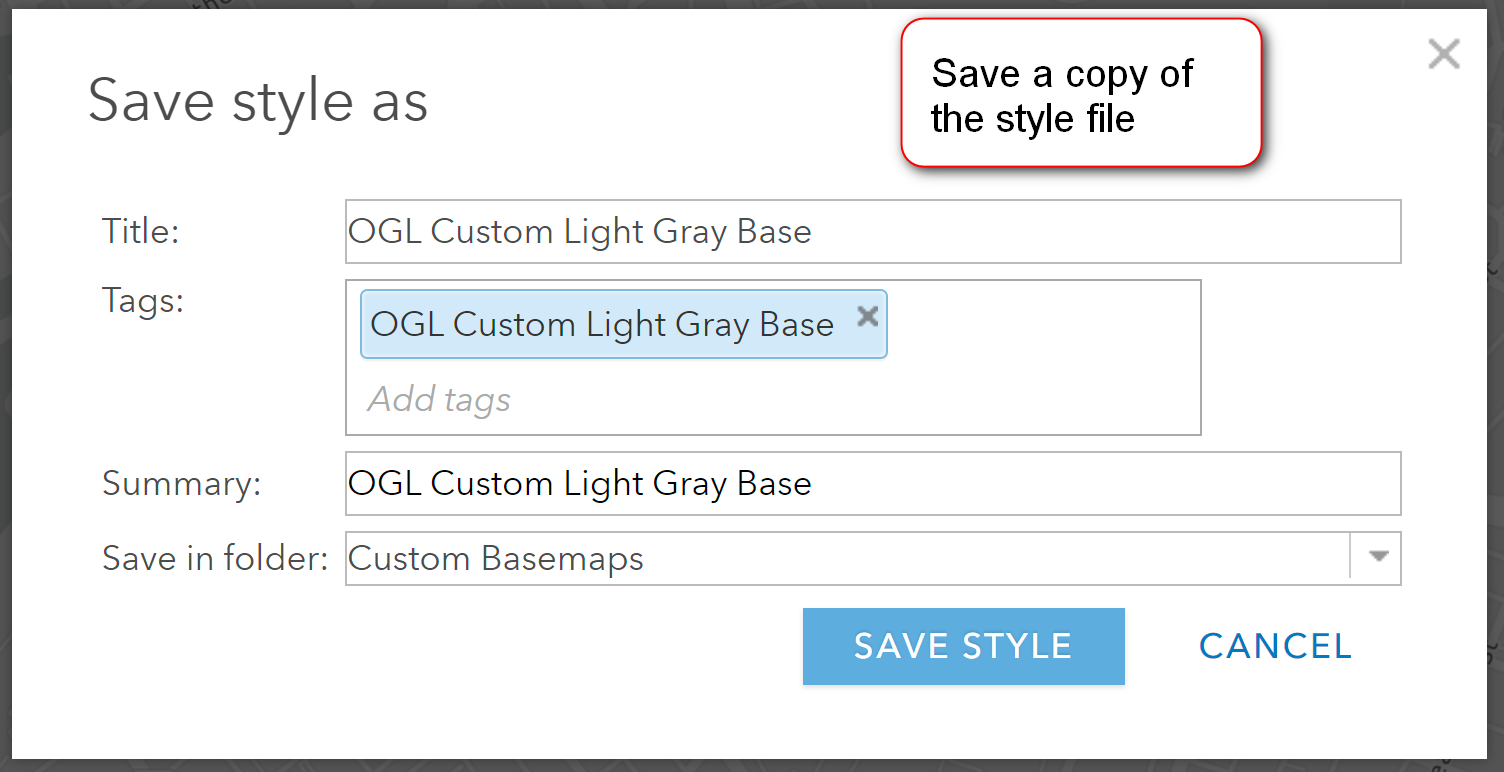
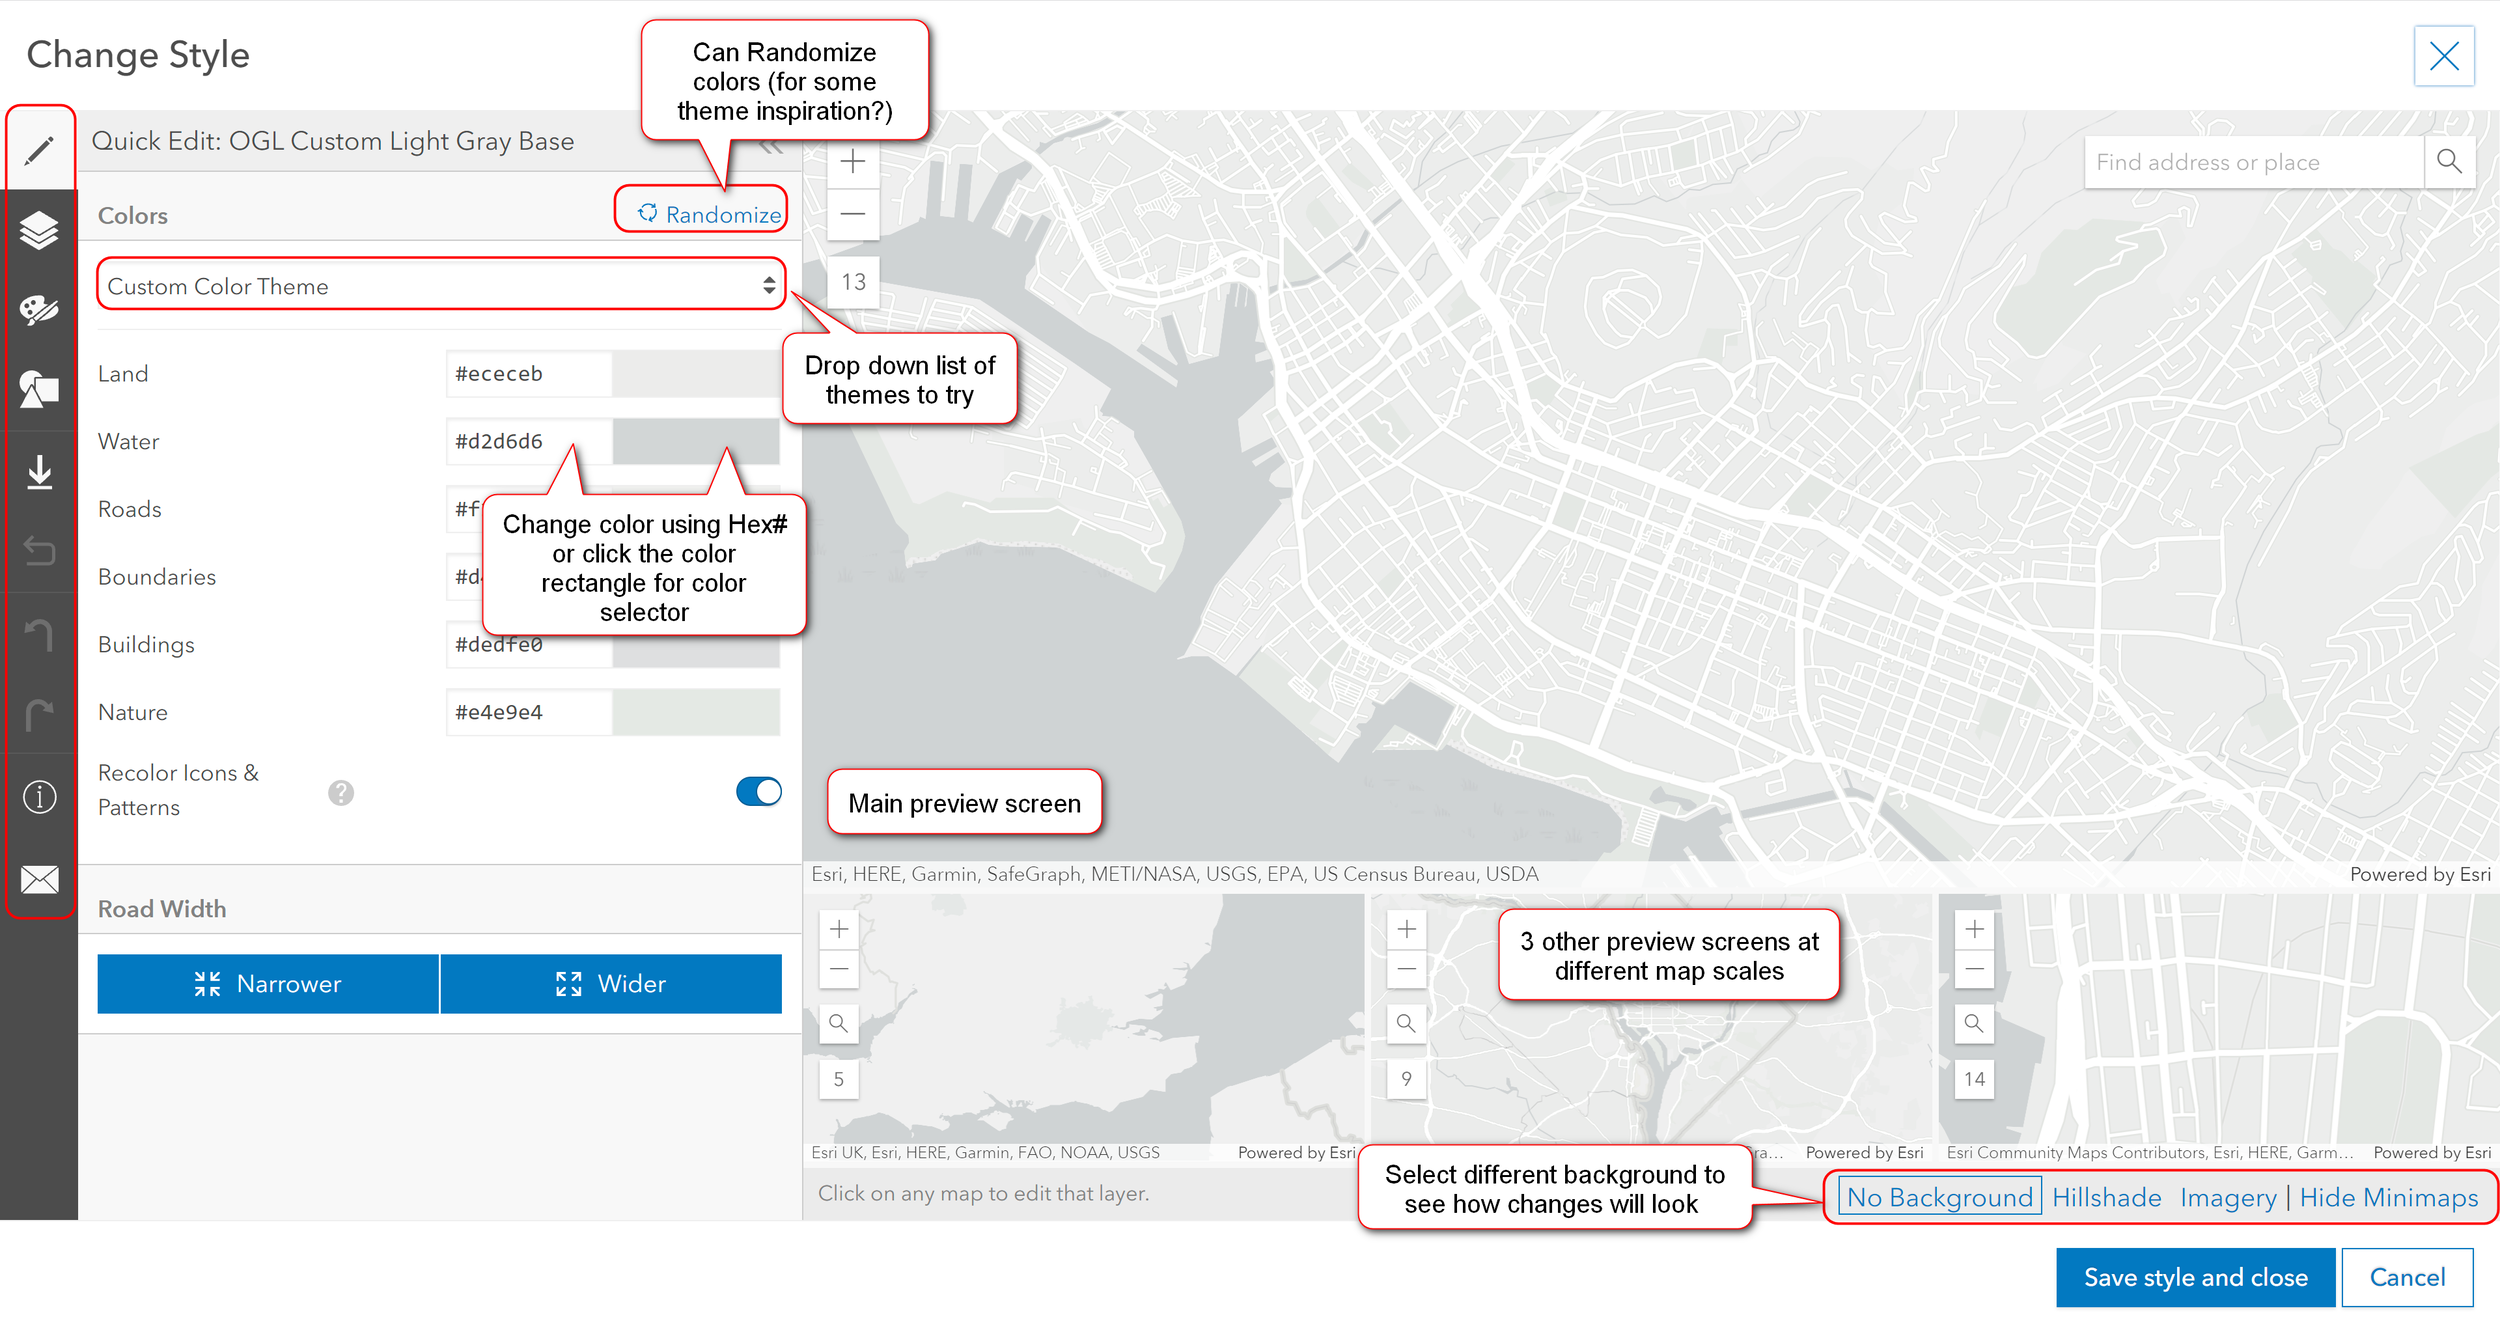
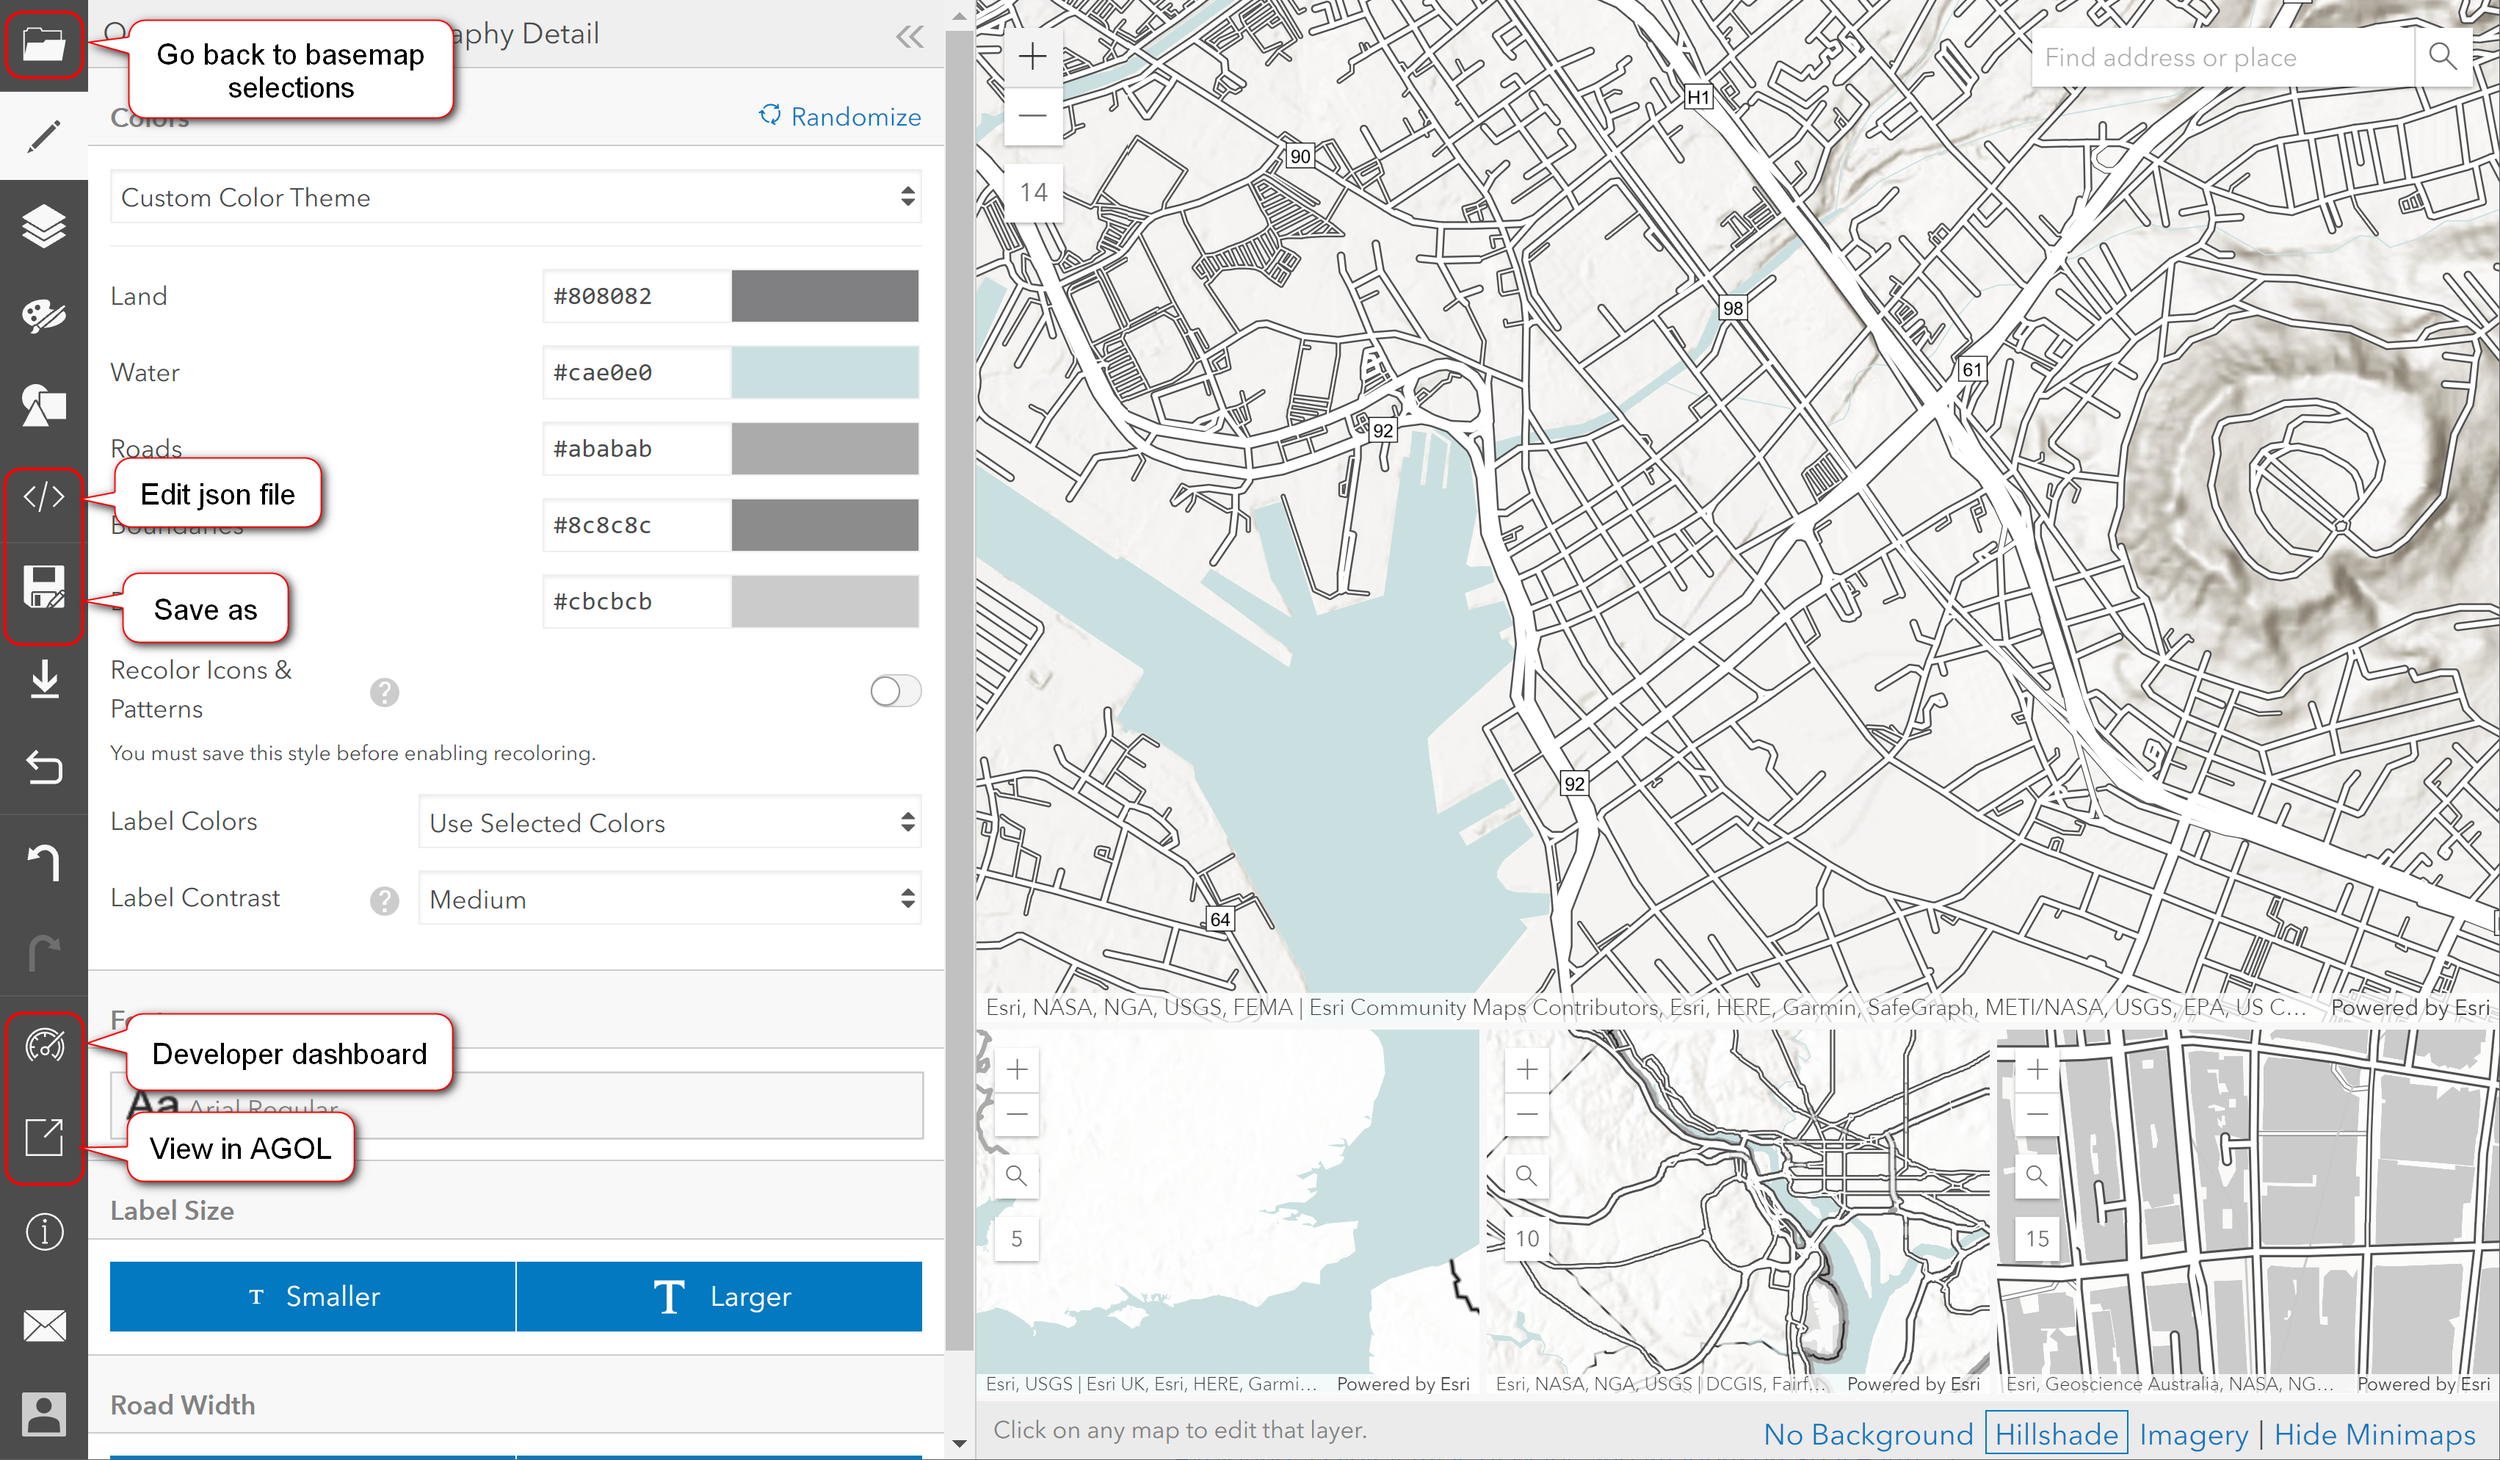
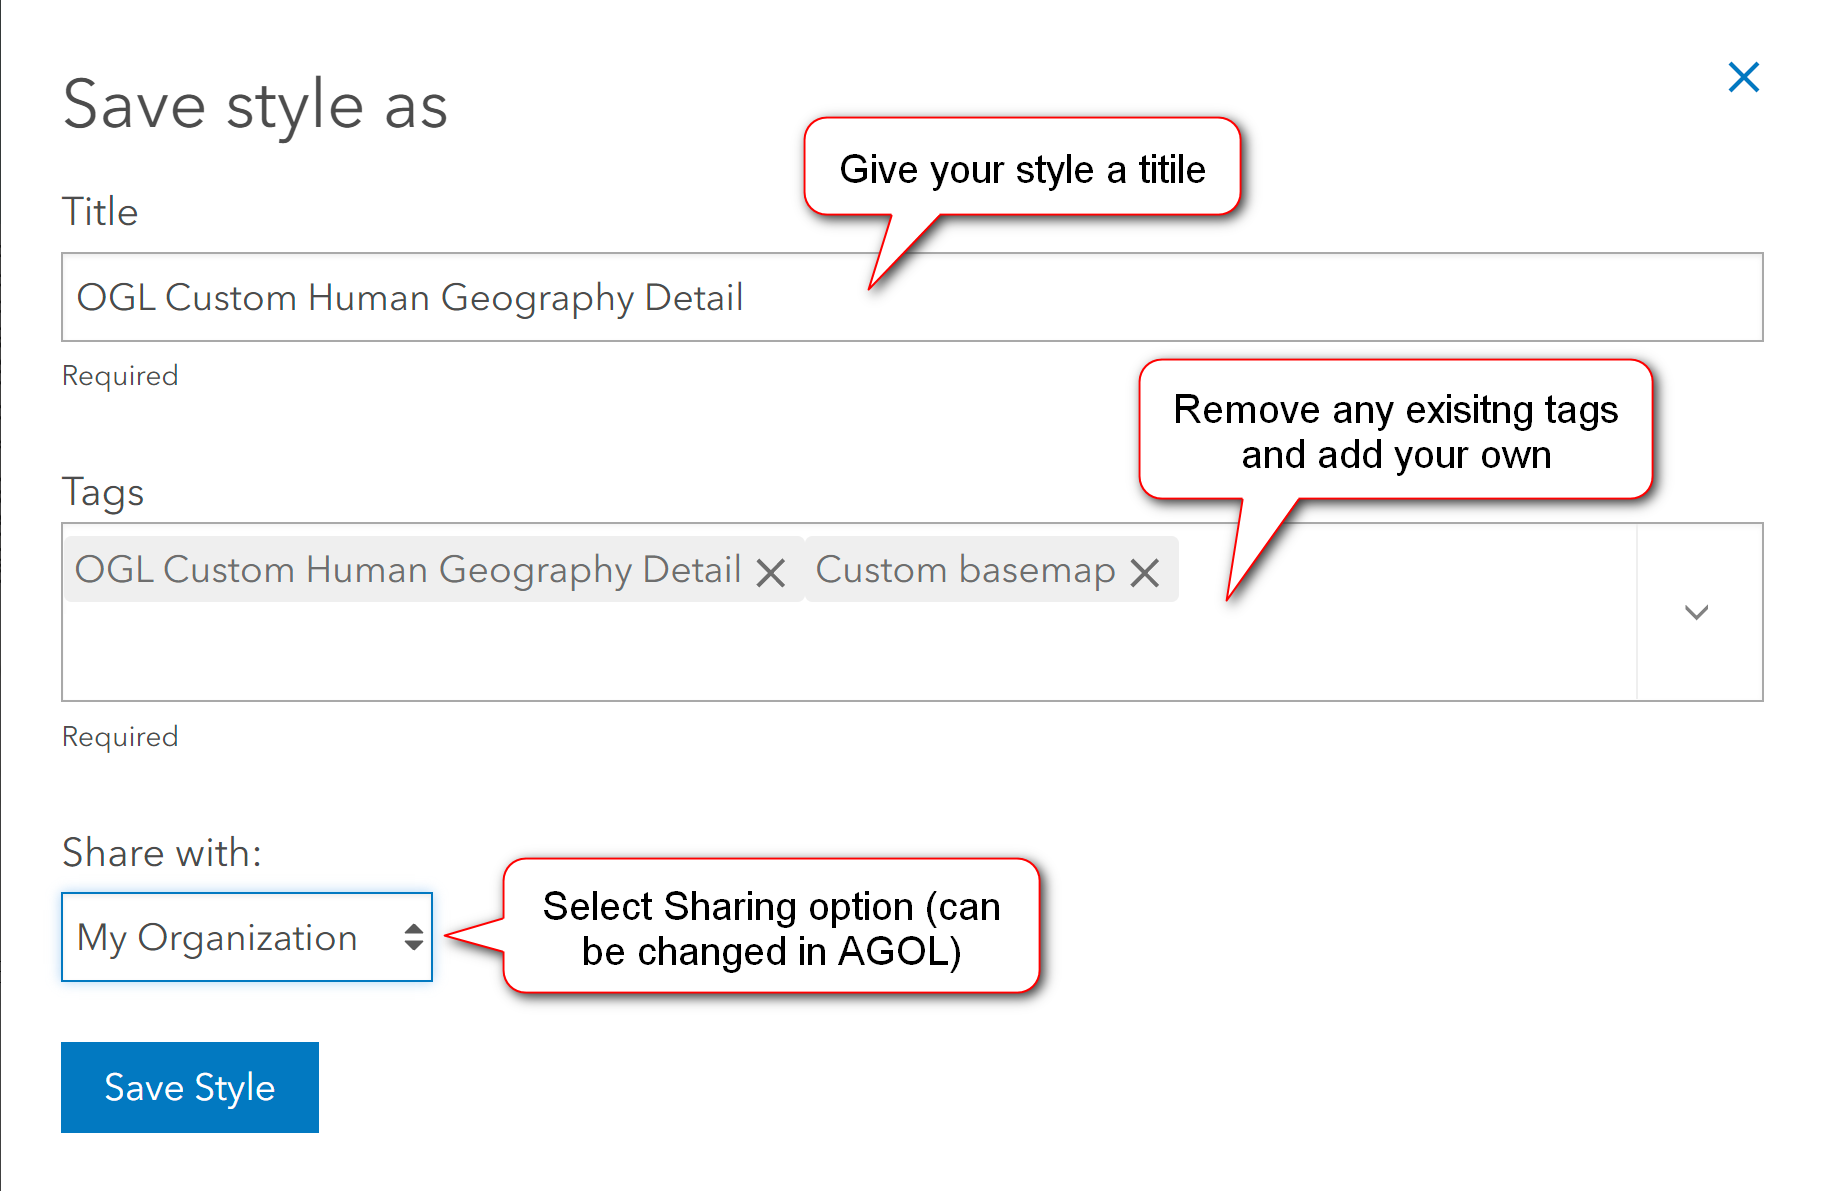
After saving a copy of the style file, the VTSE window will be displayed - see slides below. On the left hand side are a set of tools for you to work with. There are lots of options to play around with. When you are satisfied with your customizations, Save Style and Close out to get back to your map. If you don’t like your custom basemap, you can always delete it or keep revising until you’re happy with it.
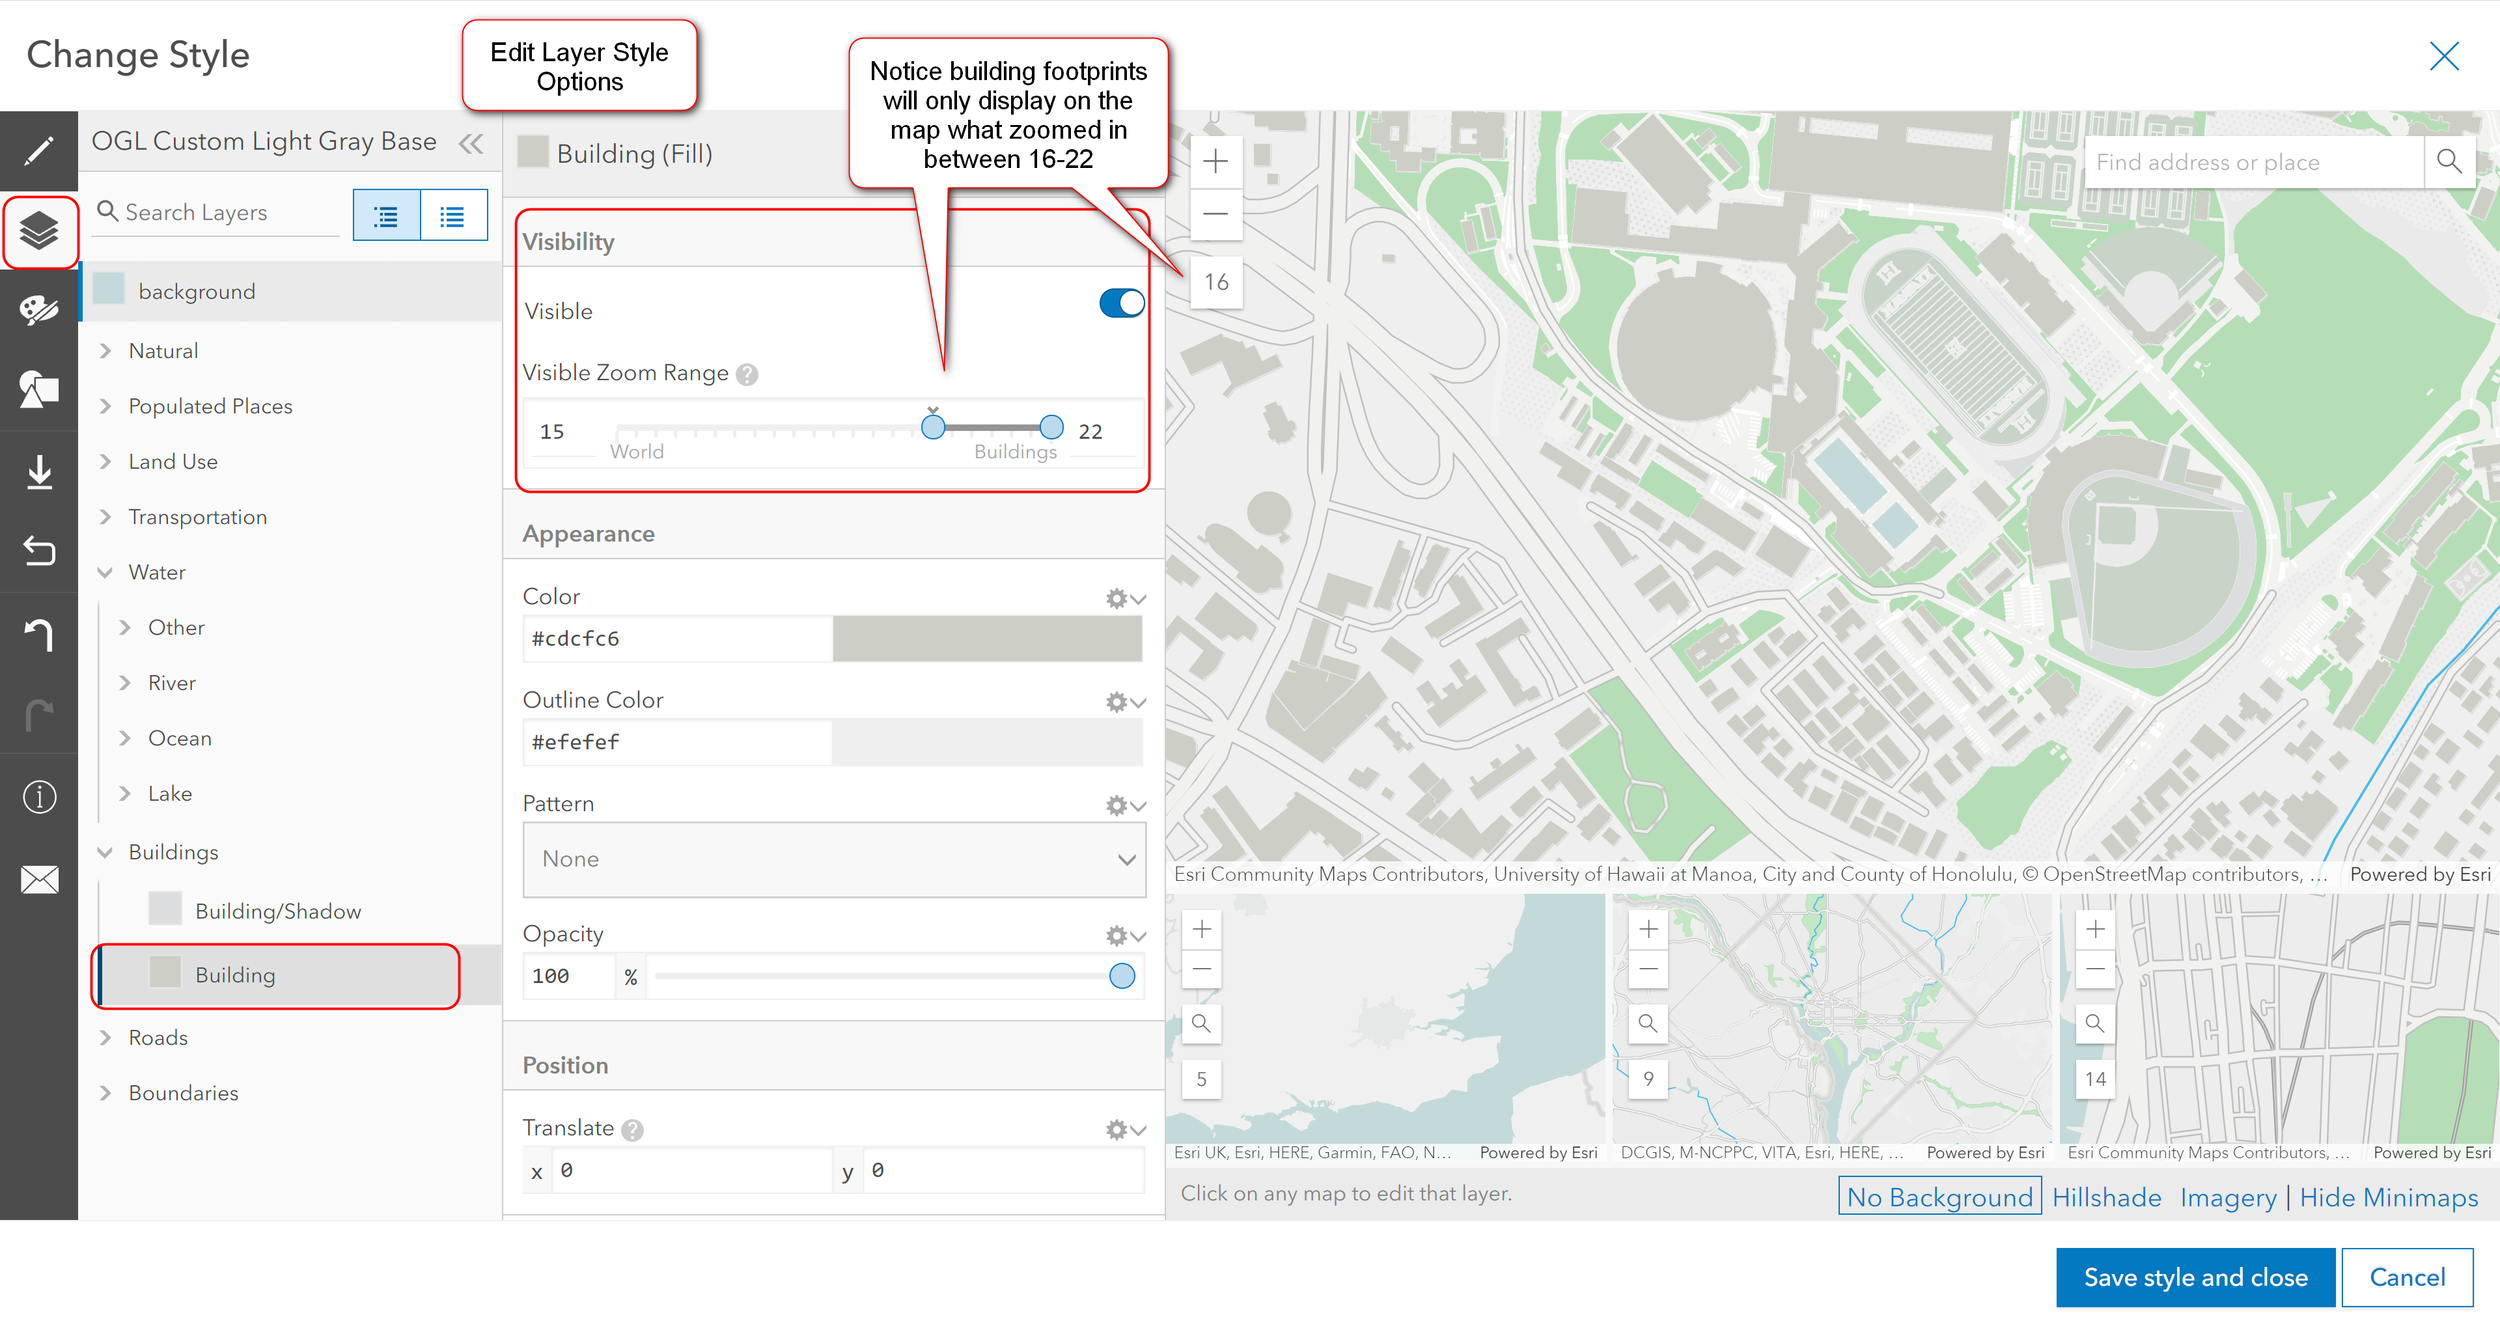
Note: Some features will have a scale to them — building footprints will only show up at zoom levels of 16-22.
Quick Edit (default): allows you to make changes to a group of features all at once (i.e. universal or global change).
Edit Layer Style: lets you style individual layers/features. Clicking on a feature (e.g. water) on the map or in the layer list will give you more detailed editing options.
Edit by Colors: select and edit all items with a specific color and change them all at once (universal or global change).
Edit Icons and Patterns: select and change, add, remove sprites and patterns
Download Current Style: downloads style file as json file
Reset Style: resets style back to previous version (before saving)
Undo Changes: Undo changes
Redo Change: Redo changes
Below are snapshots showing the original Esri Light Gray Canvas basemap and one that I customized. You’ll noticed that I changed the colors of the water features, urban land areas, parks/openspace, building footprints, etc. I also edited the Reference (annotation) layer and increased the size of street name labels so it’s more readable.

Original Esri Light Gray Canvas before customization (above)
Customized Light Gray Basemap
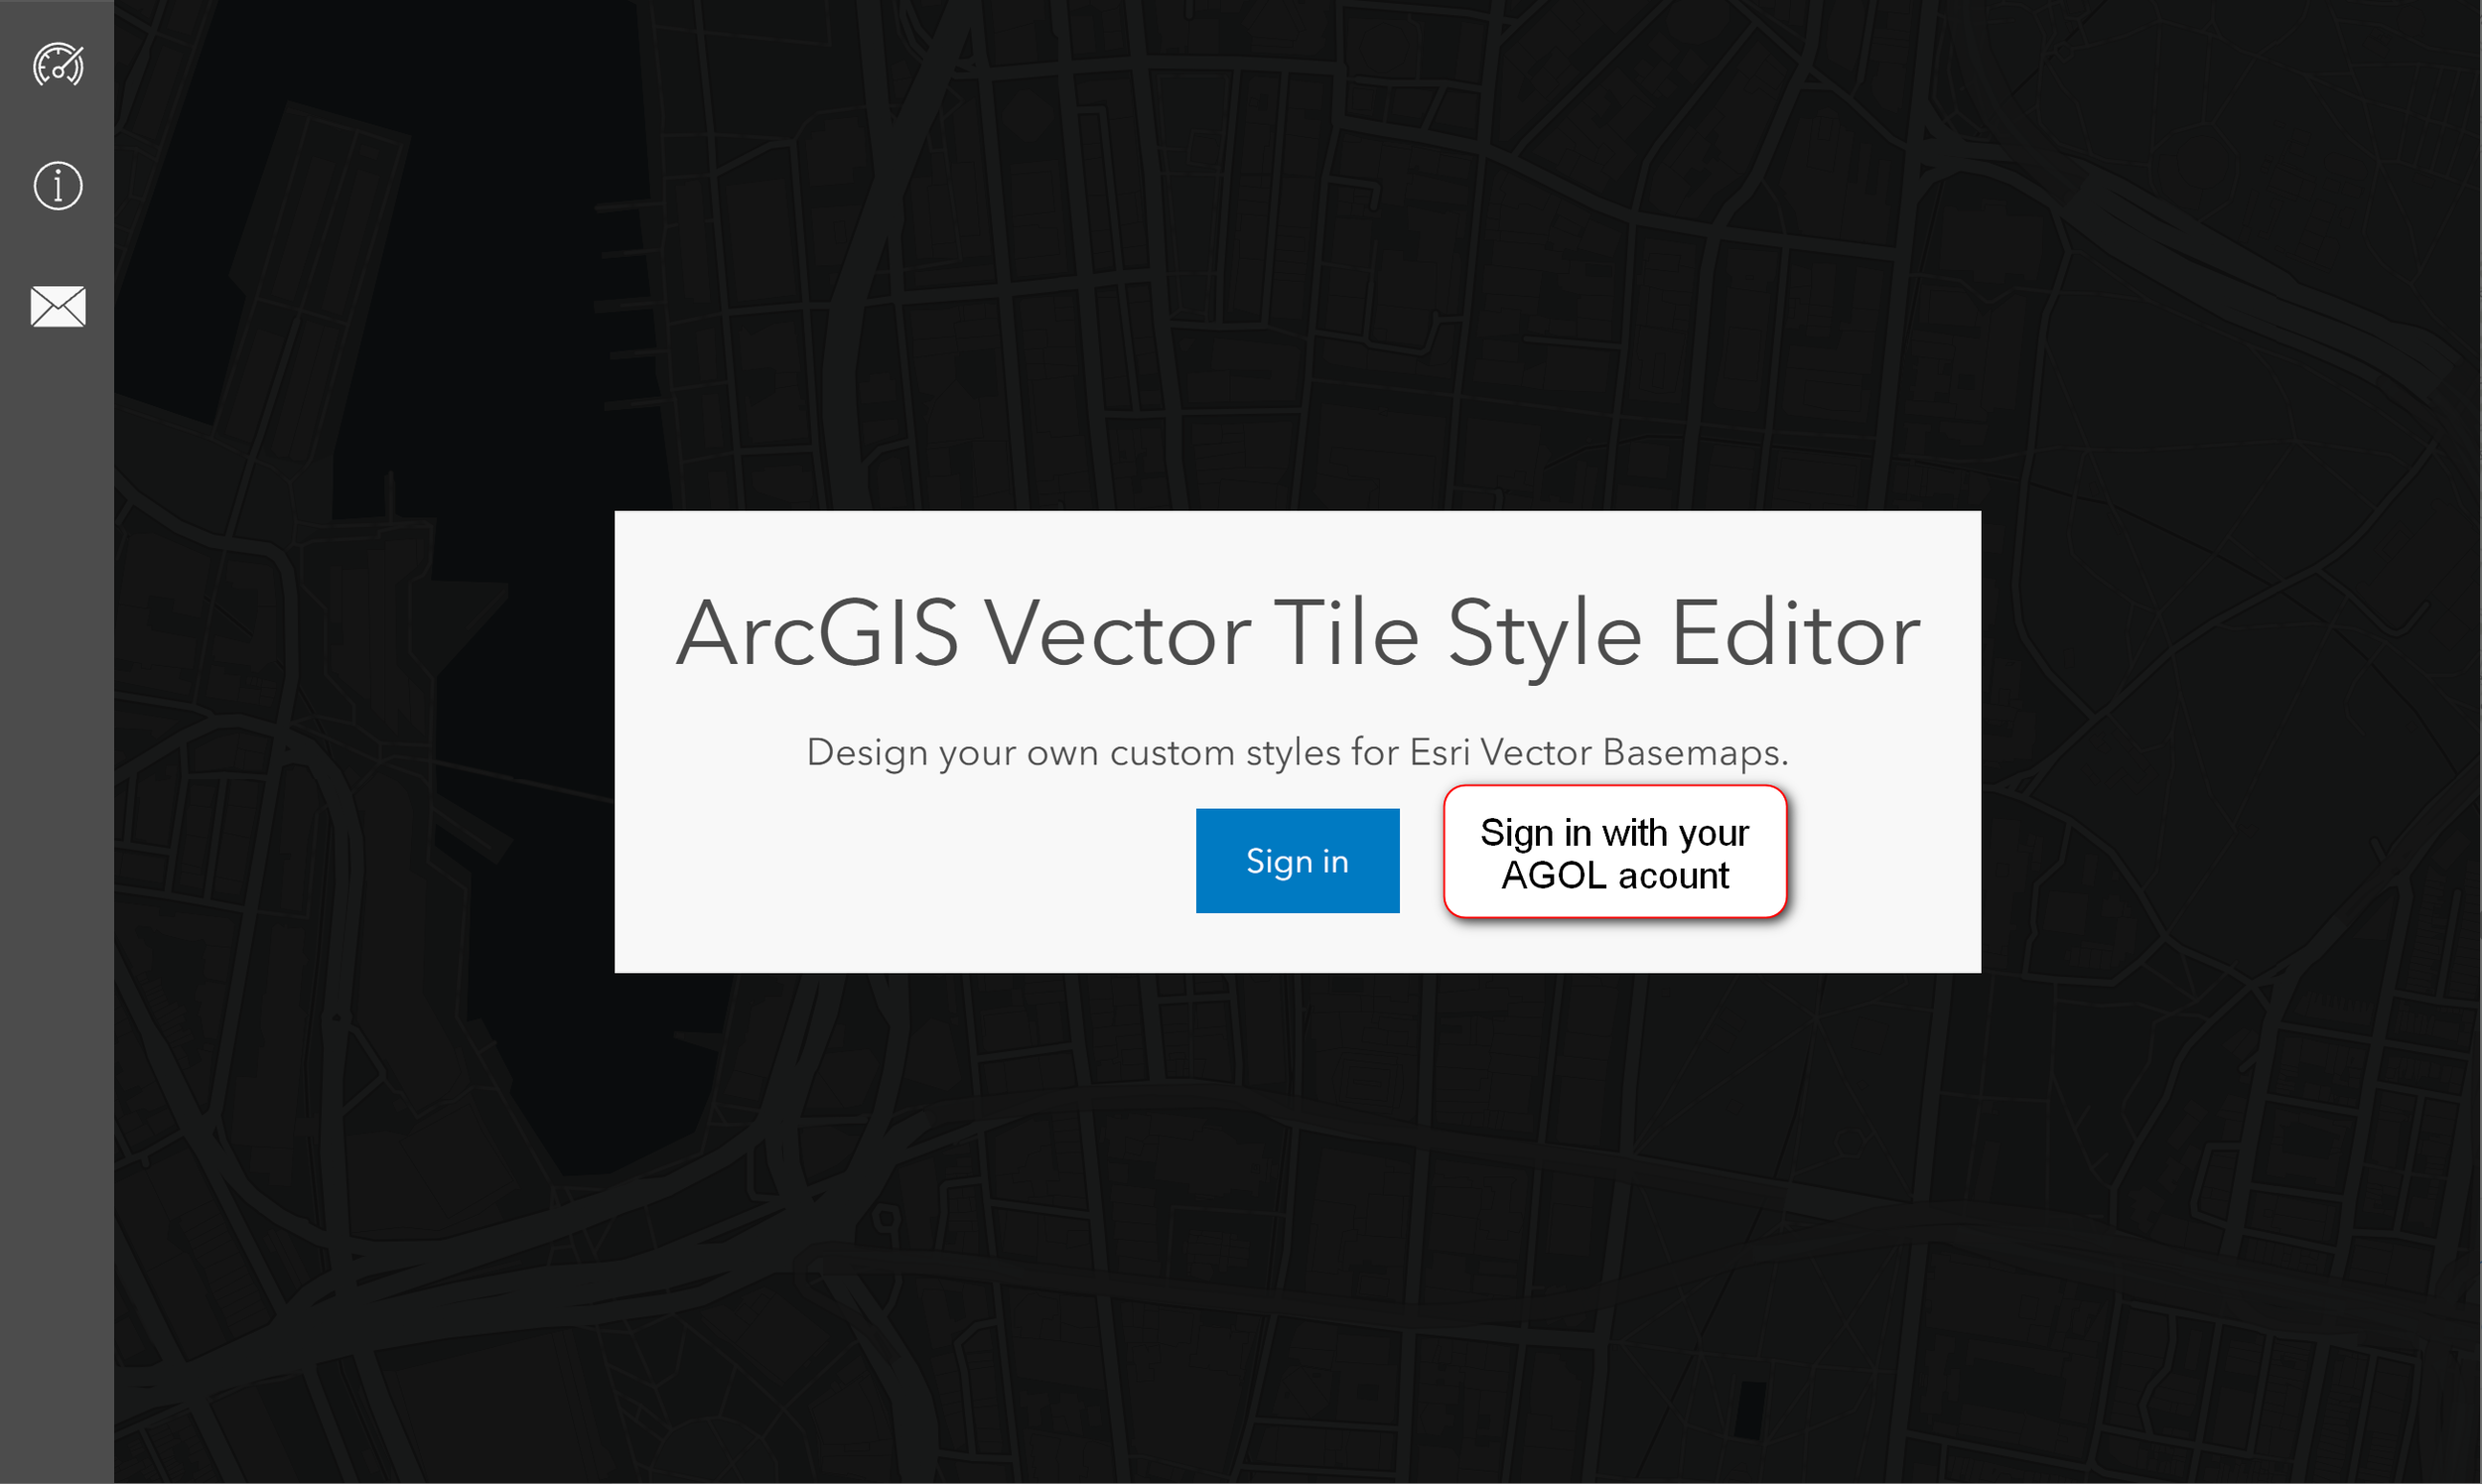
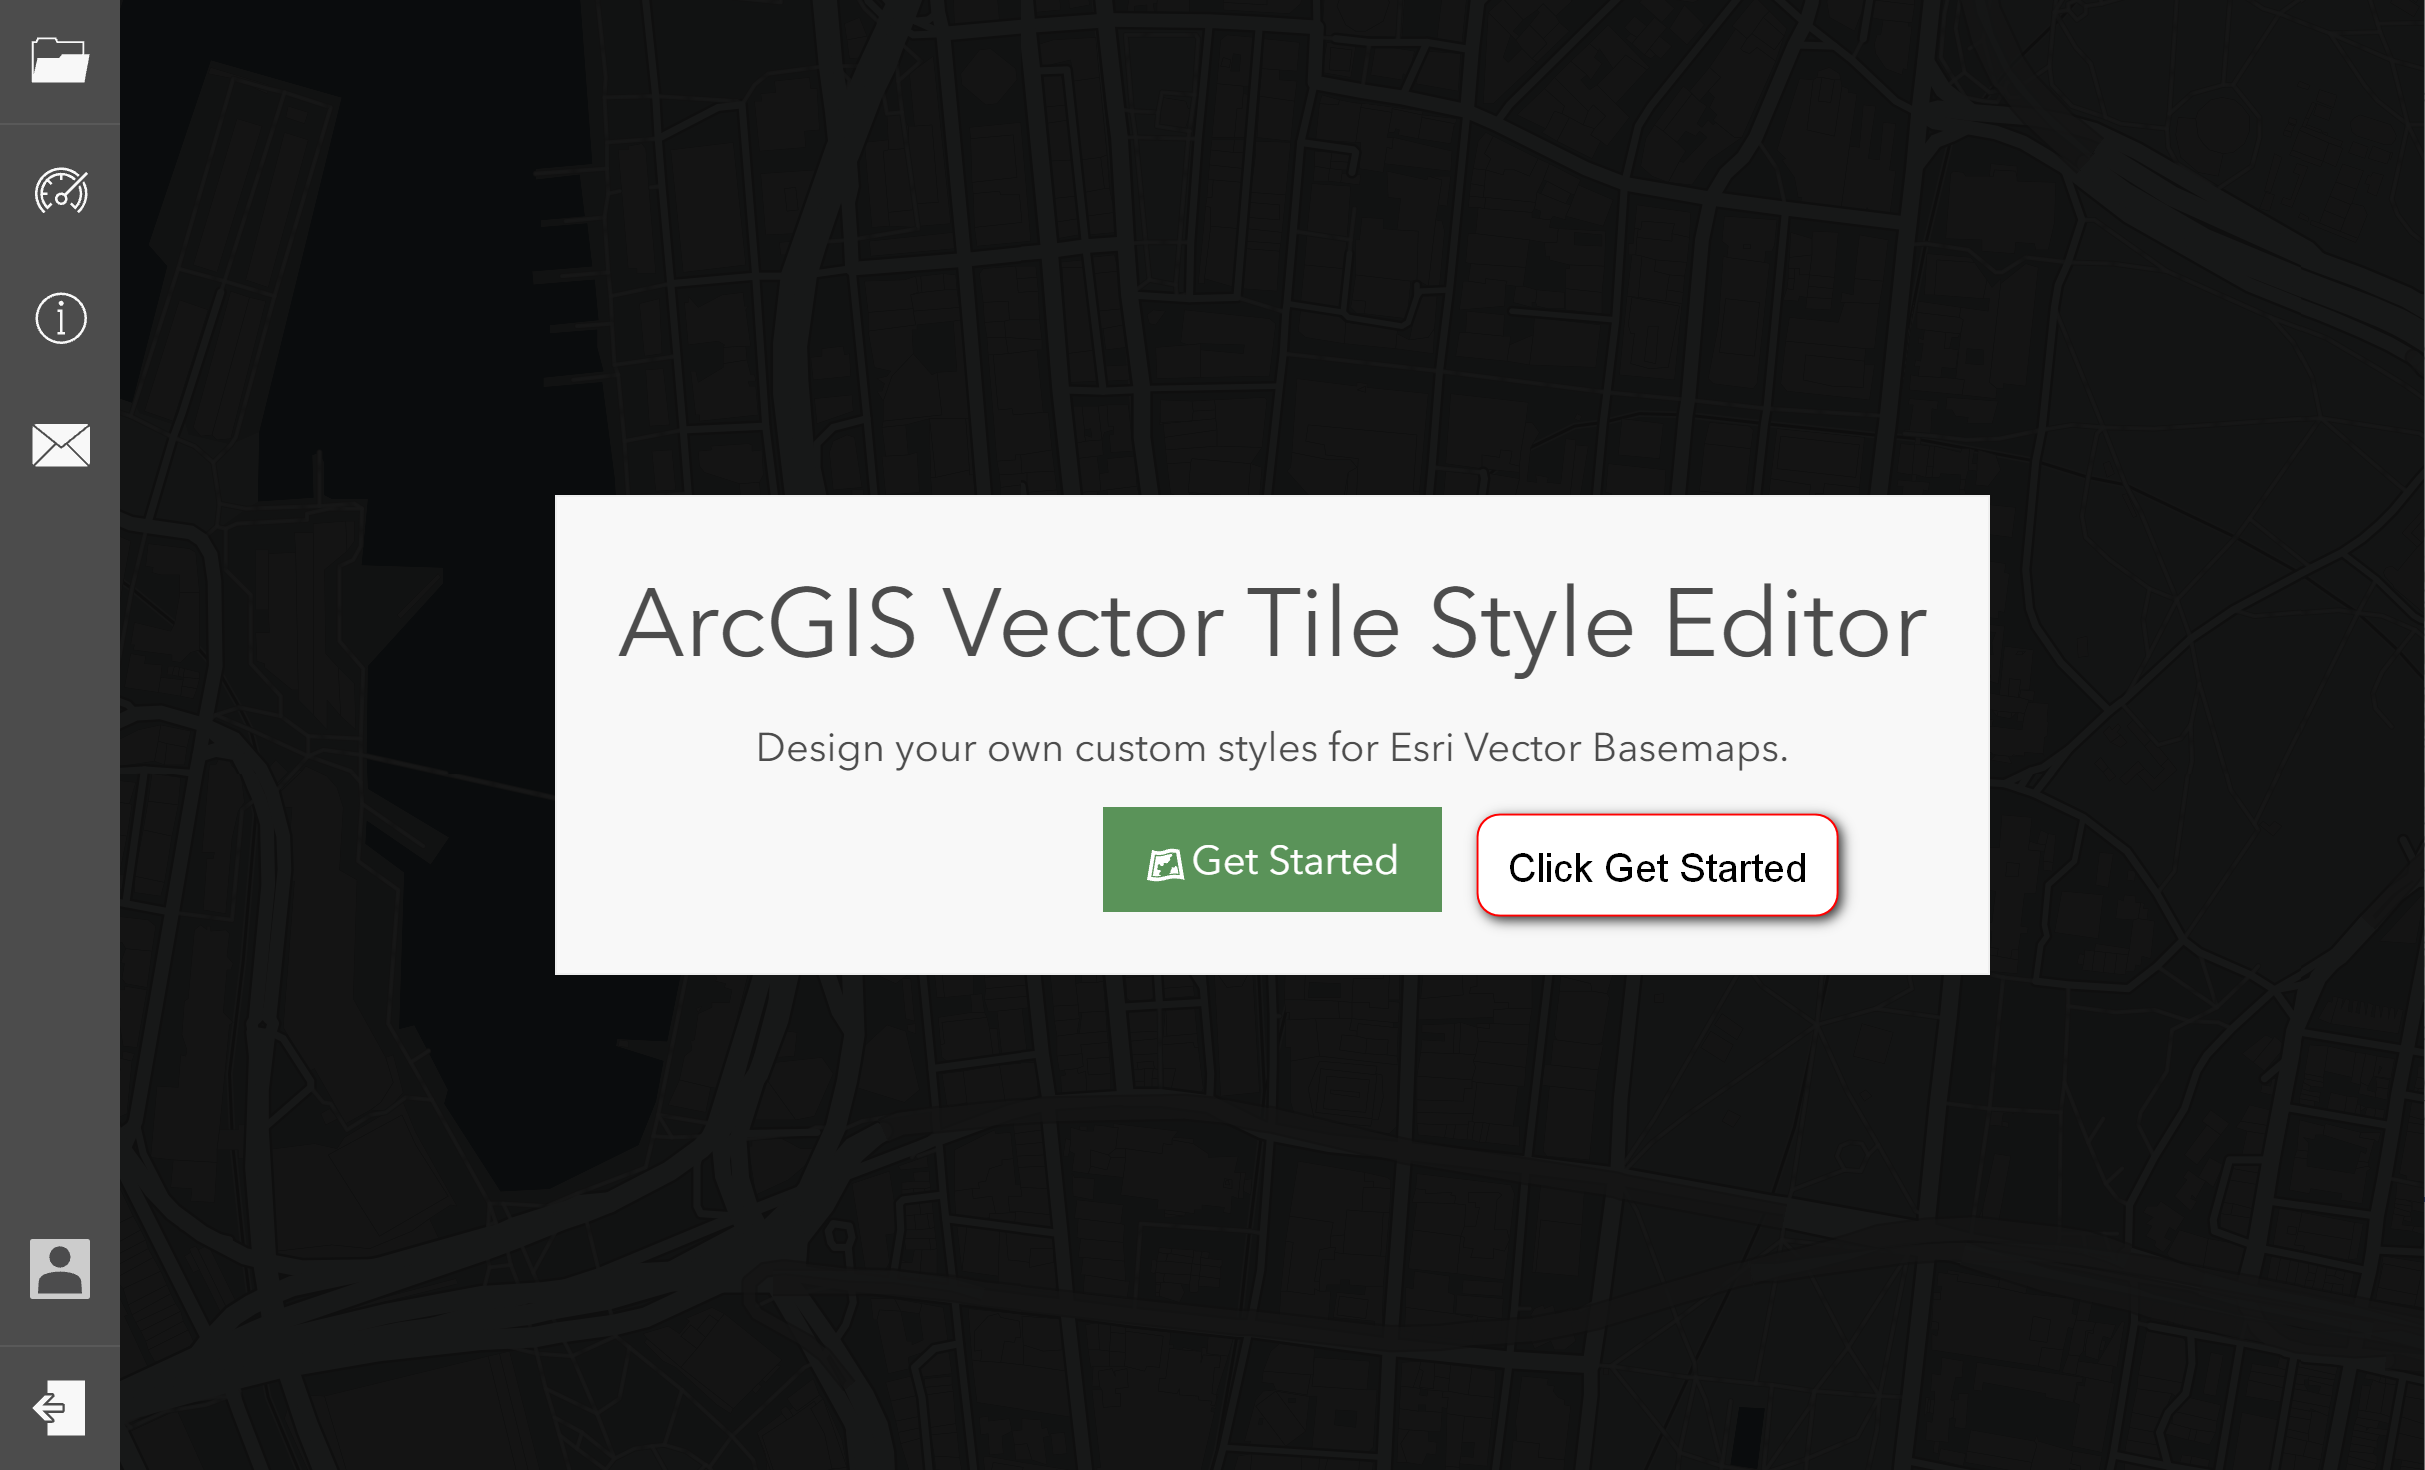
Option 2: Stand-alone Vector Tile Style Editor
The stand-alone version of the Vector Tile Style Editor can be accessed via a separate window. Sign in with your AGOL account then click the Get Started Button to select an existing basemap to customize. You’ll notice that the stand-alone VTSE looks just slightly different with a few more tools in the left hand panel but otherwise works the same as the integrated version in AGOL.
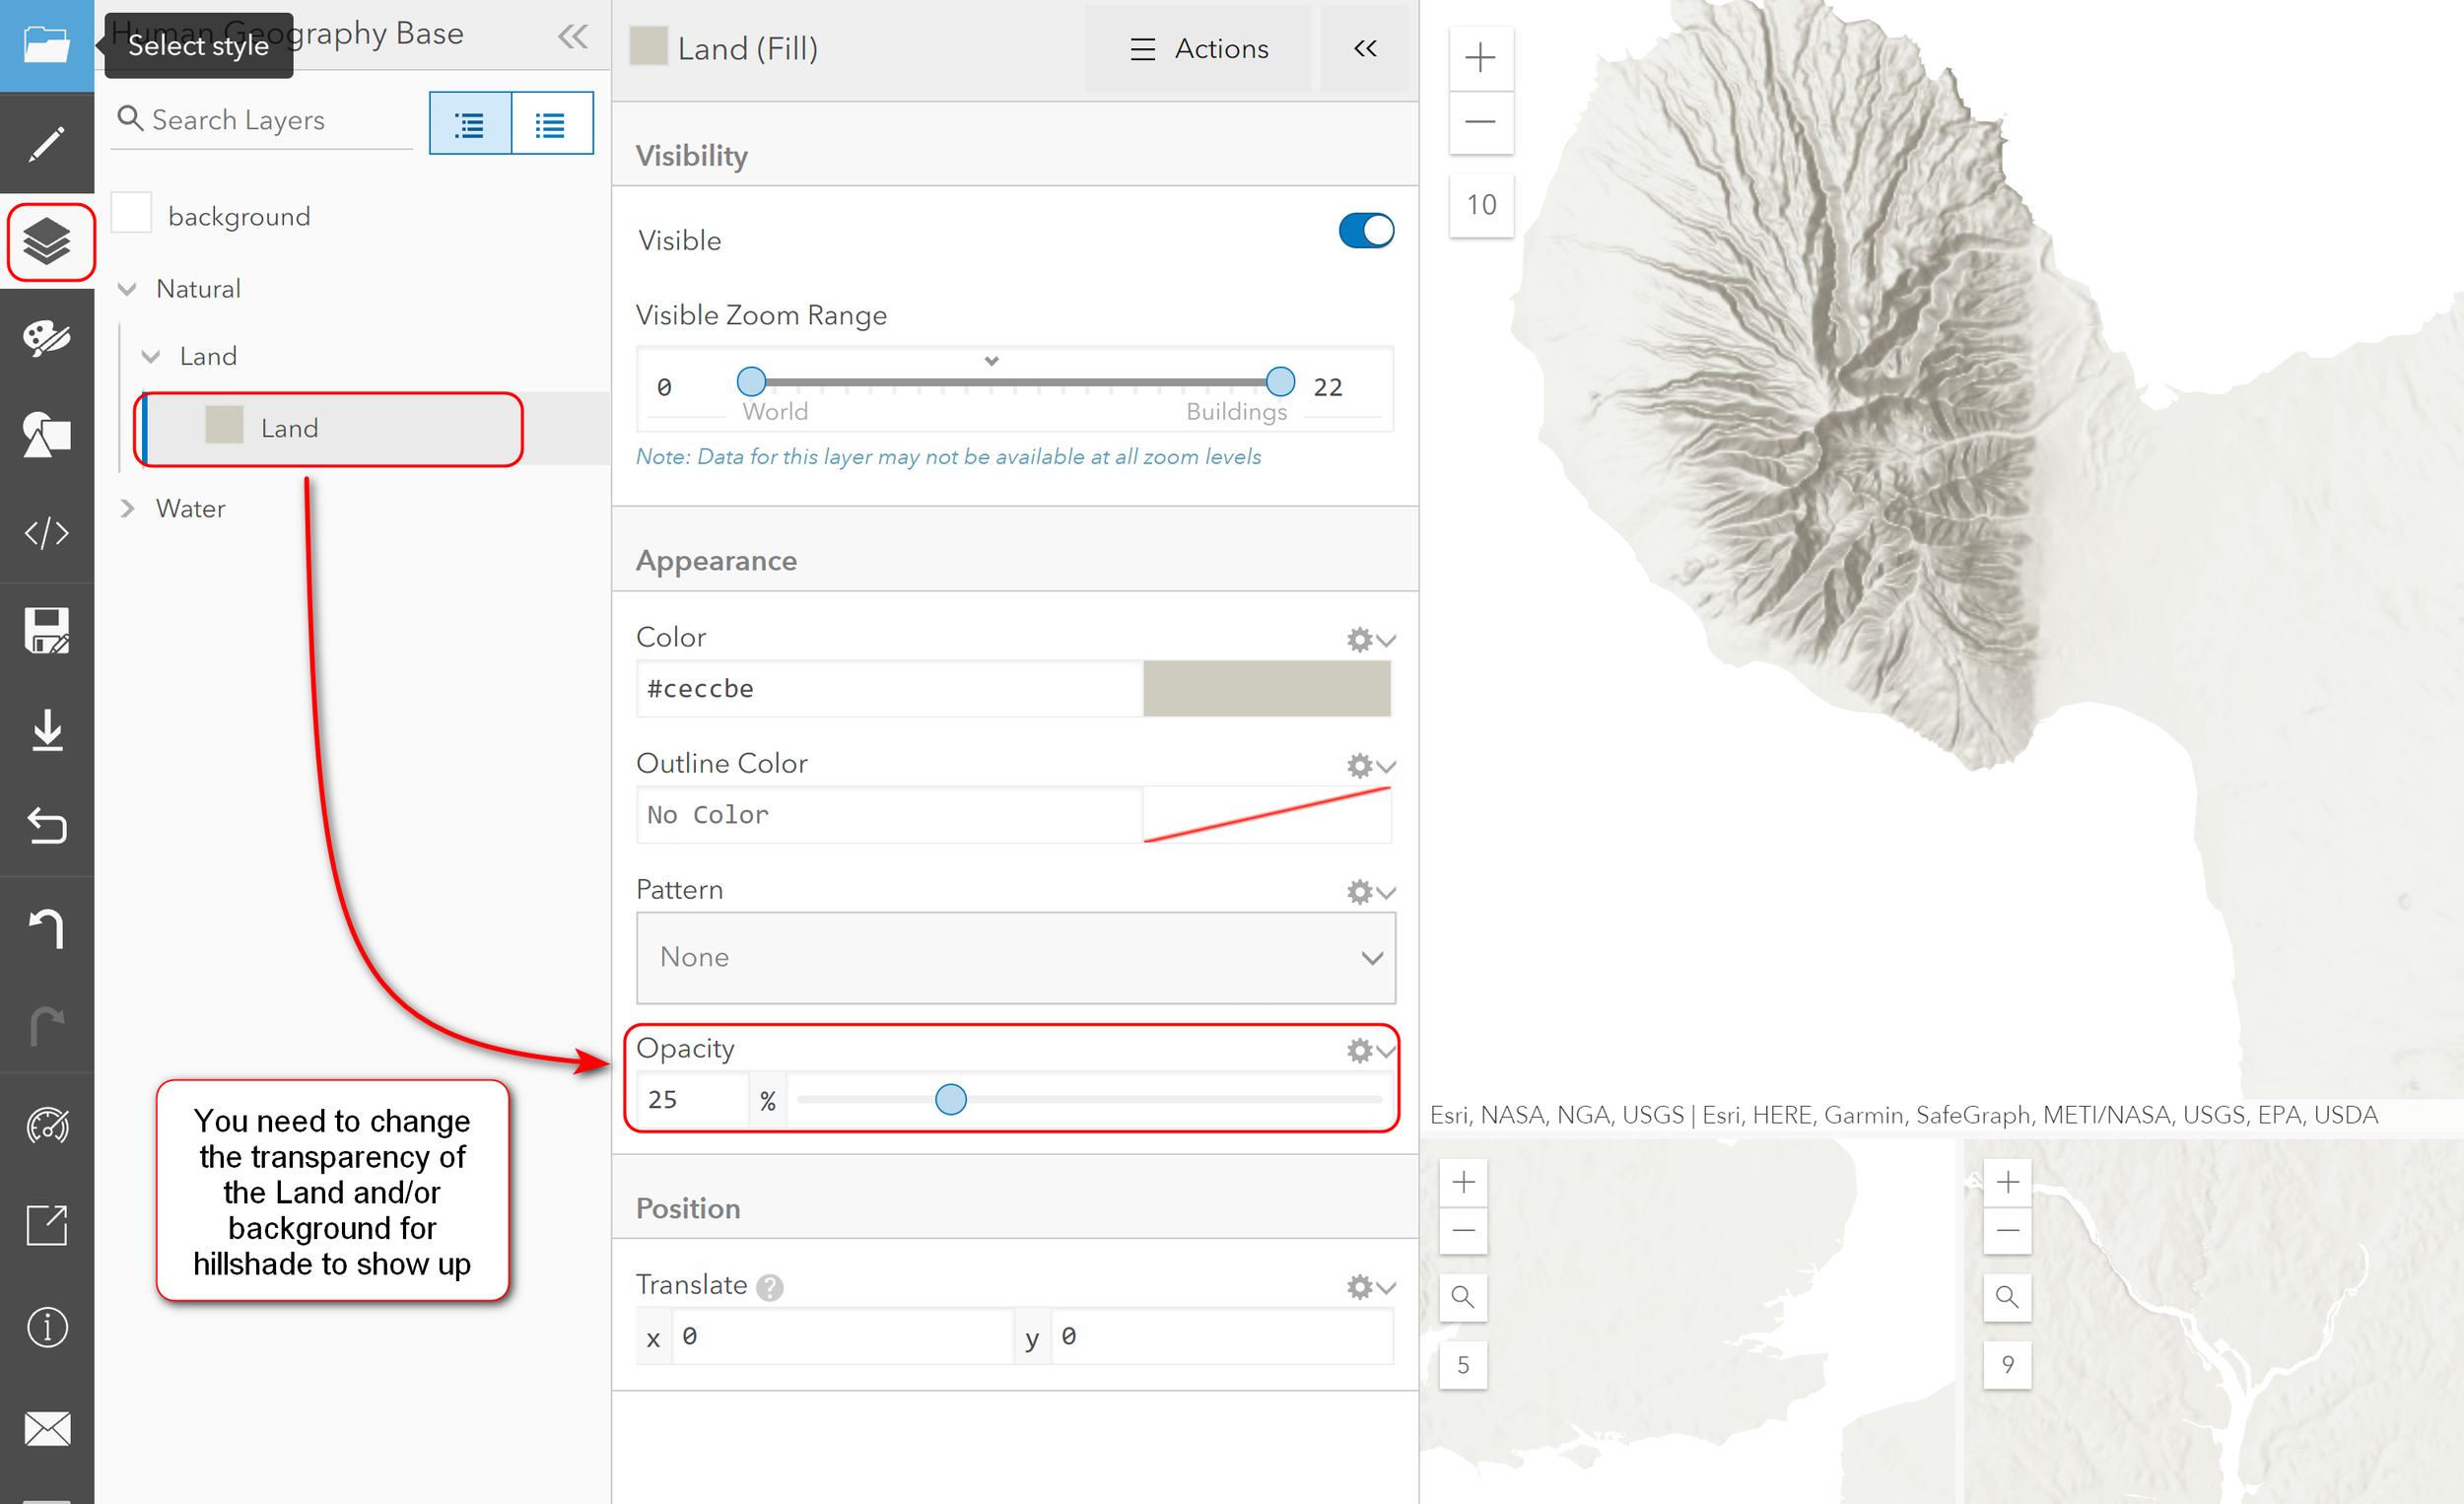
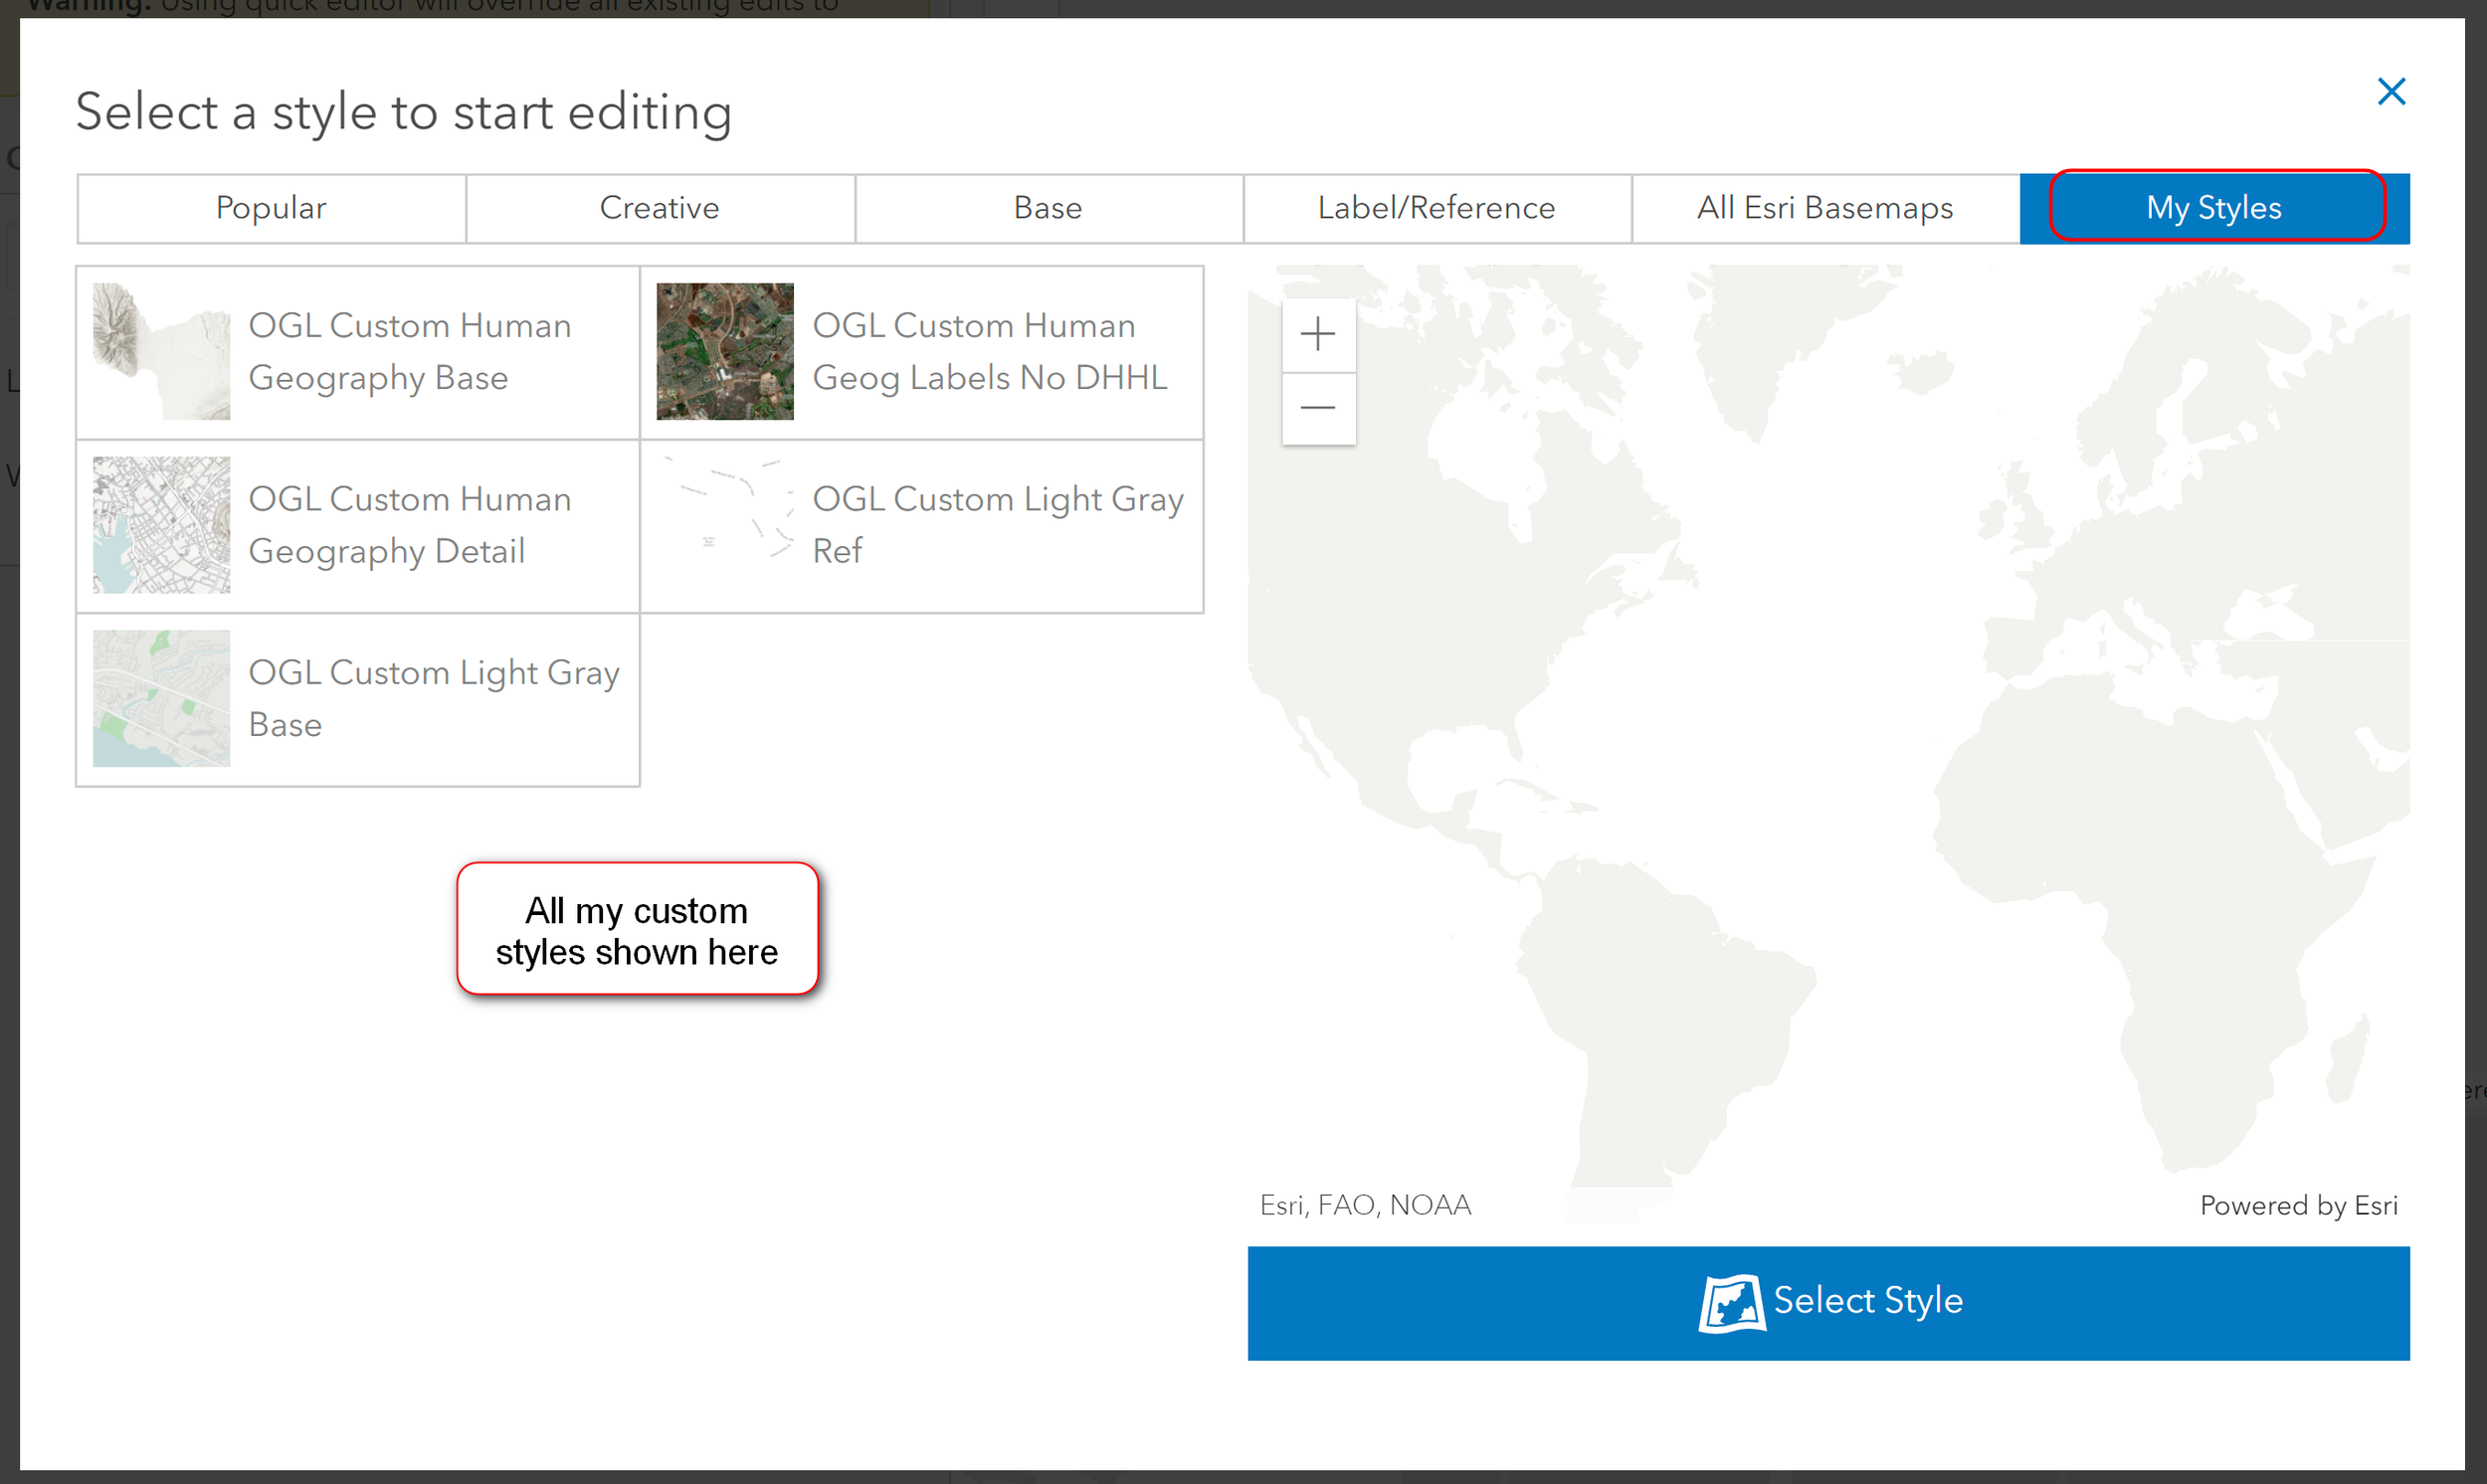
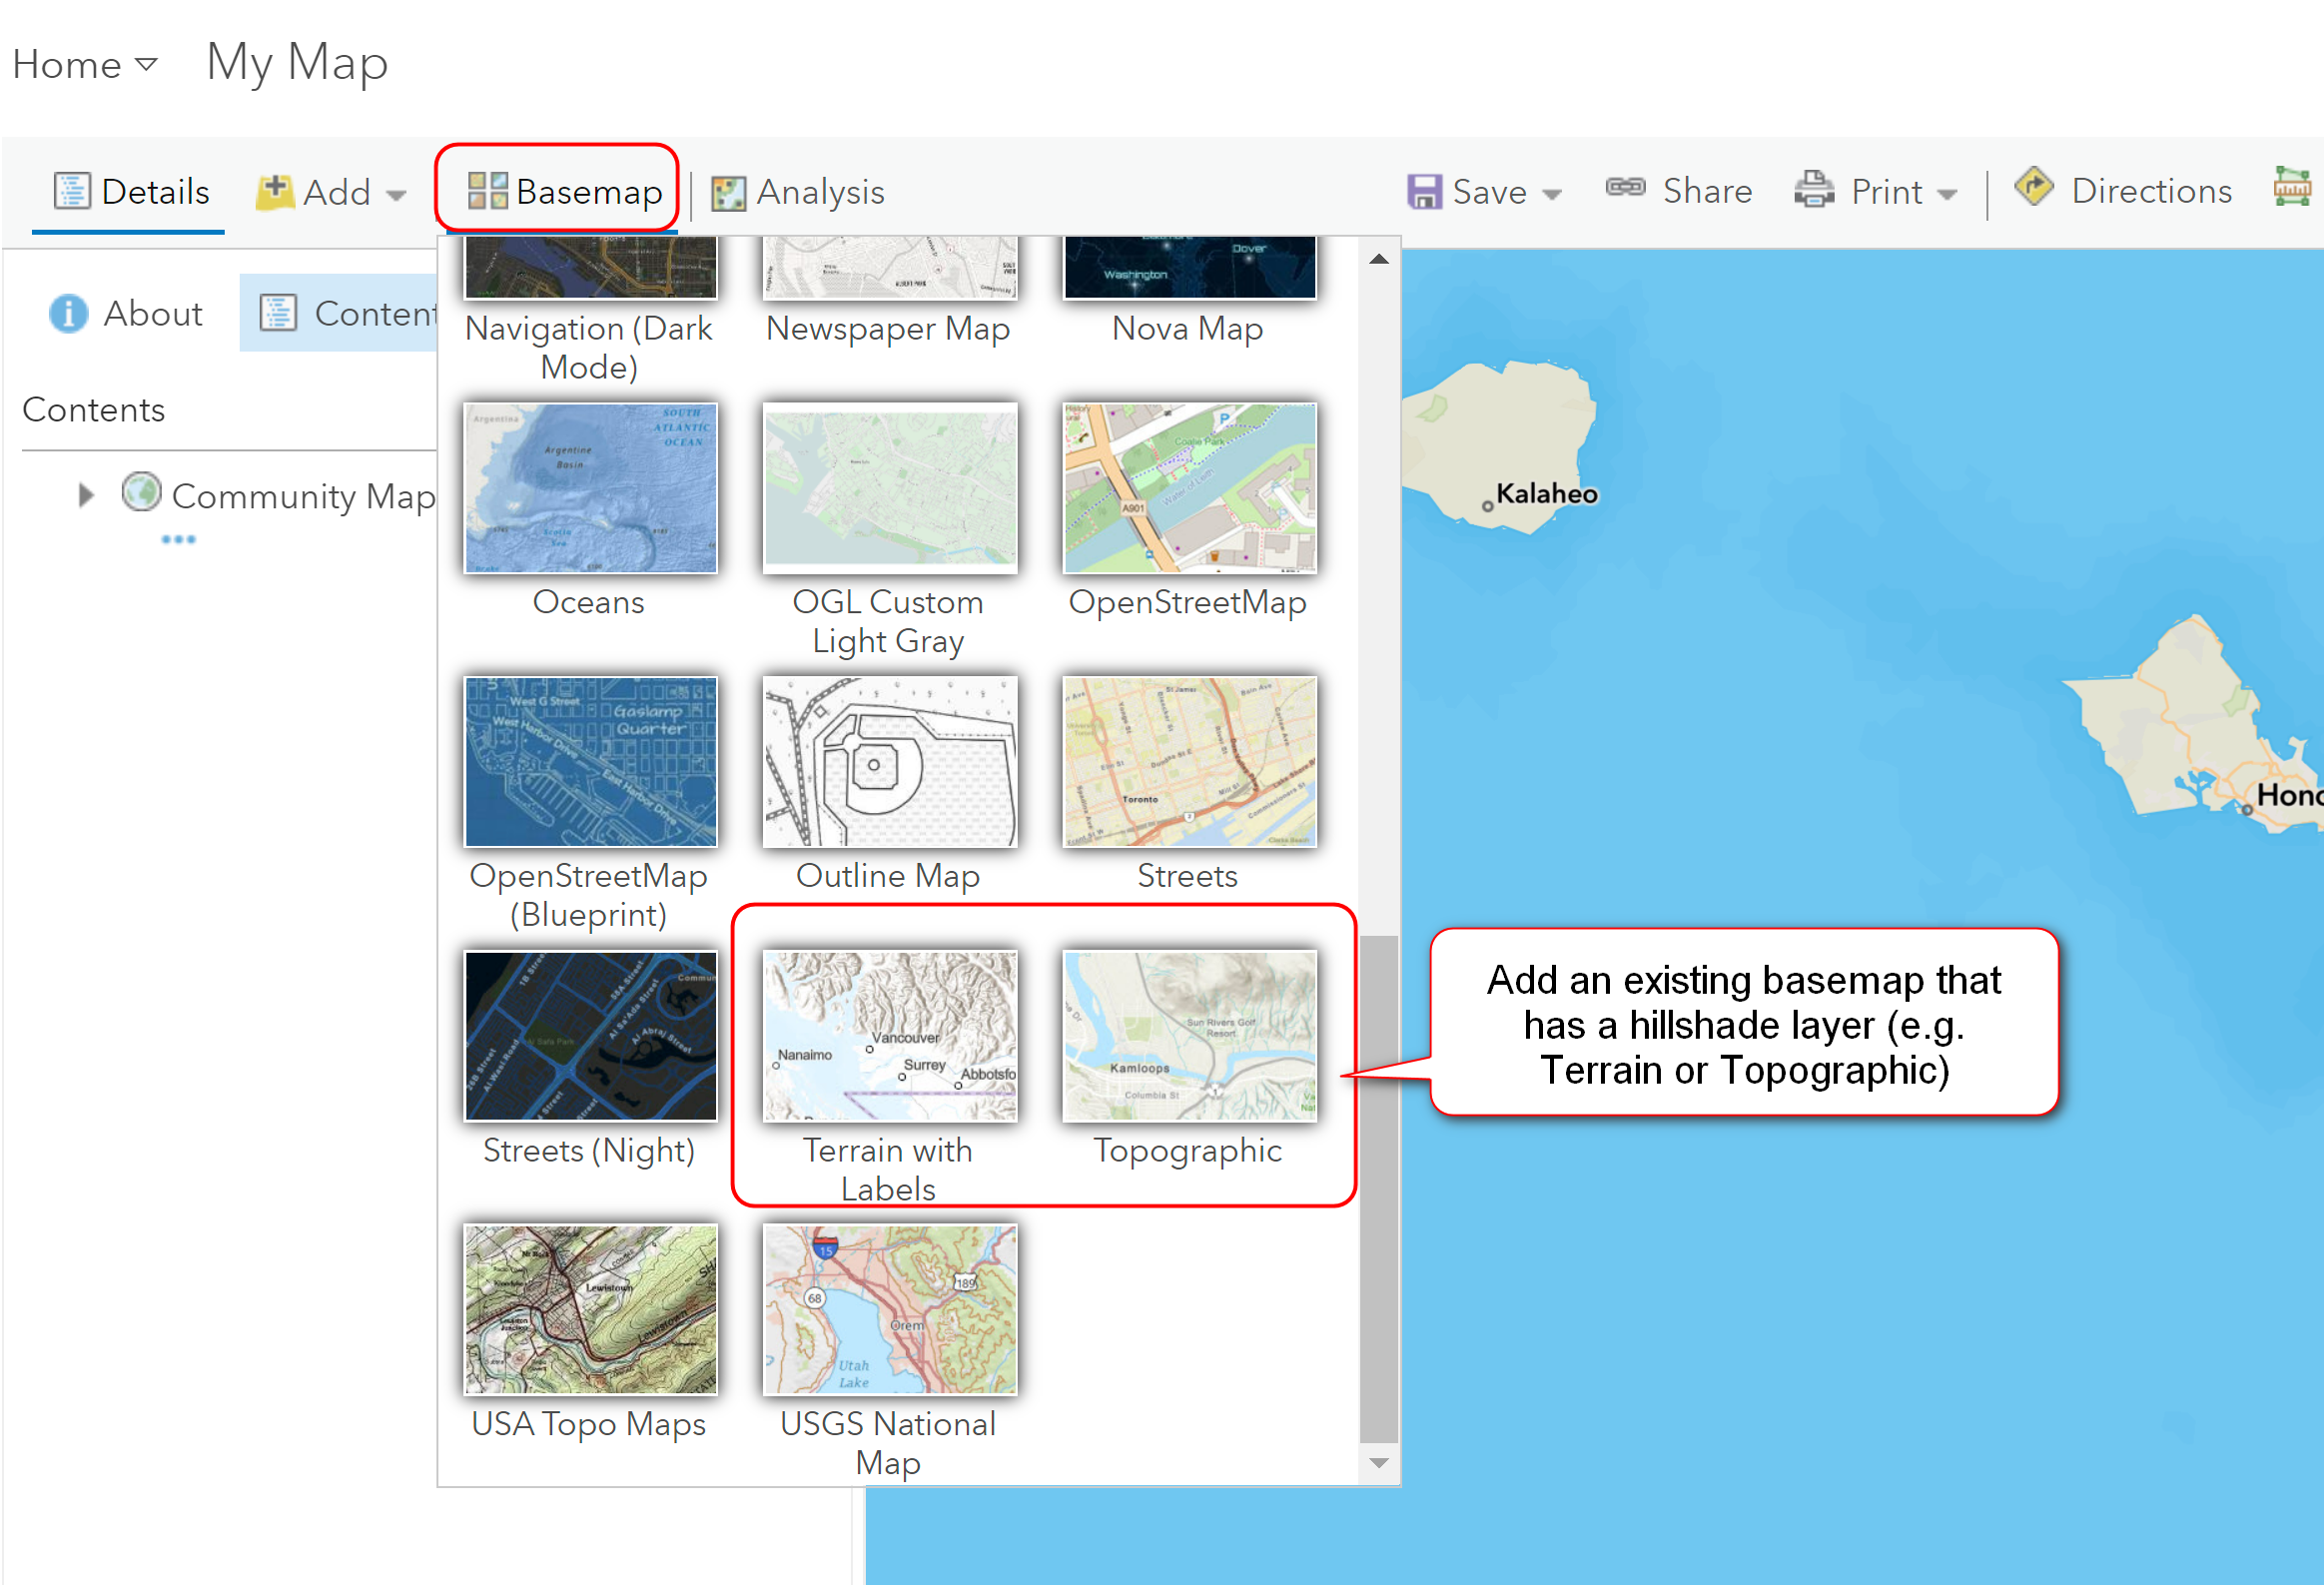
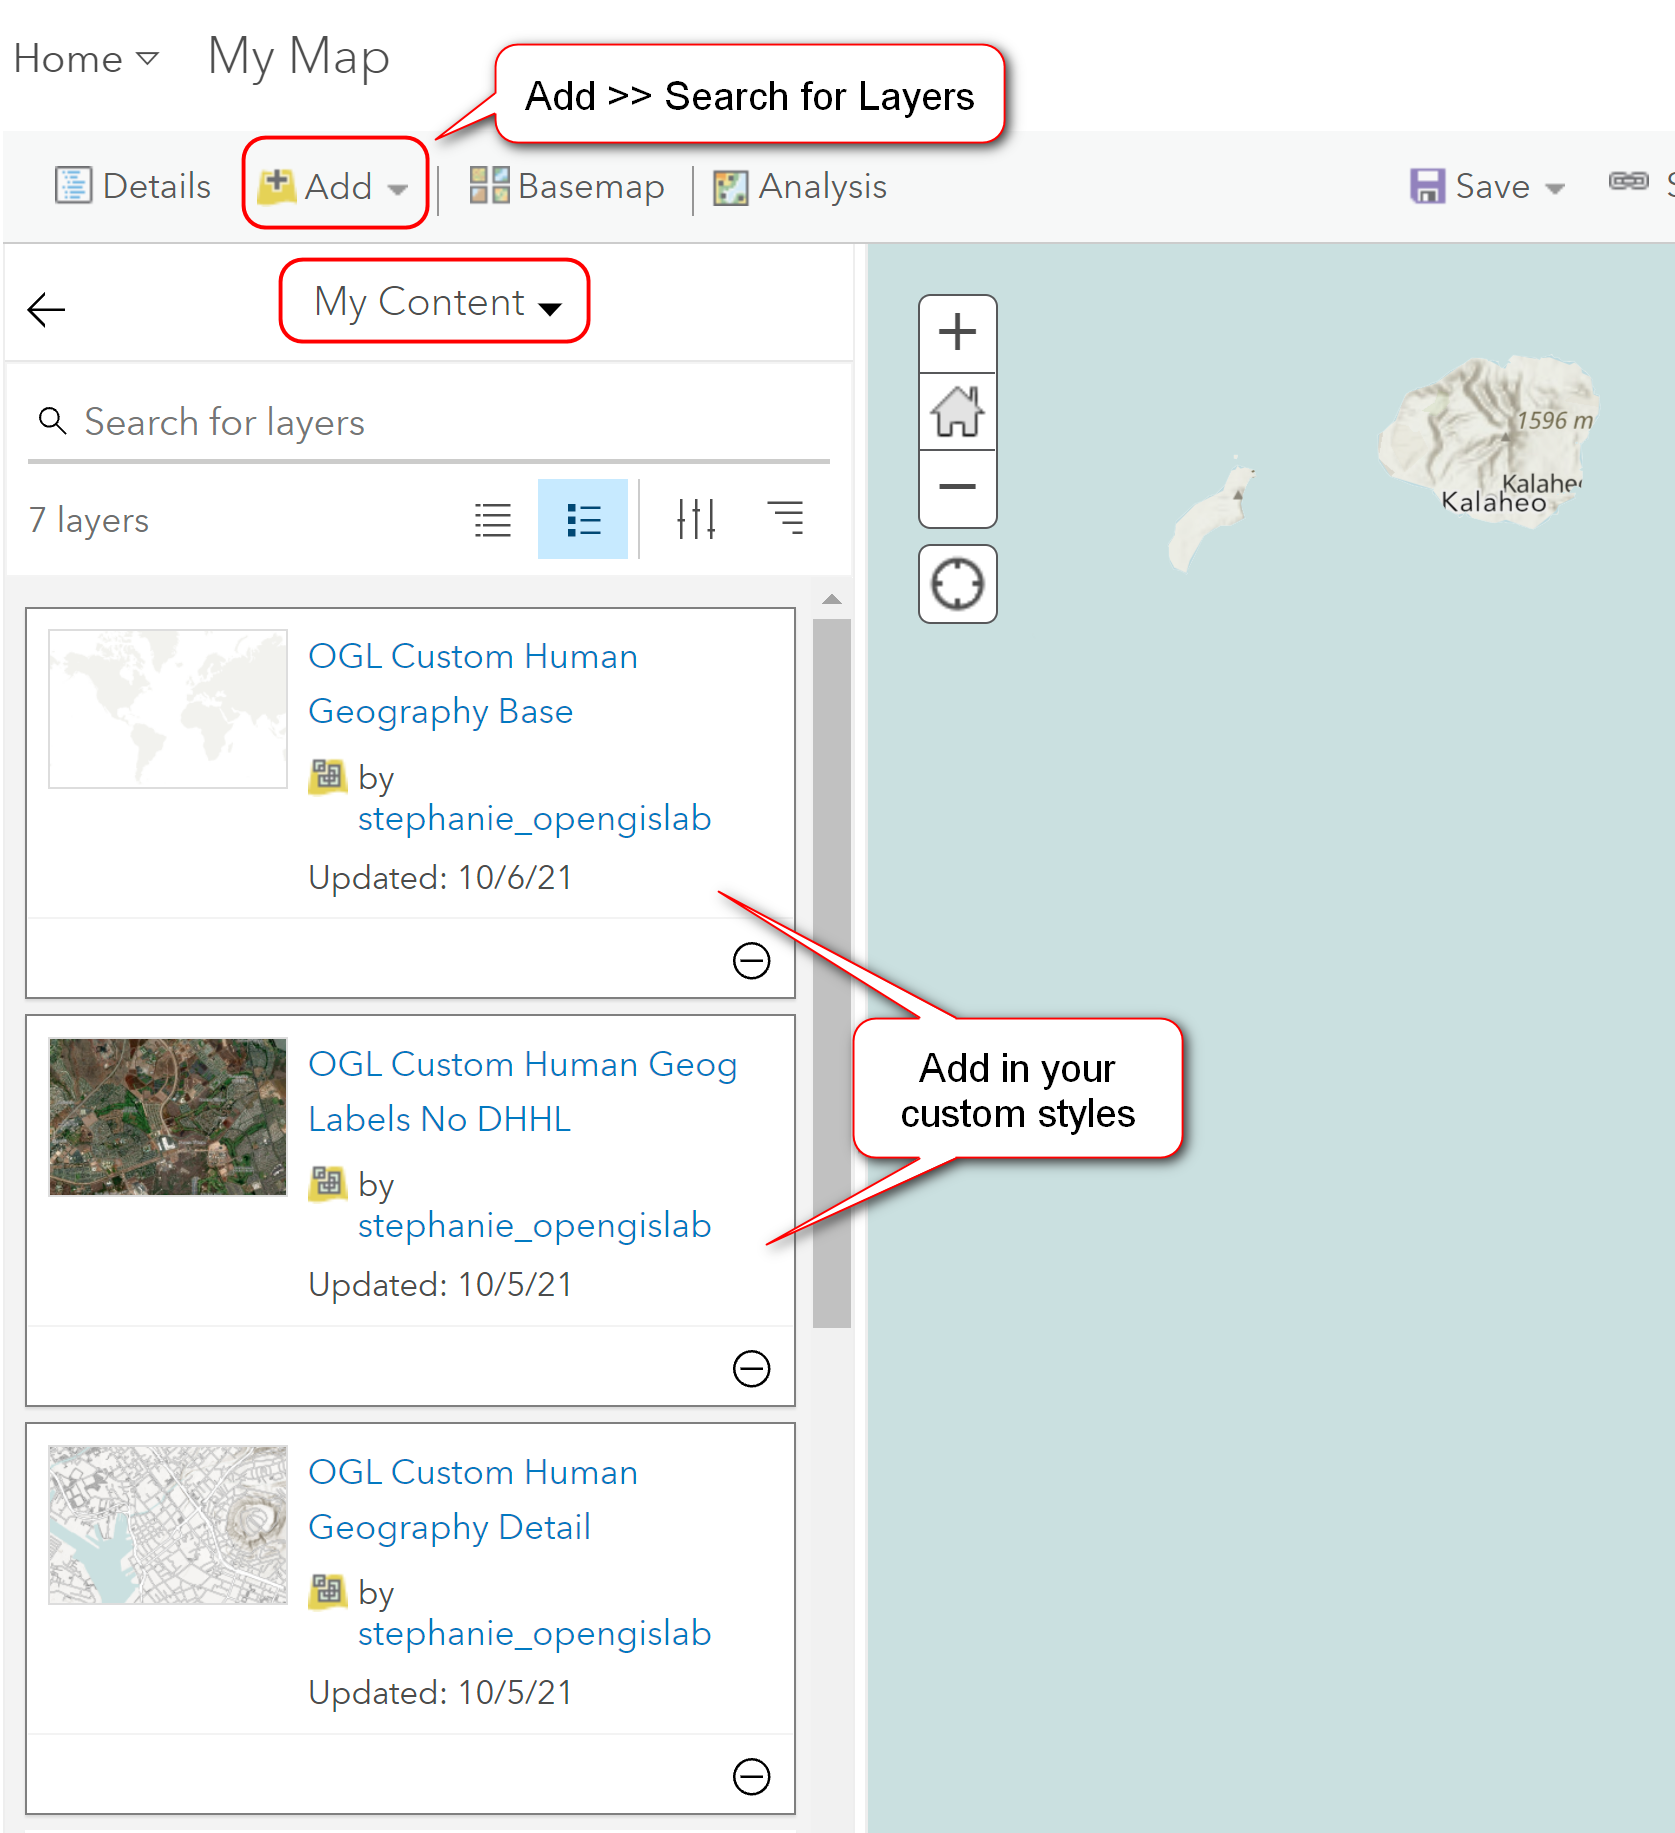
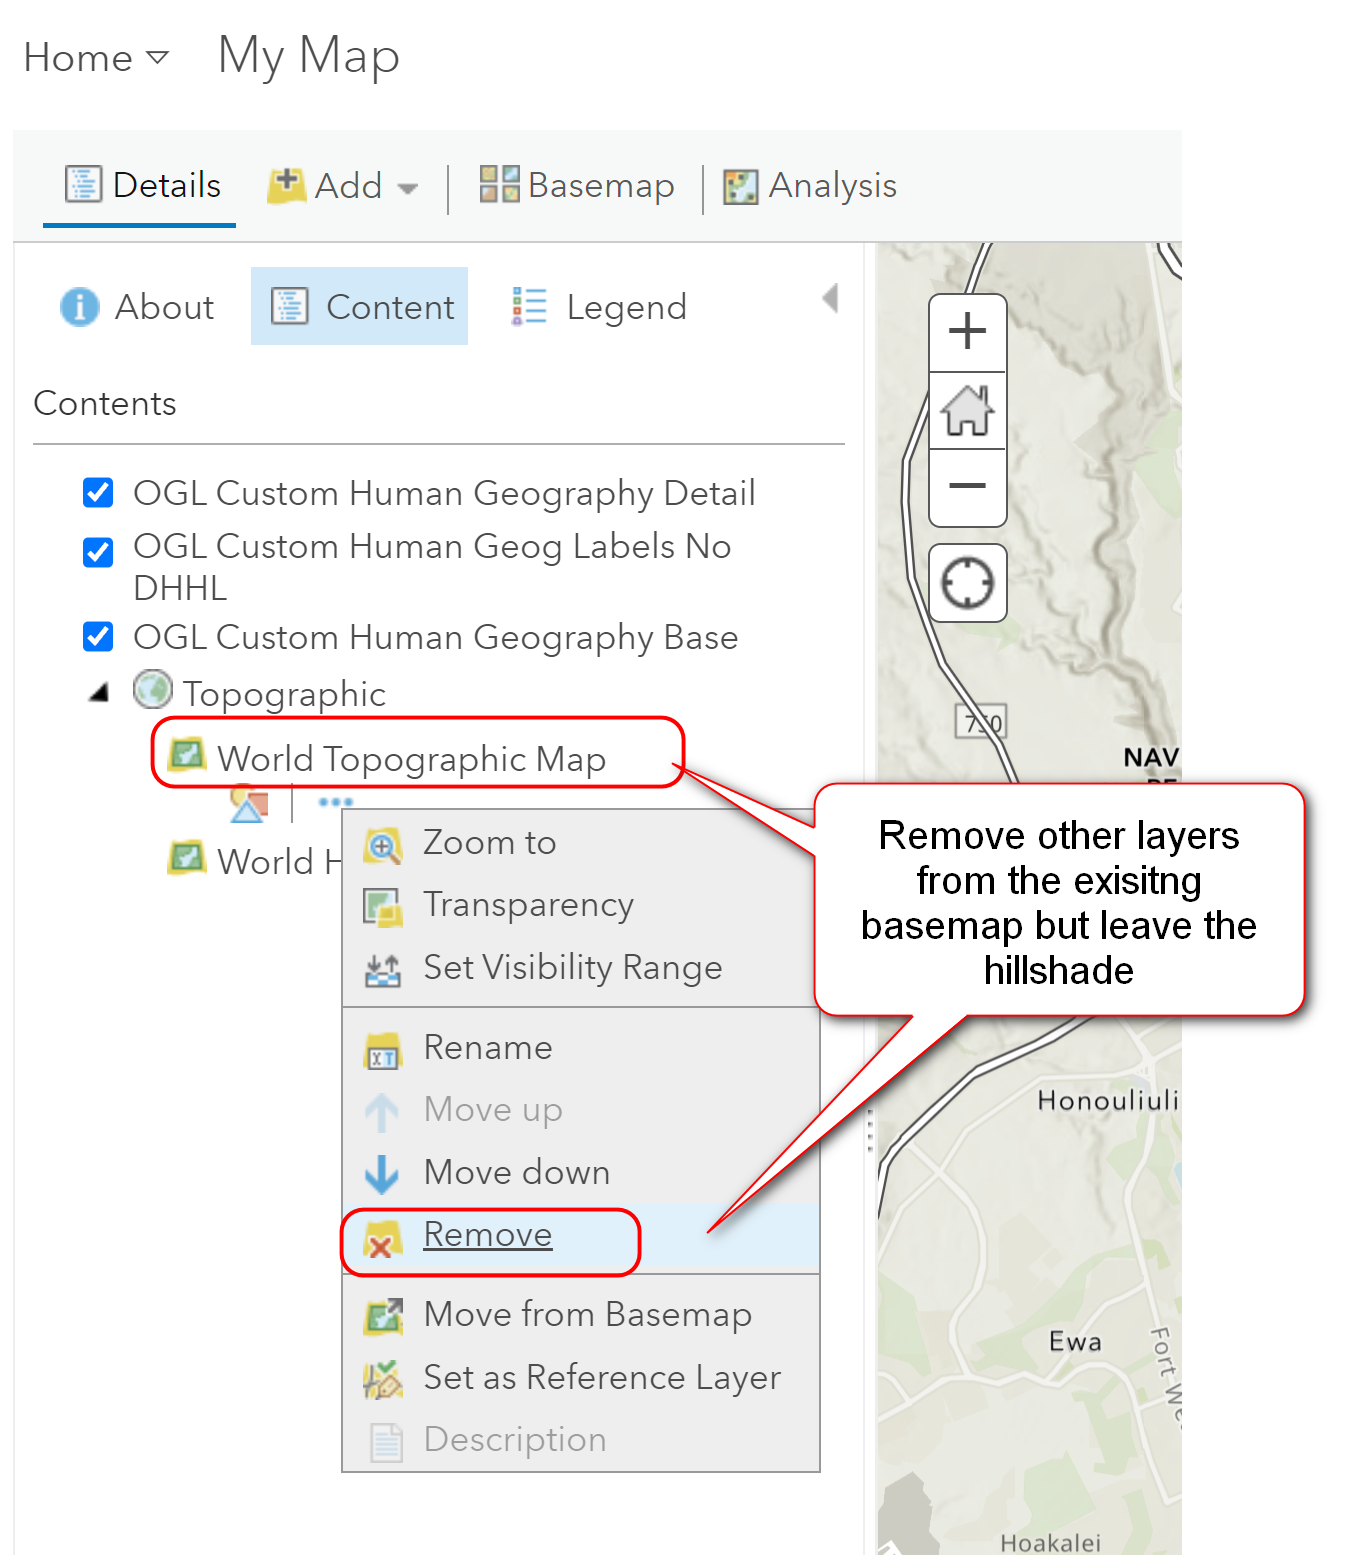
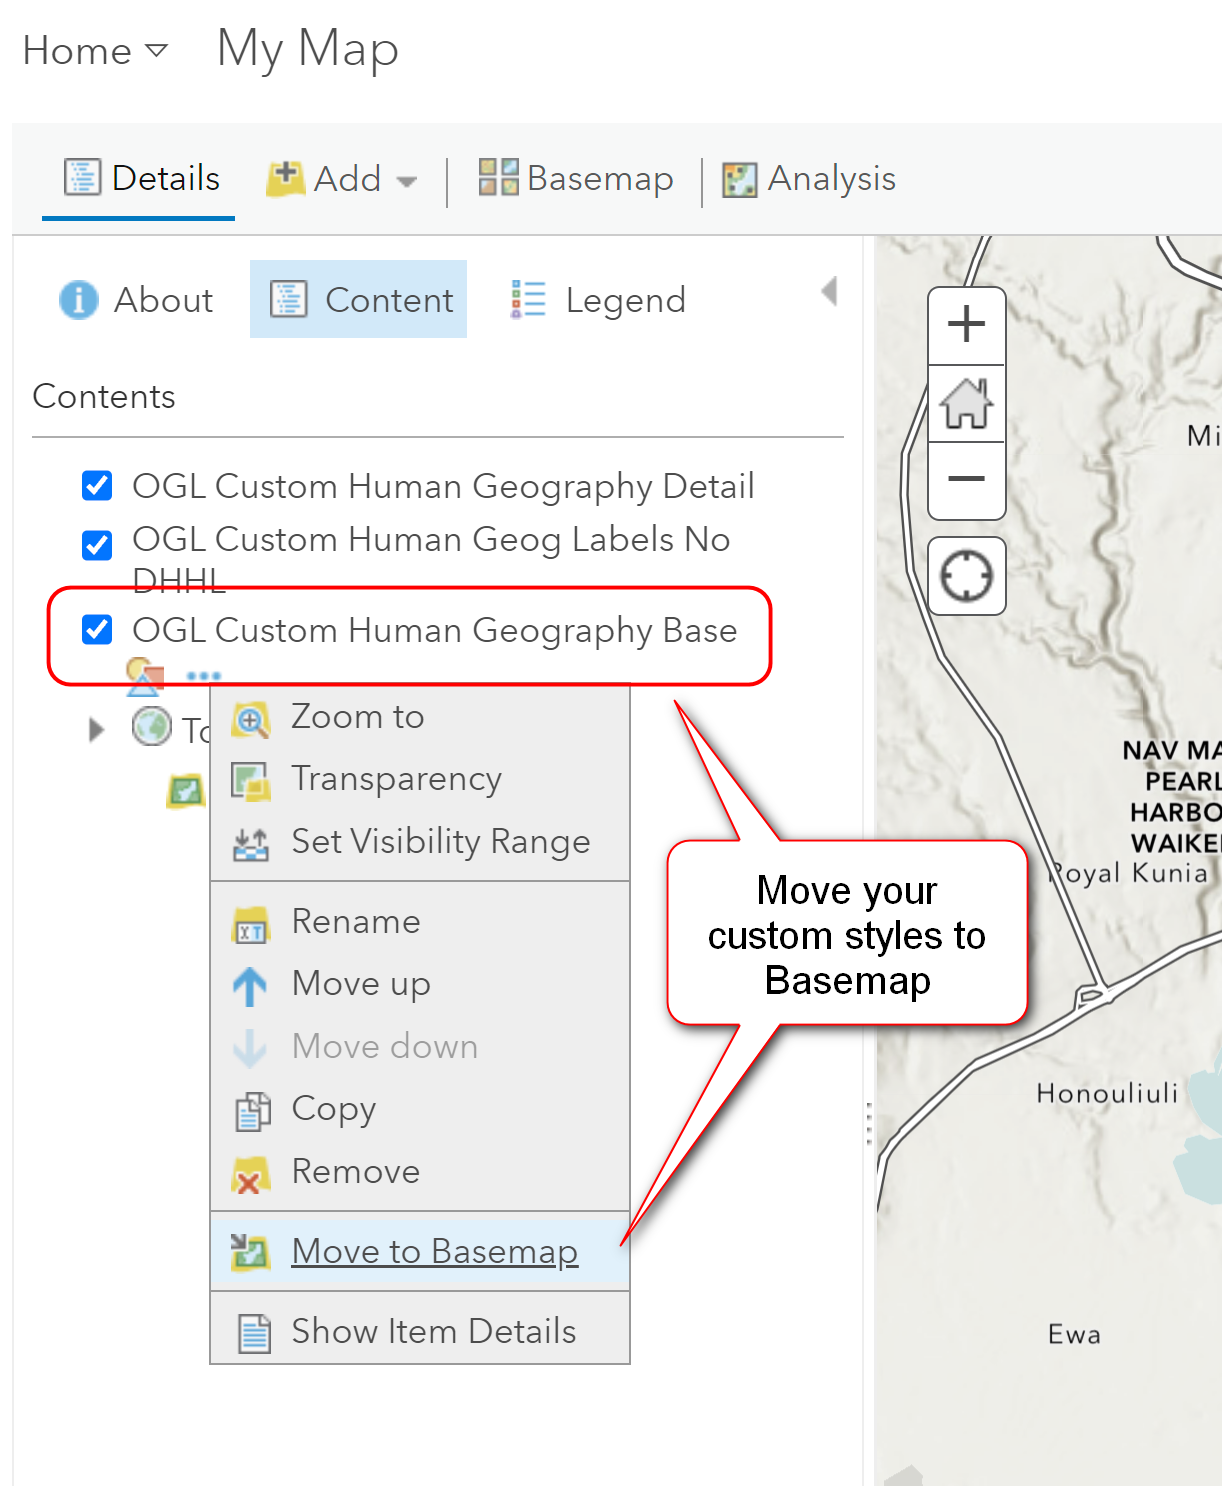
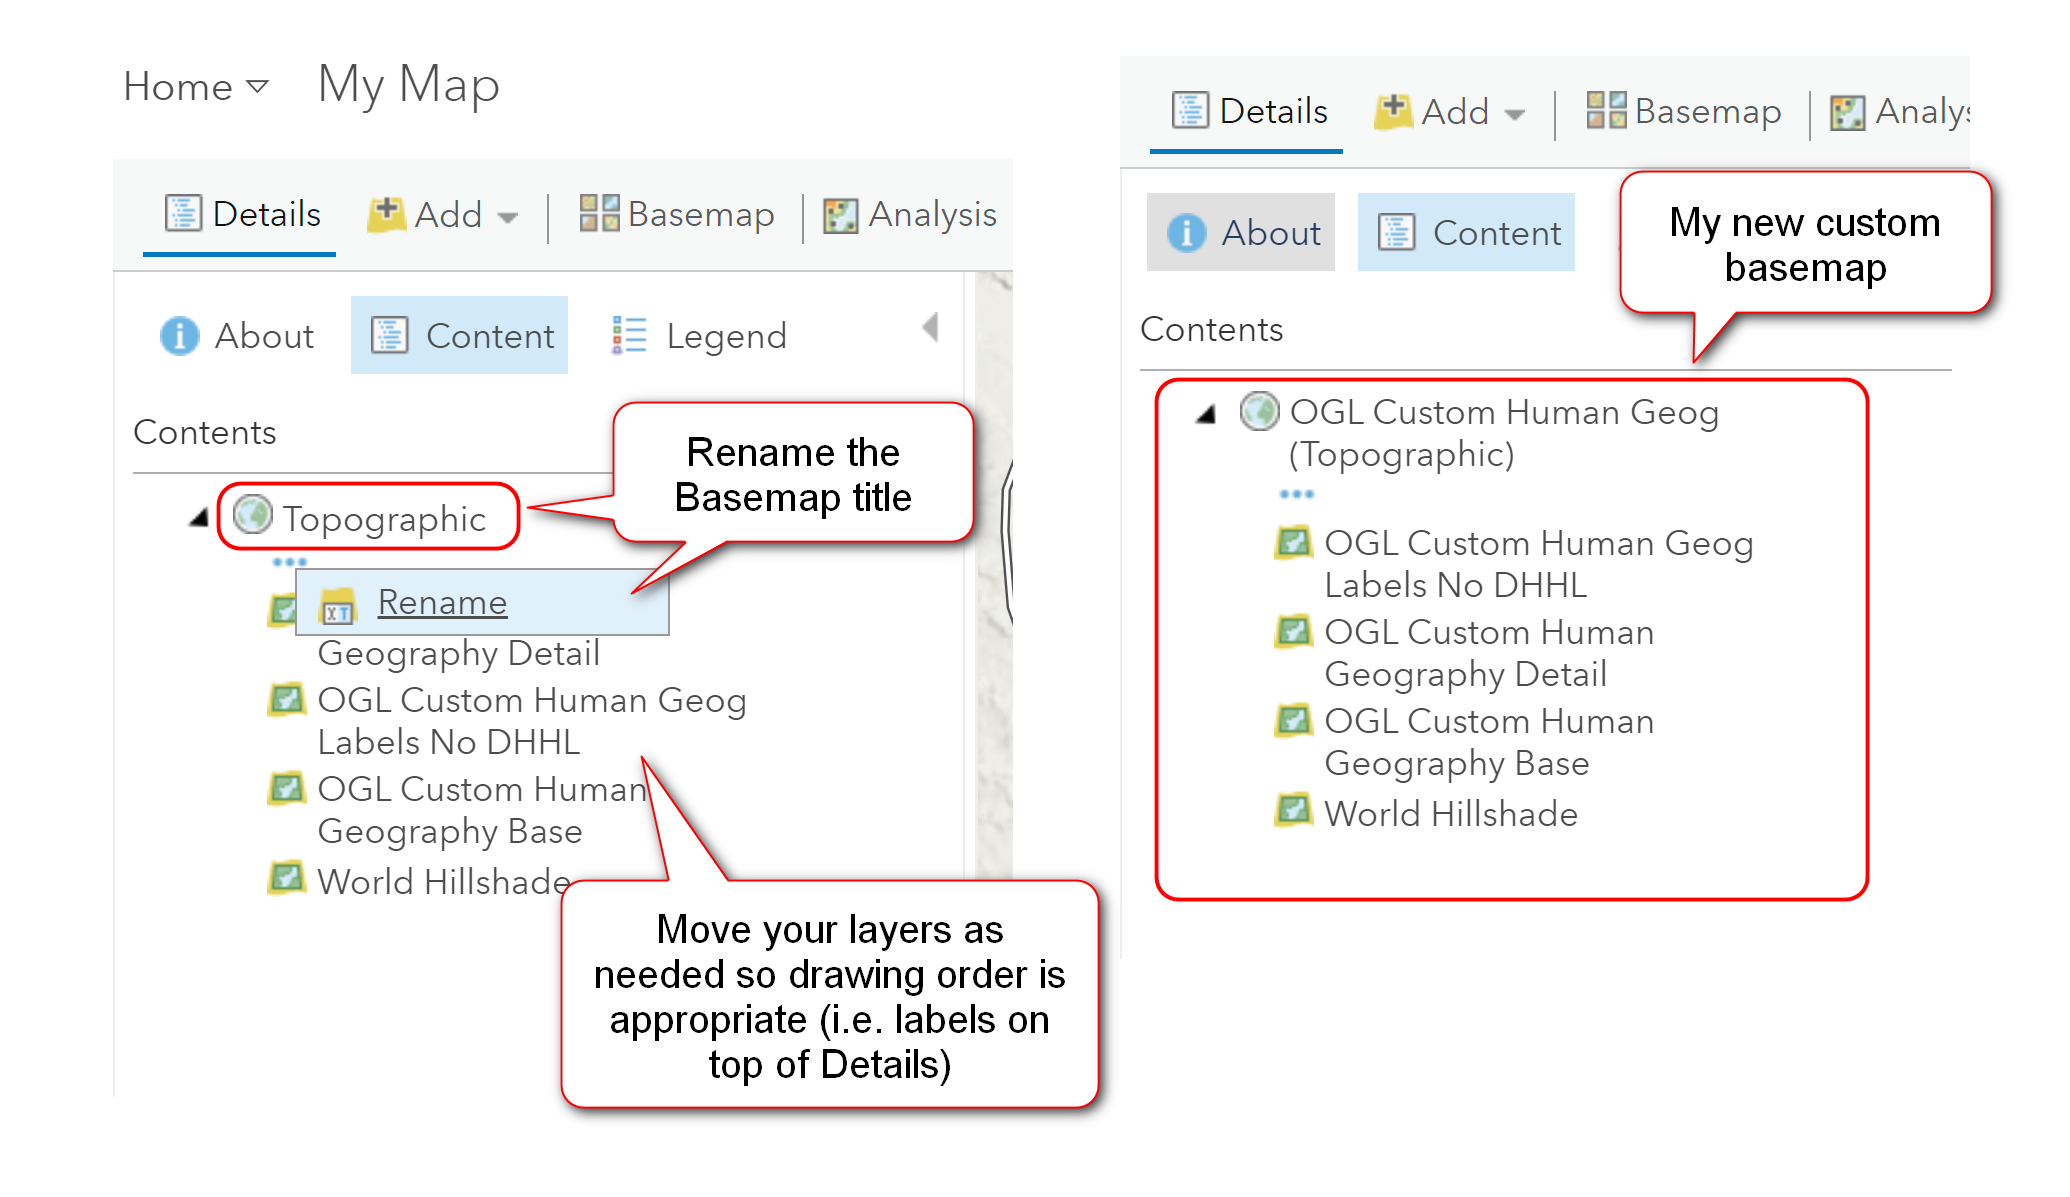
For this example, I am using the Human Geography basemap which has 3 layers: a Reference (labels), Details (features), and a Base (Land & Water only). For the Reference layer I’m just going to remove the Hawaiian Home Land labels, so I can manually add in my own labels later. For the Details layer I’m going to color the ocean blue. For the Base layer, I’m going to remove the background and change the transparency of the Land areas - this is so I can manually add in a hillshade later. Refer to the Adding Hillshade section in the Vector Tile Style Editor documentation for more info. After you are done customizing, you can go back to the main basemap gallery selection and see your styles in My Styles section.

Adding hillshade and creating a new custom basemap
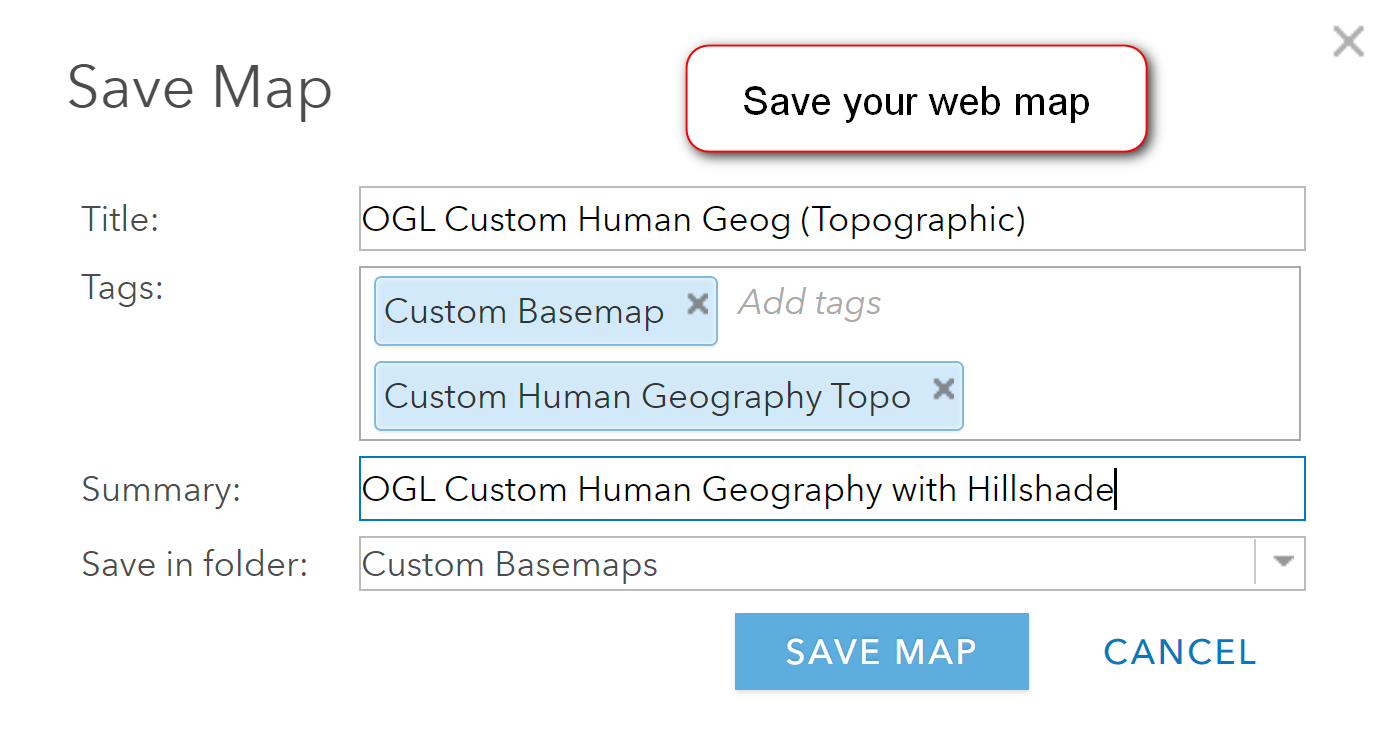
So after you’ve saved all your custom styles, go back to your AGOL and create a new Map that includes a hilllshade and your custom styles. This web map then can be used as a new custom basemap in the Basemap Gallery.
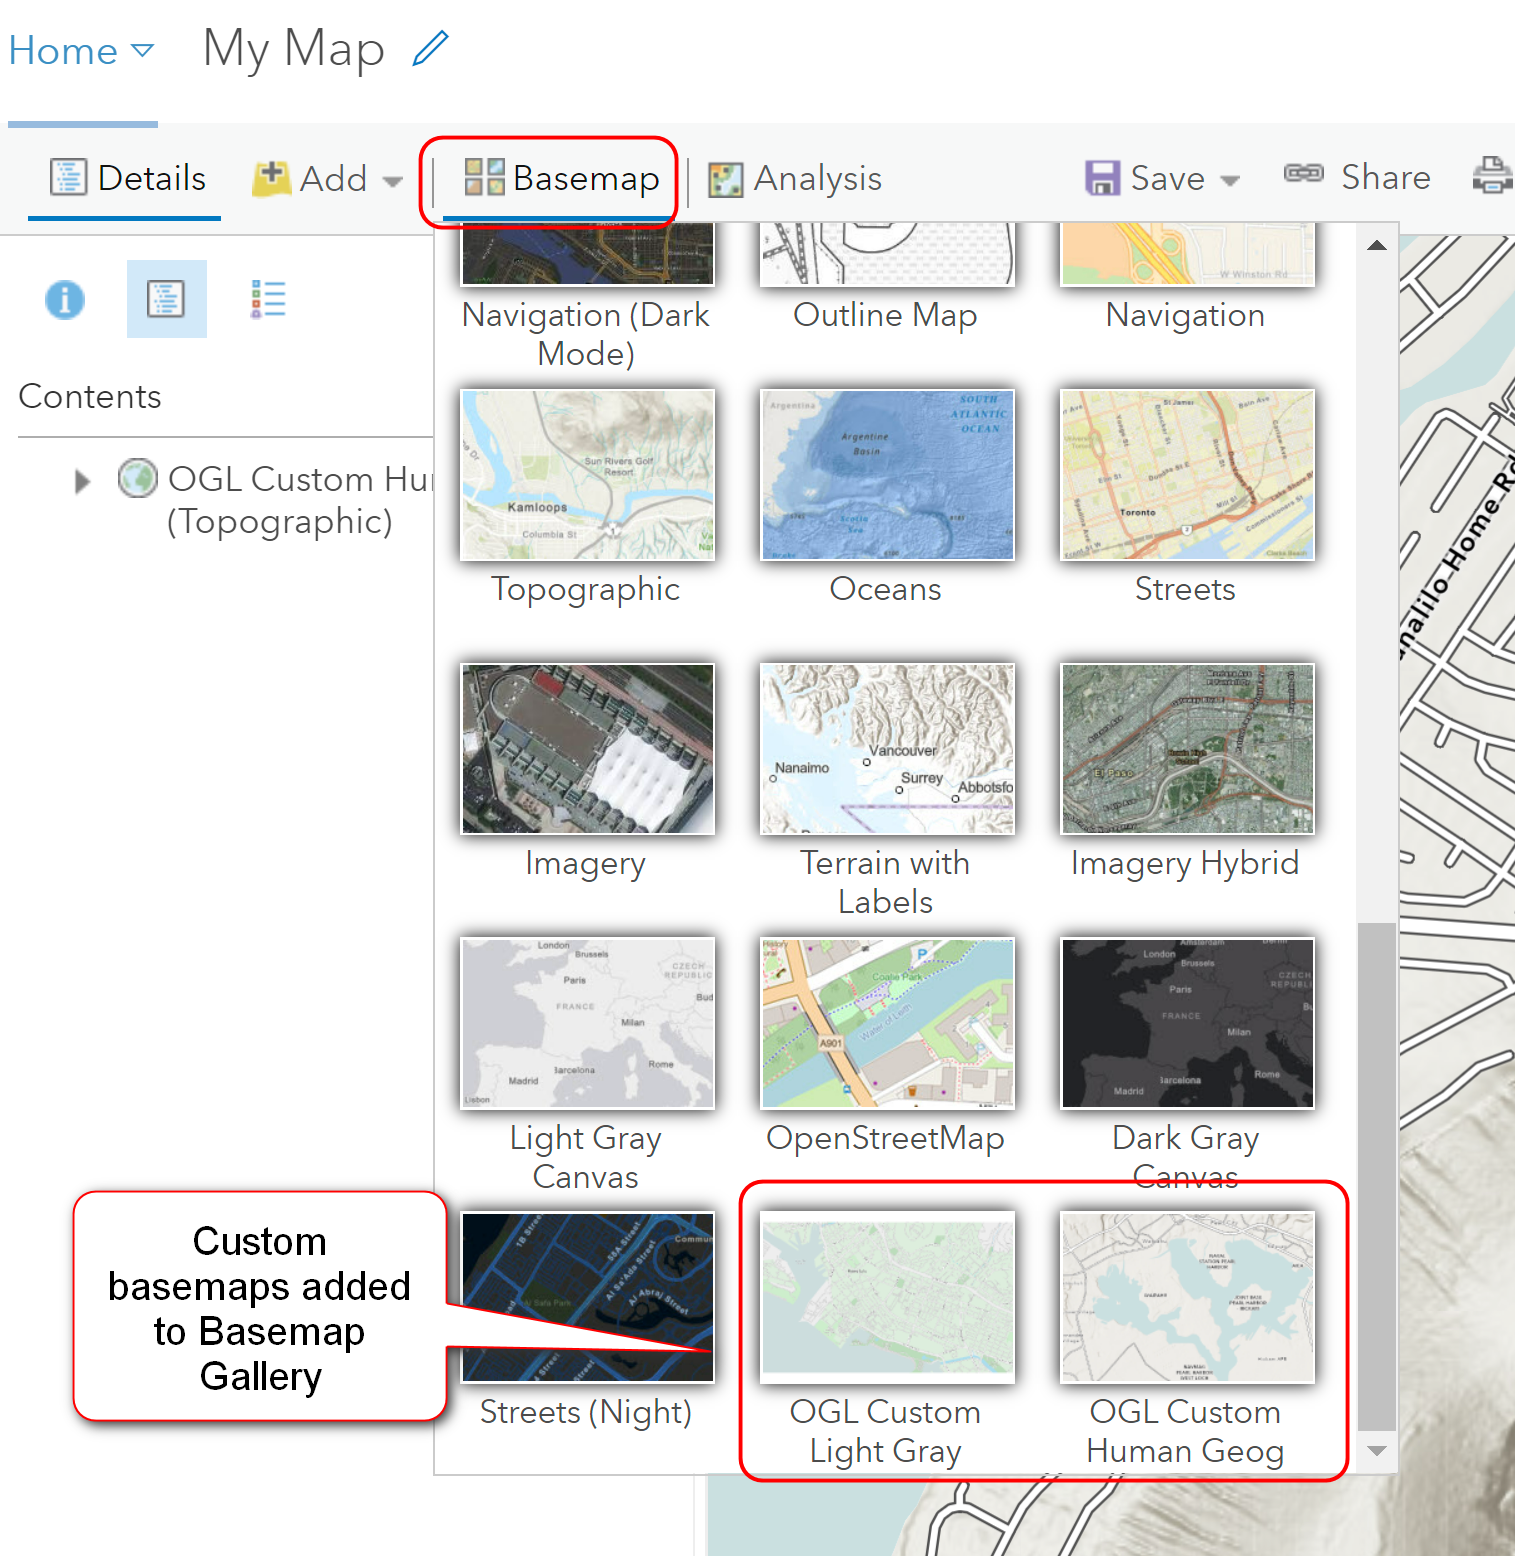
Adding custom basemap to Basemap Gallery
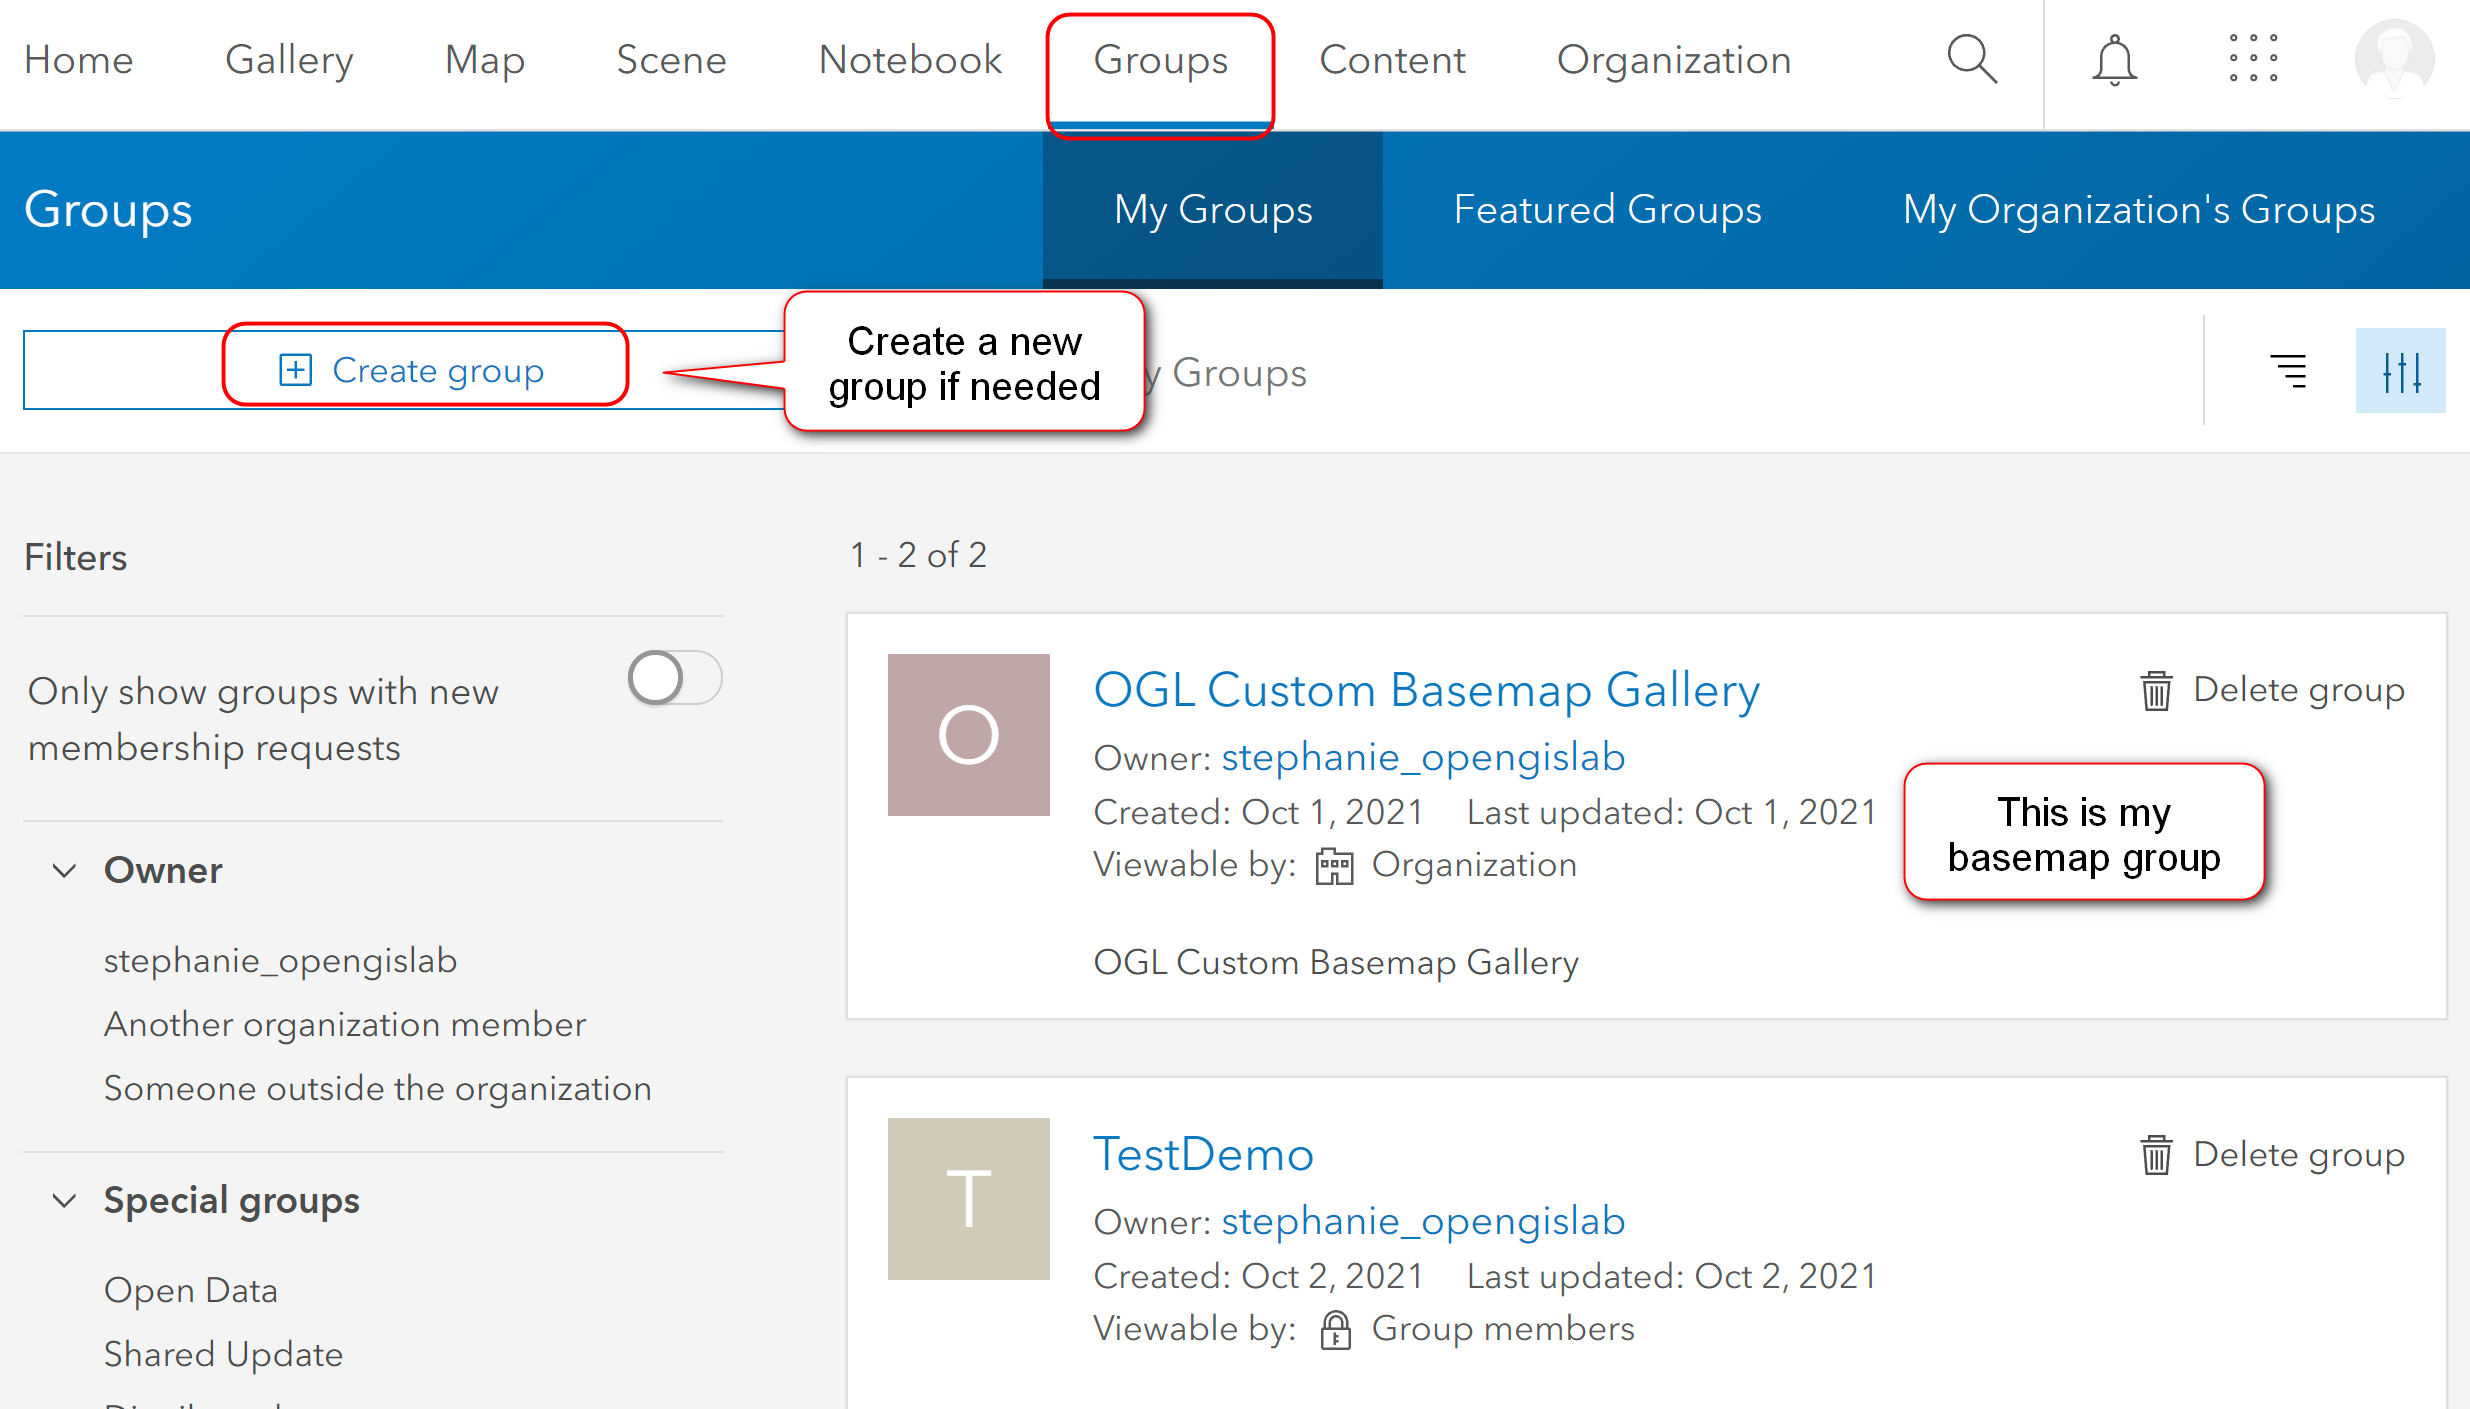
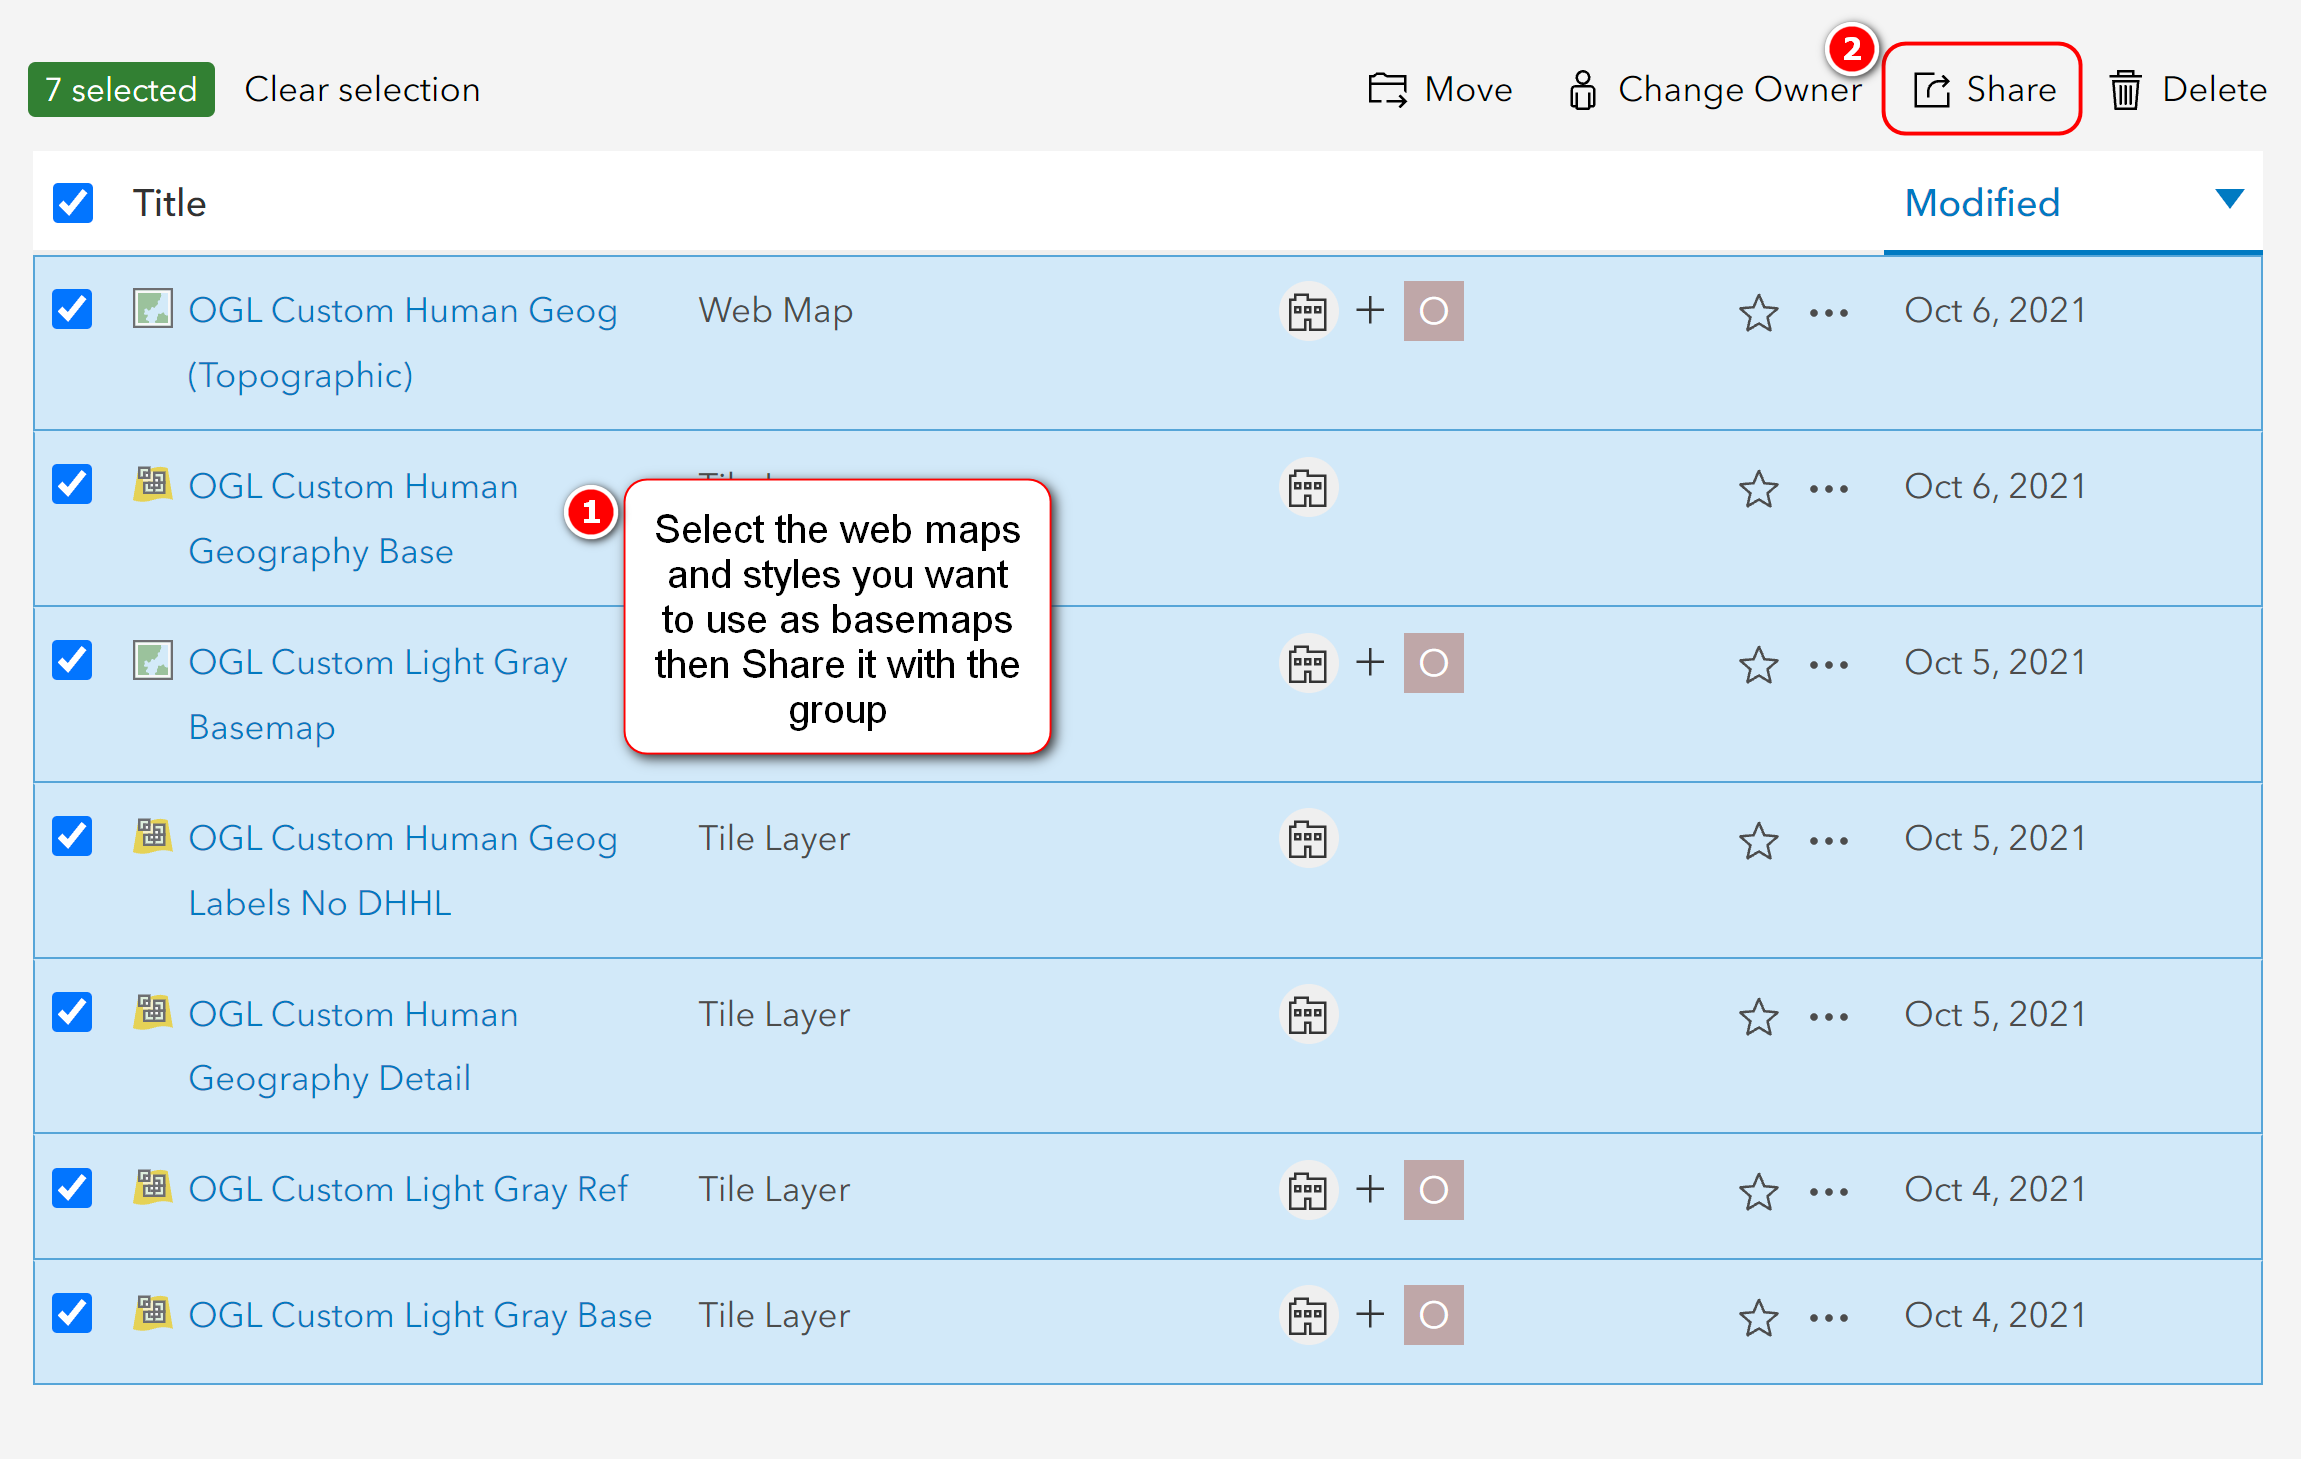
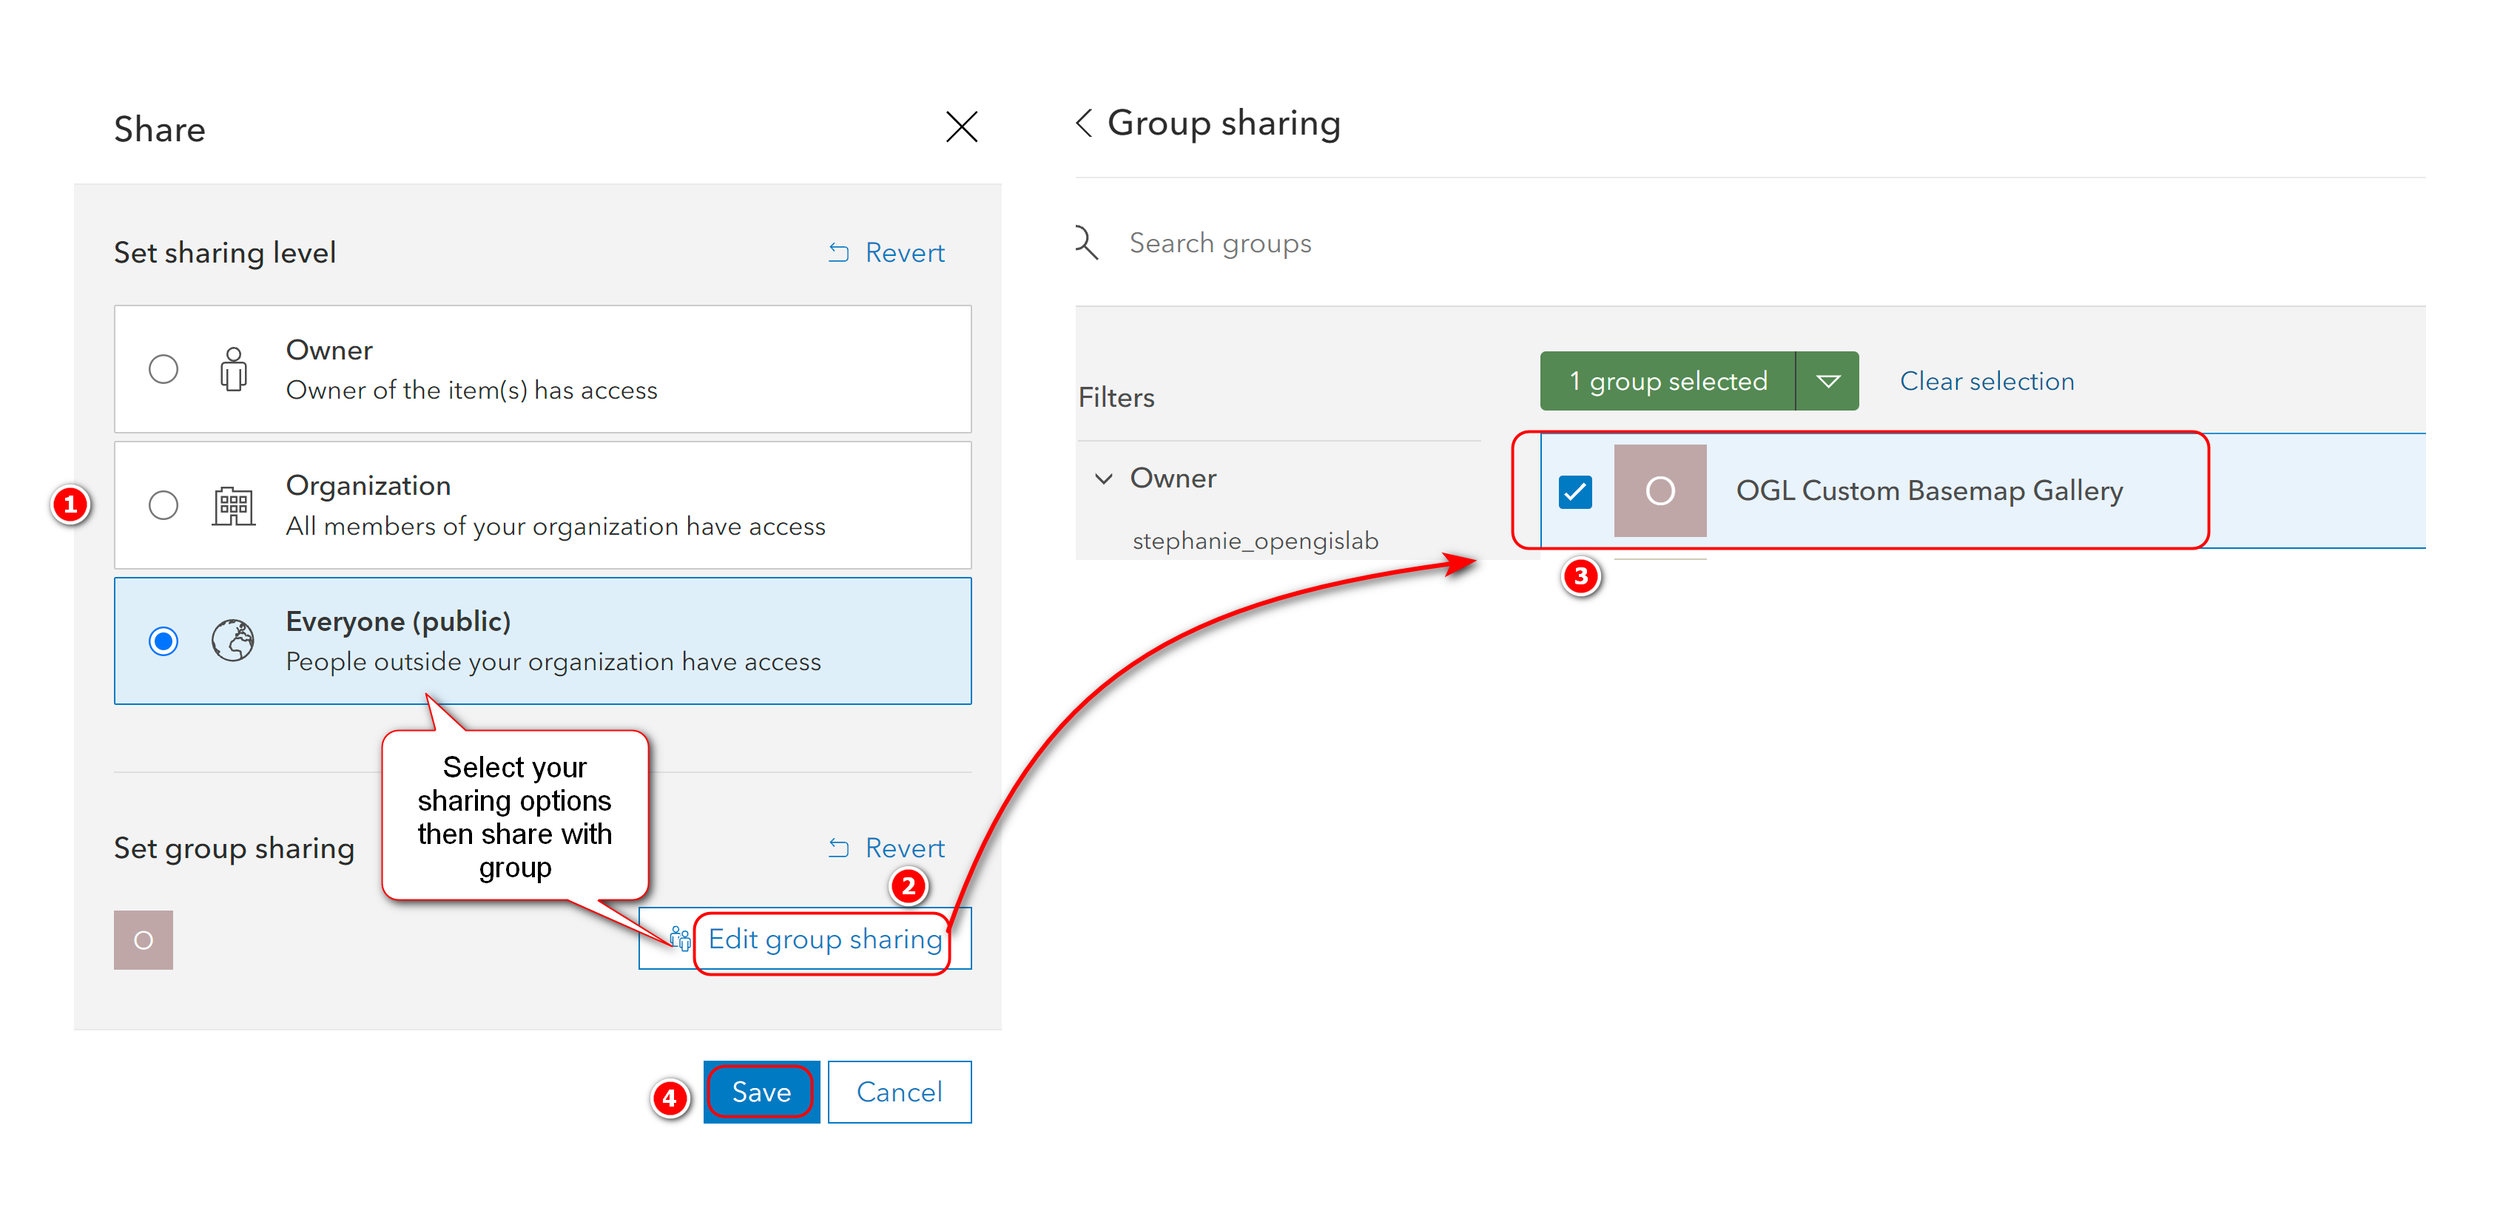
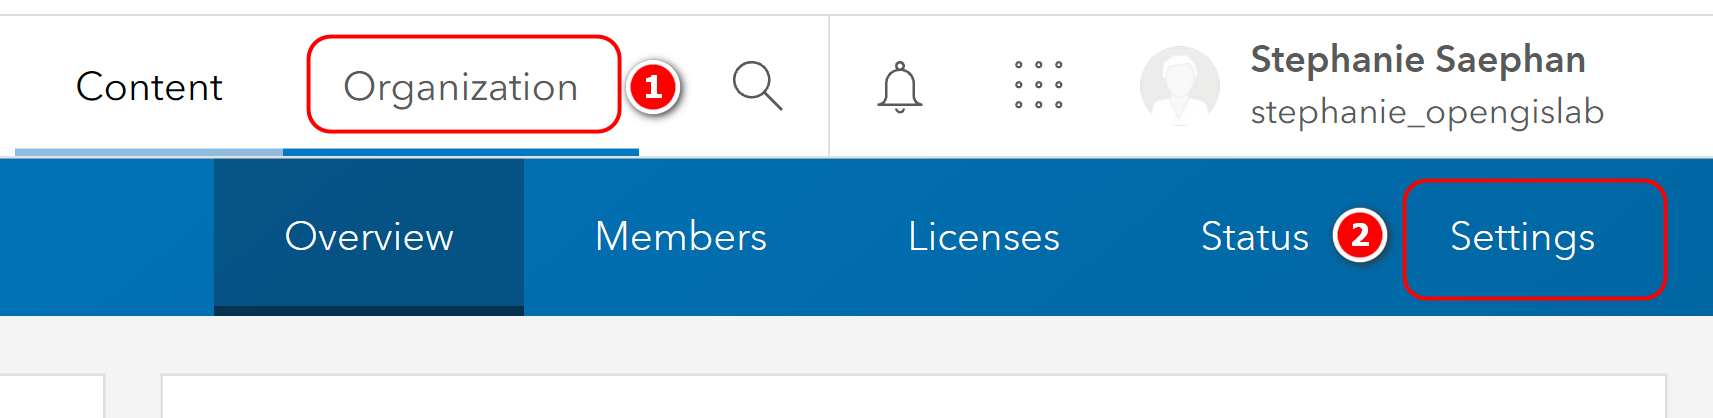
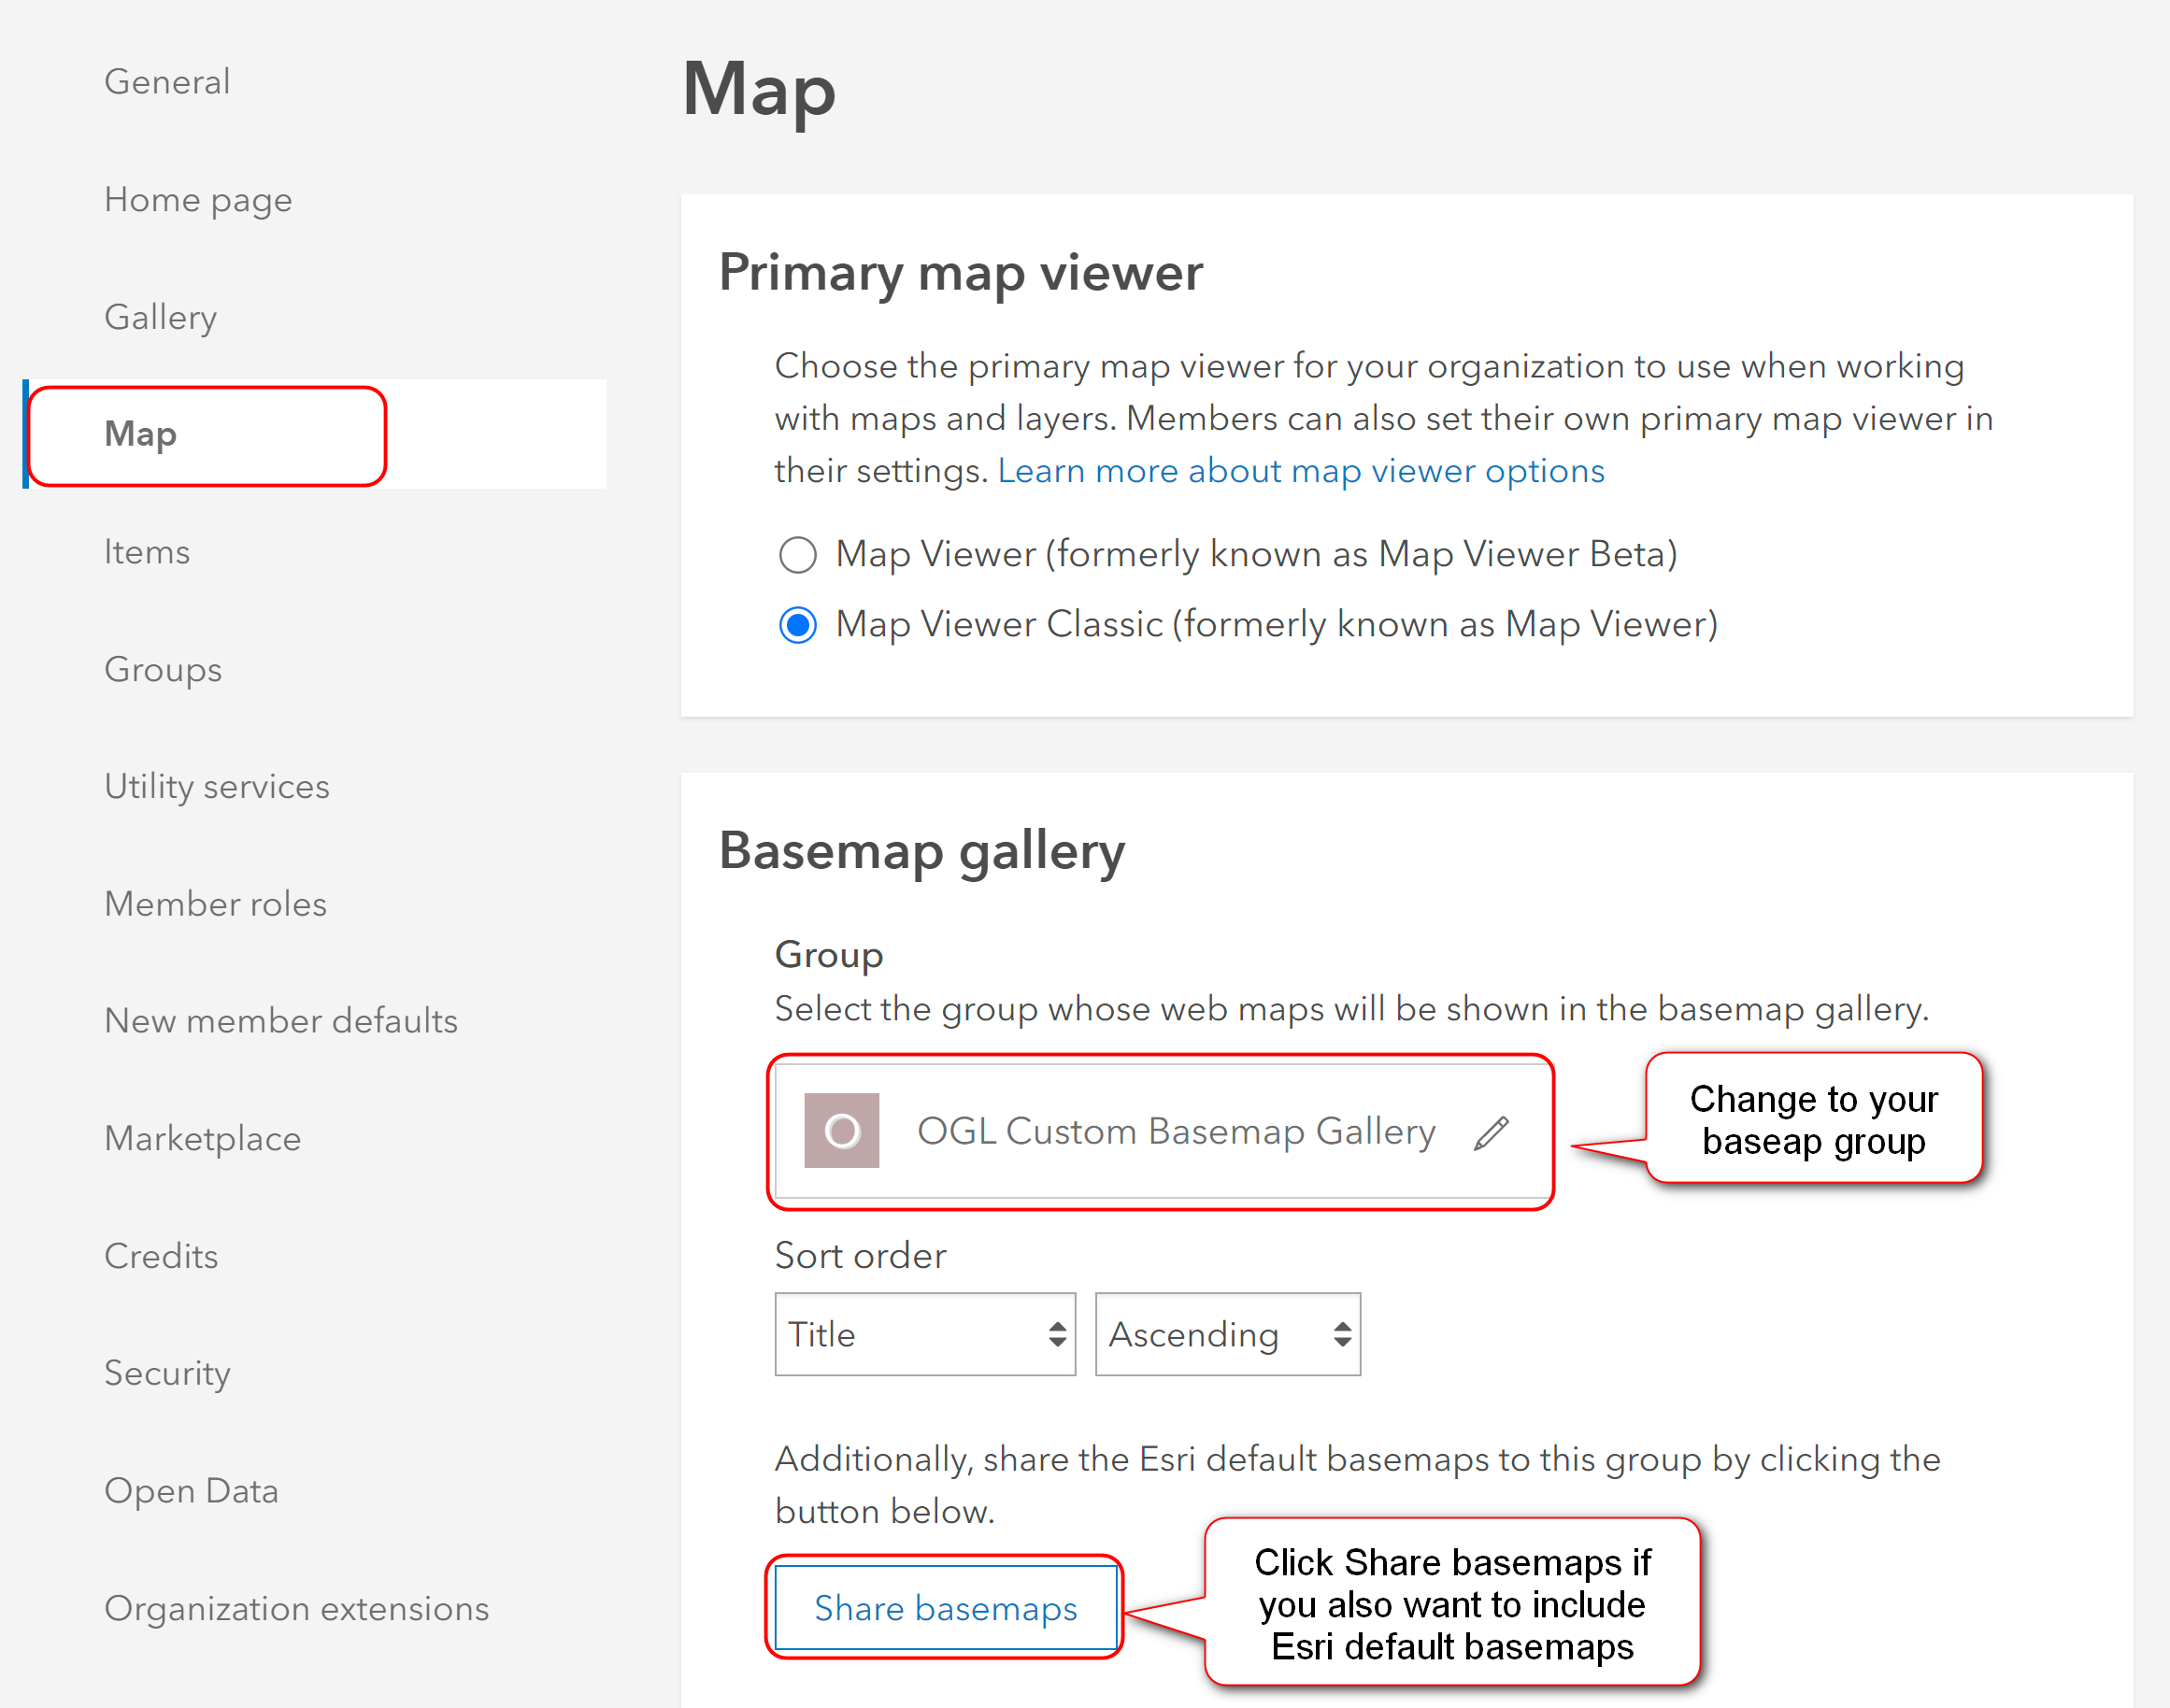
After creating a new web map with your custom styles you can add it as a custom basemap to the Basemap Gallery. See this custom basemap gallery page for more details. So basically you have to create a new Group (or use an existing one) then add/share the maps and styles you want to use as basemaps with the Group. Then you set the Group as your Organization’s Basemap Gallery - this is under the Organization’s Map setting.
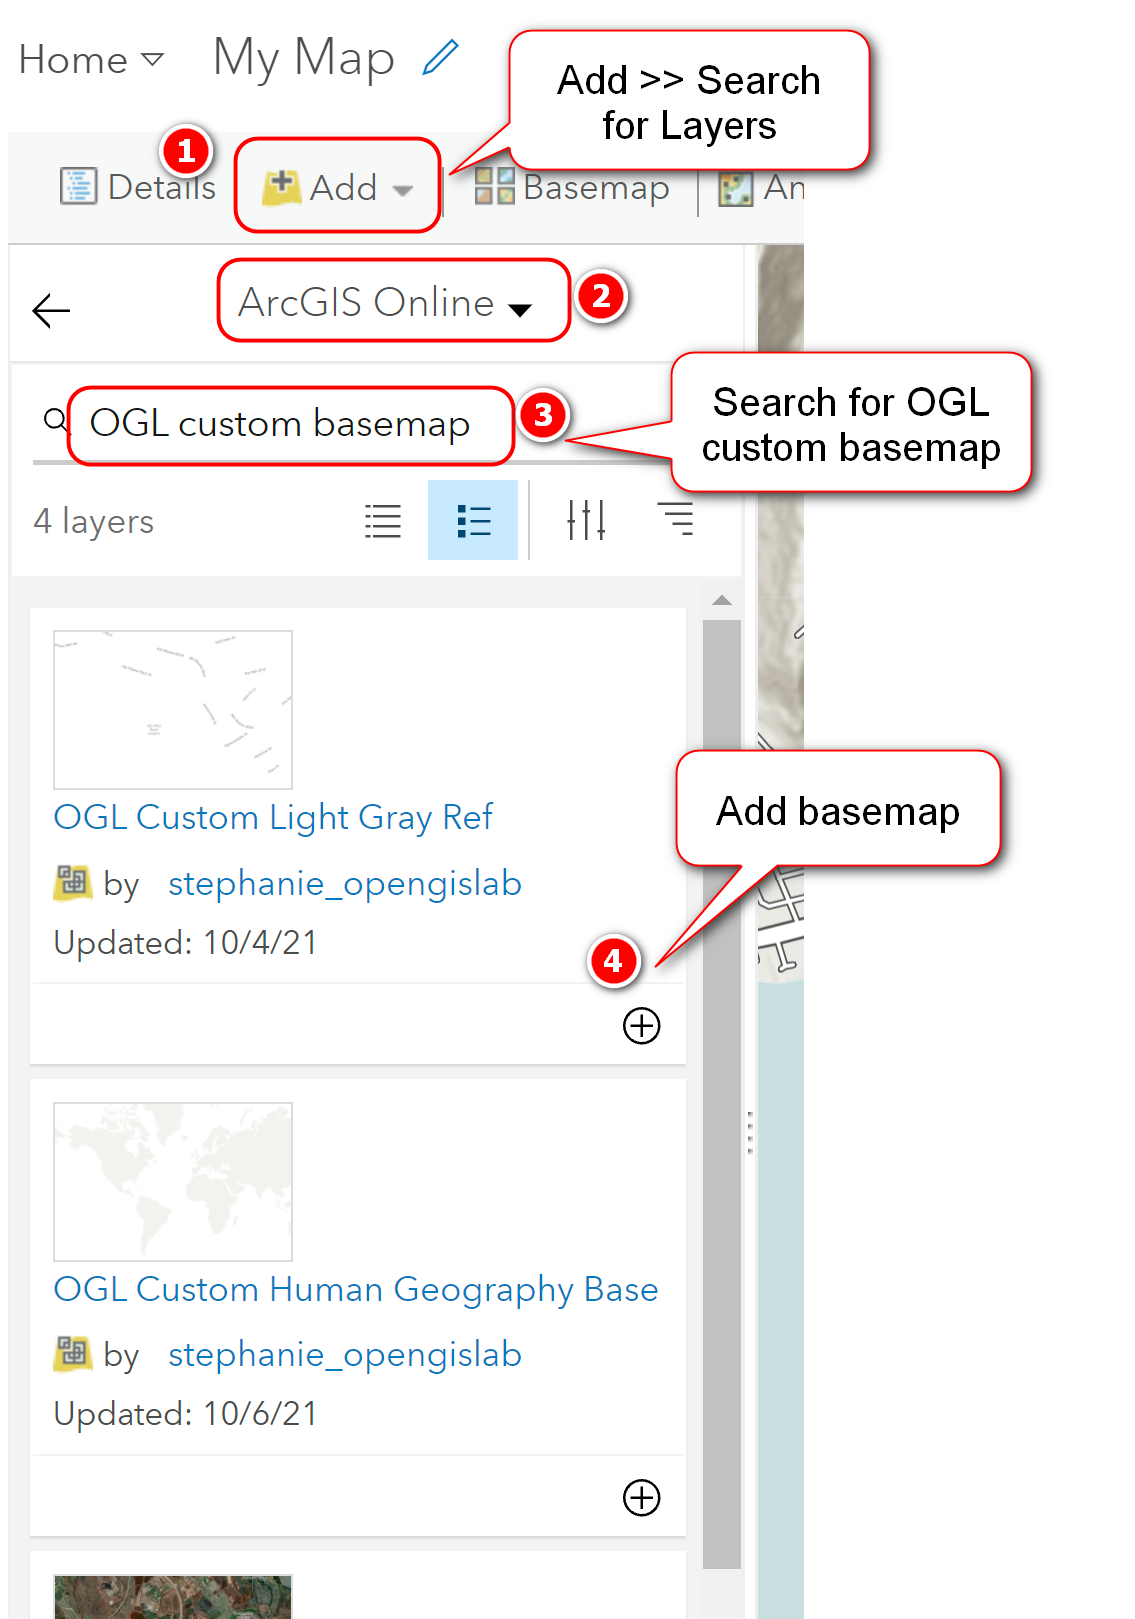
Note: I’ve made my custom basemap demo public so you can search AGOL for it. Search for “OGL Custom Basemap” or “opengislab”. See the last slide below.


Here’s a look at the before and after for the Human Geography basemap. I like the simplicity of the Human Geography basemap, however, I just want a little more color and hillshading so the landscape topography is clearly shown.

Original Esri Human Geography Basemap (above)

Customized Human Geography basemap with added hillshade
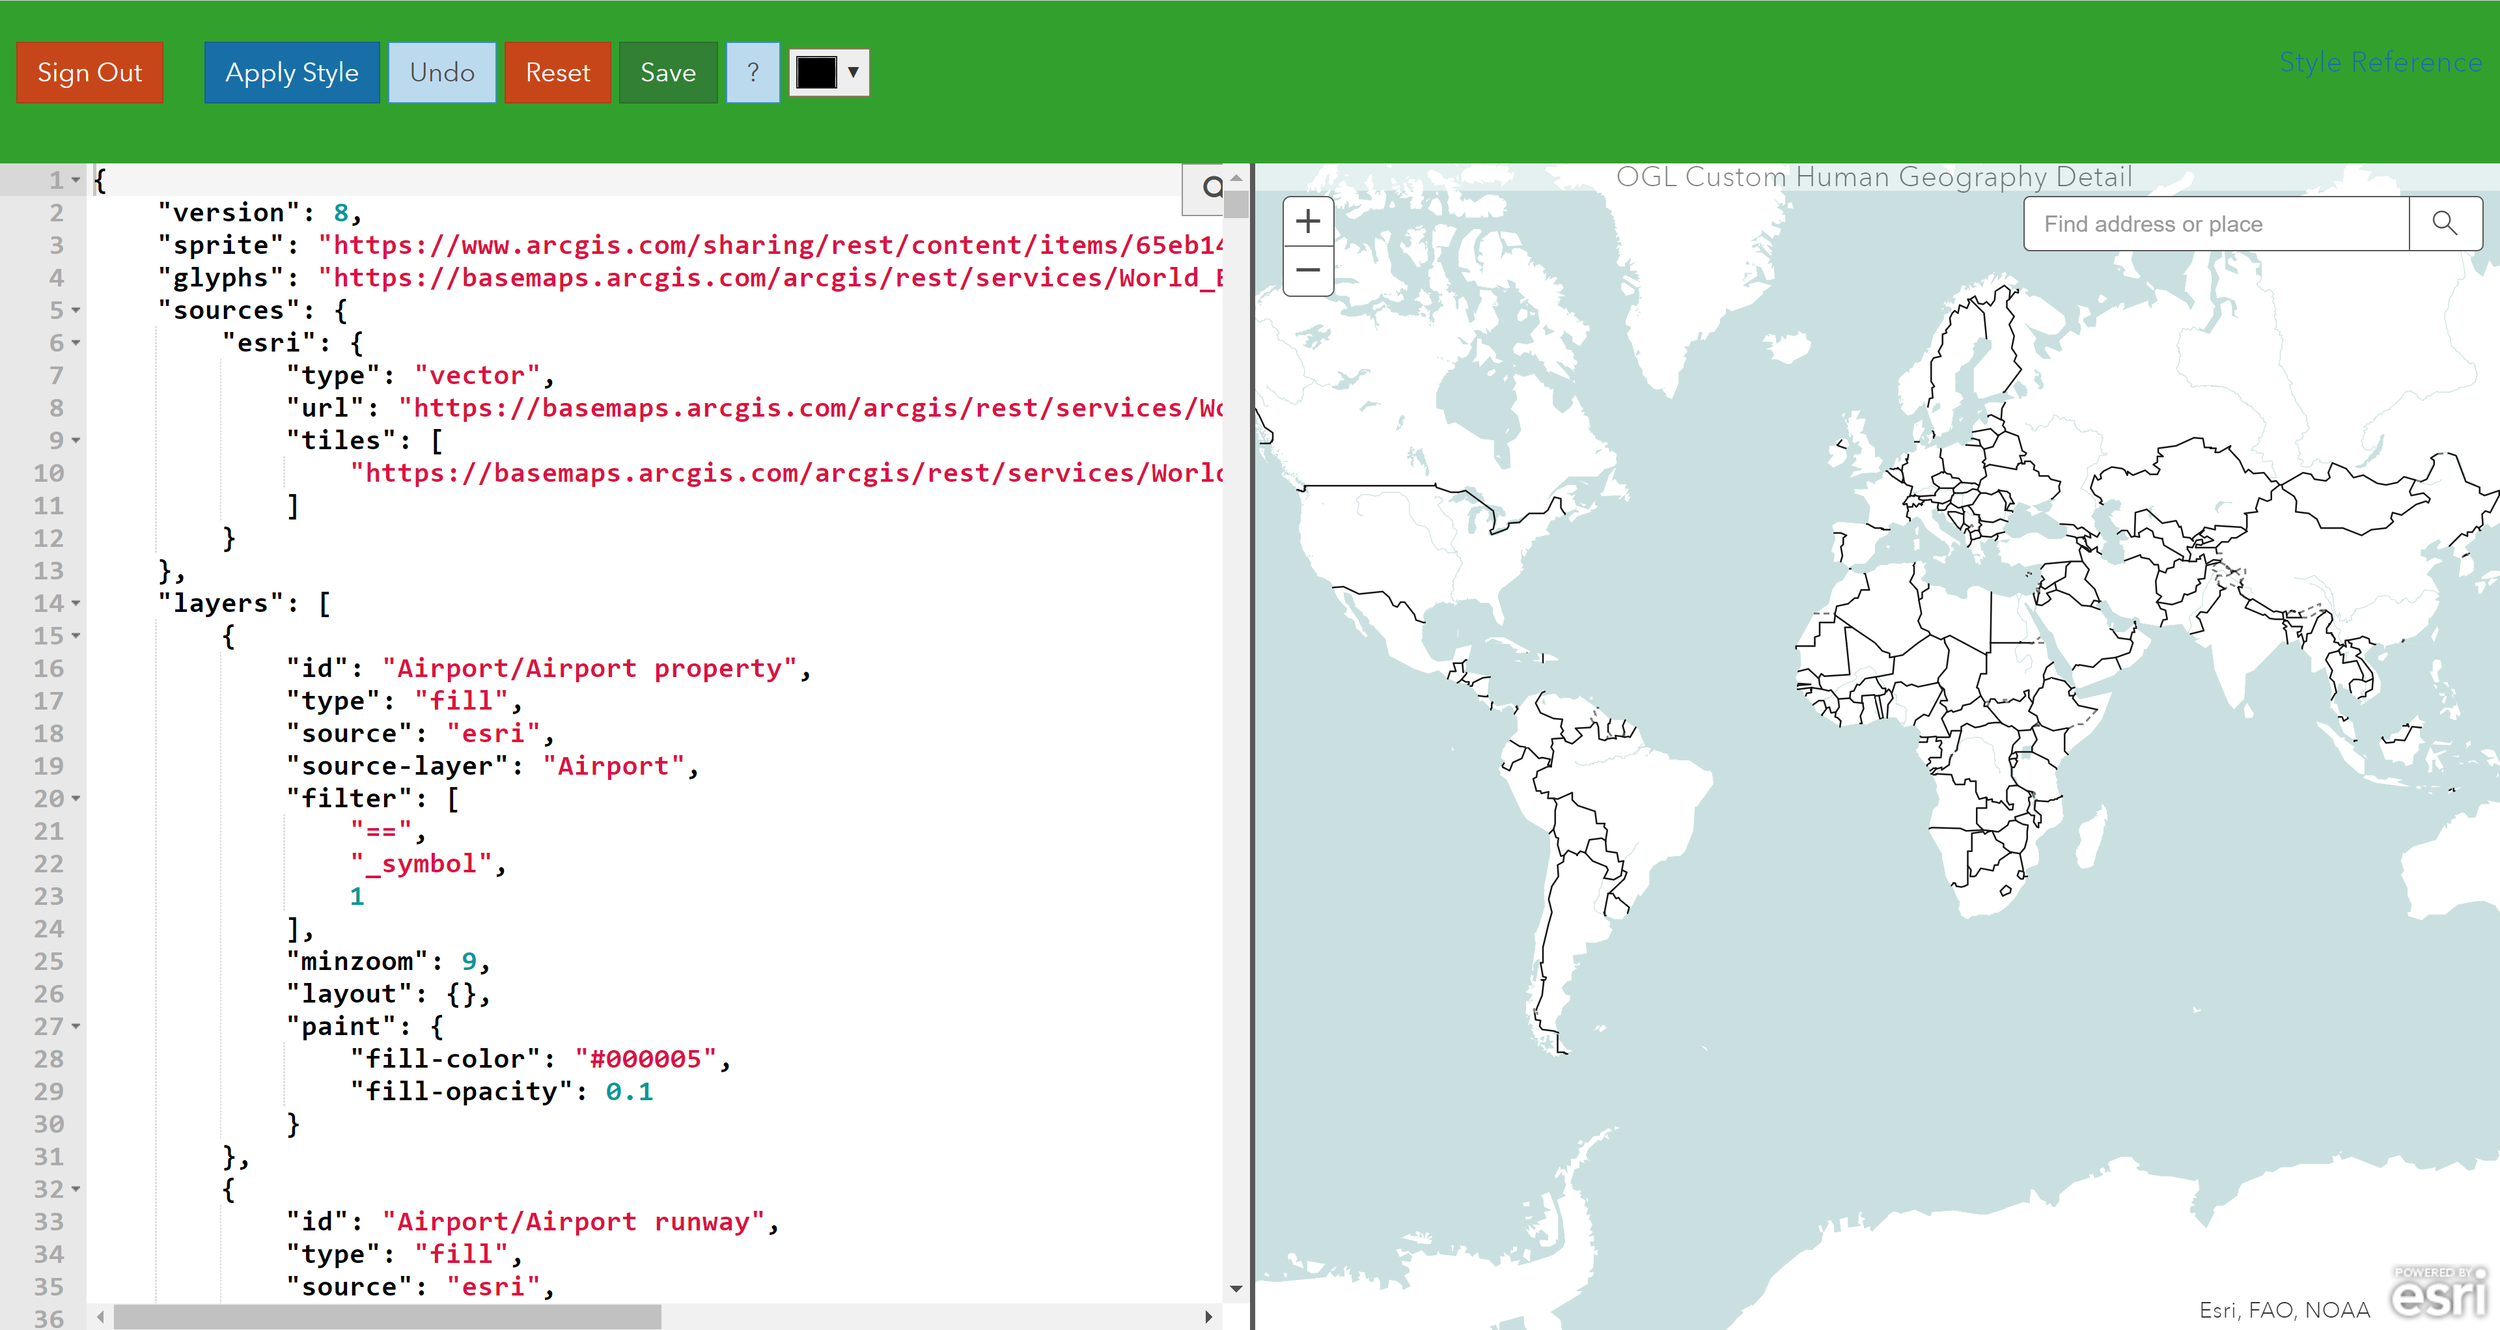
Option 3: Vector Style JSON Editor
The Vector Style JSON Editor is not covered in this posting, but I wanted to show you what it looks like. For more information, see the workflow for Editing JSON in the VSJE documentation. See also this 5 part series on customizing Esri basemaps - this is an excellent storymap series if you want a more detailed tutorial.
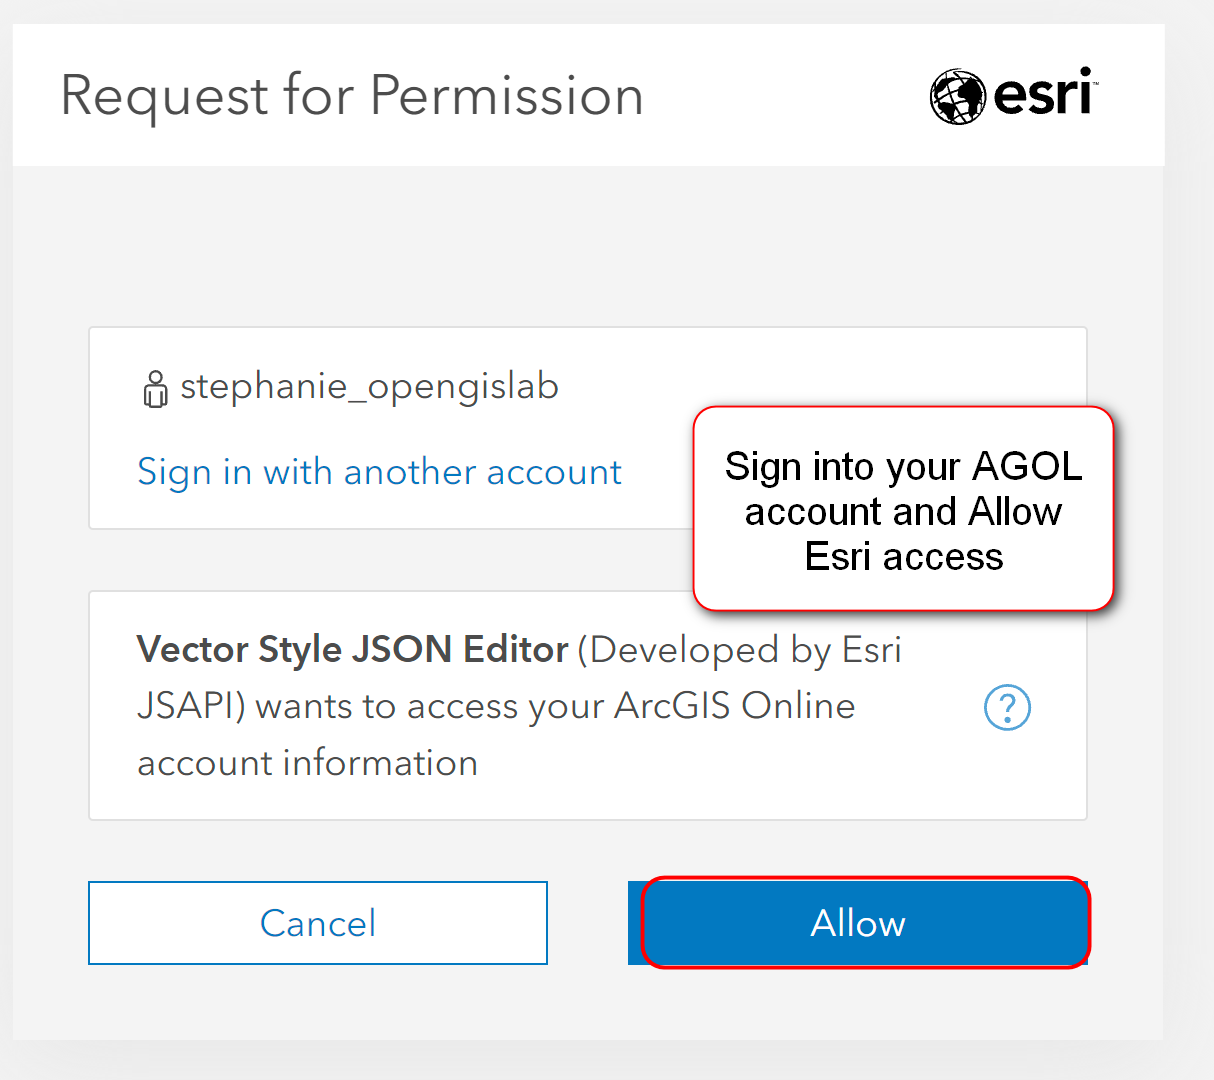
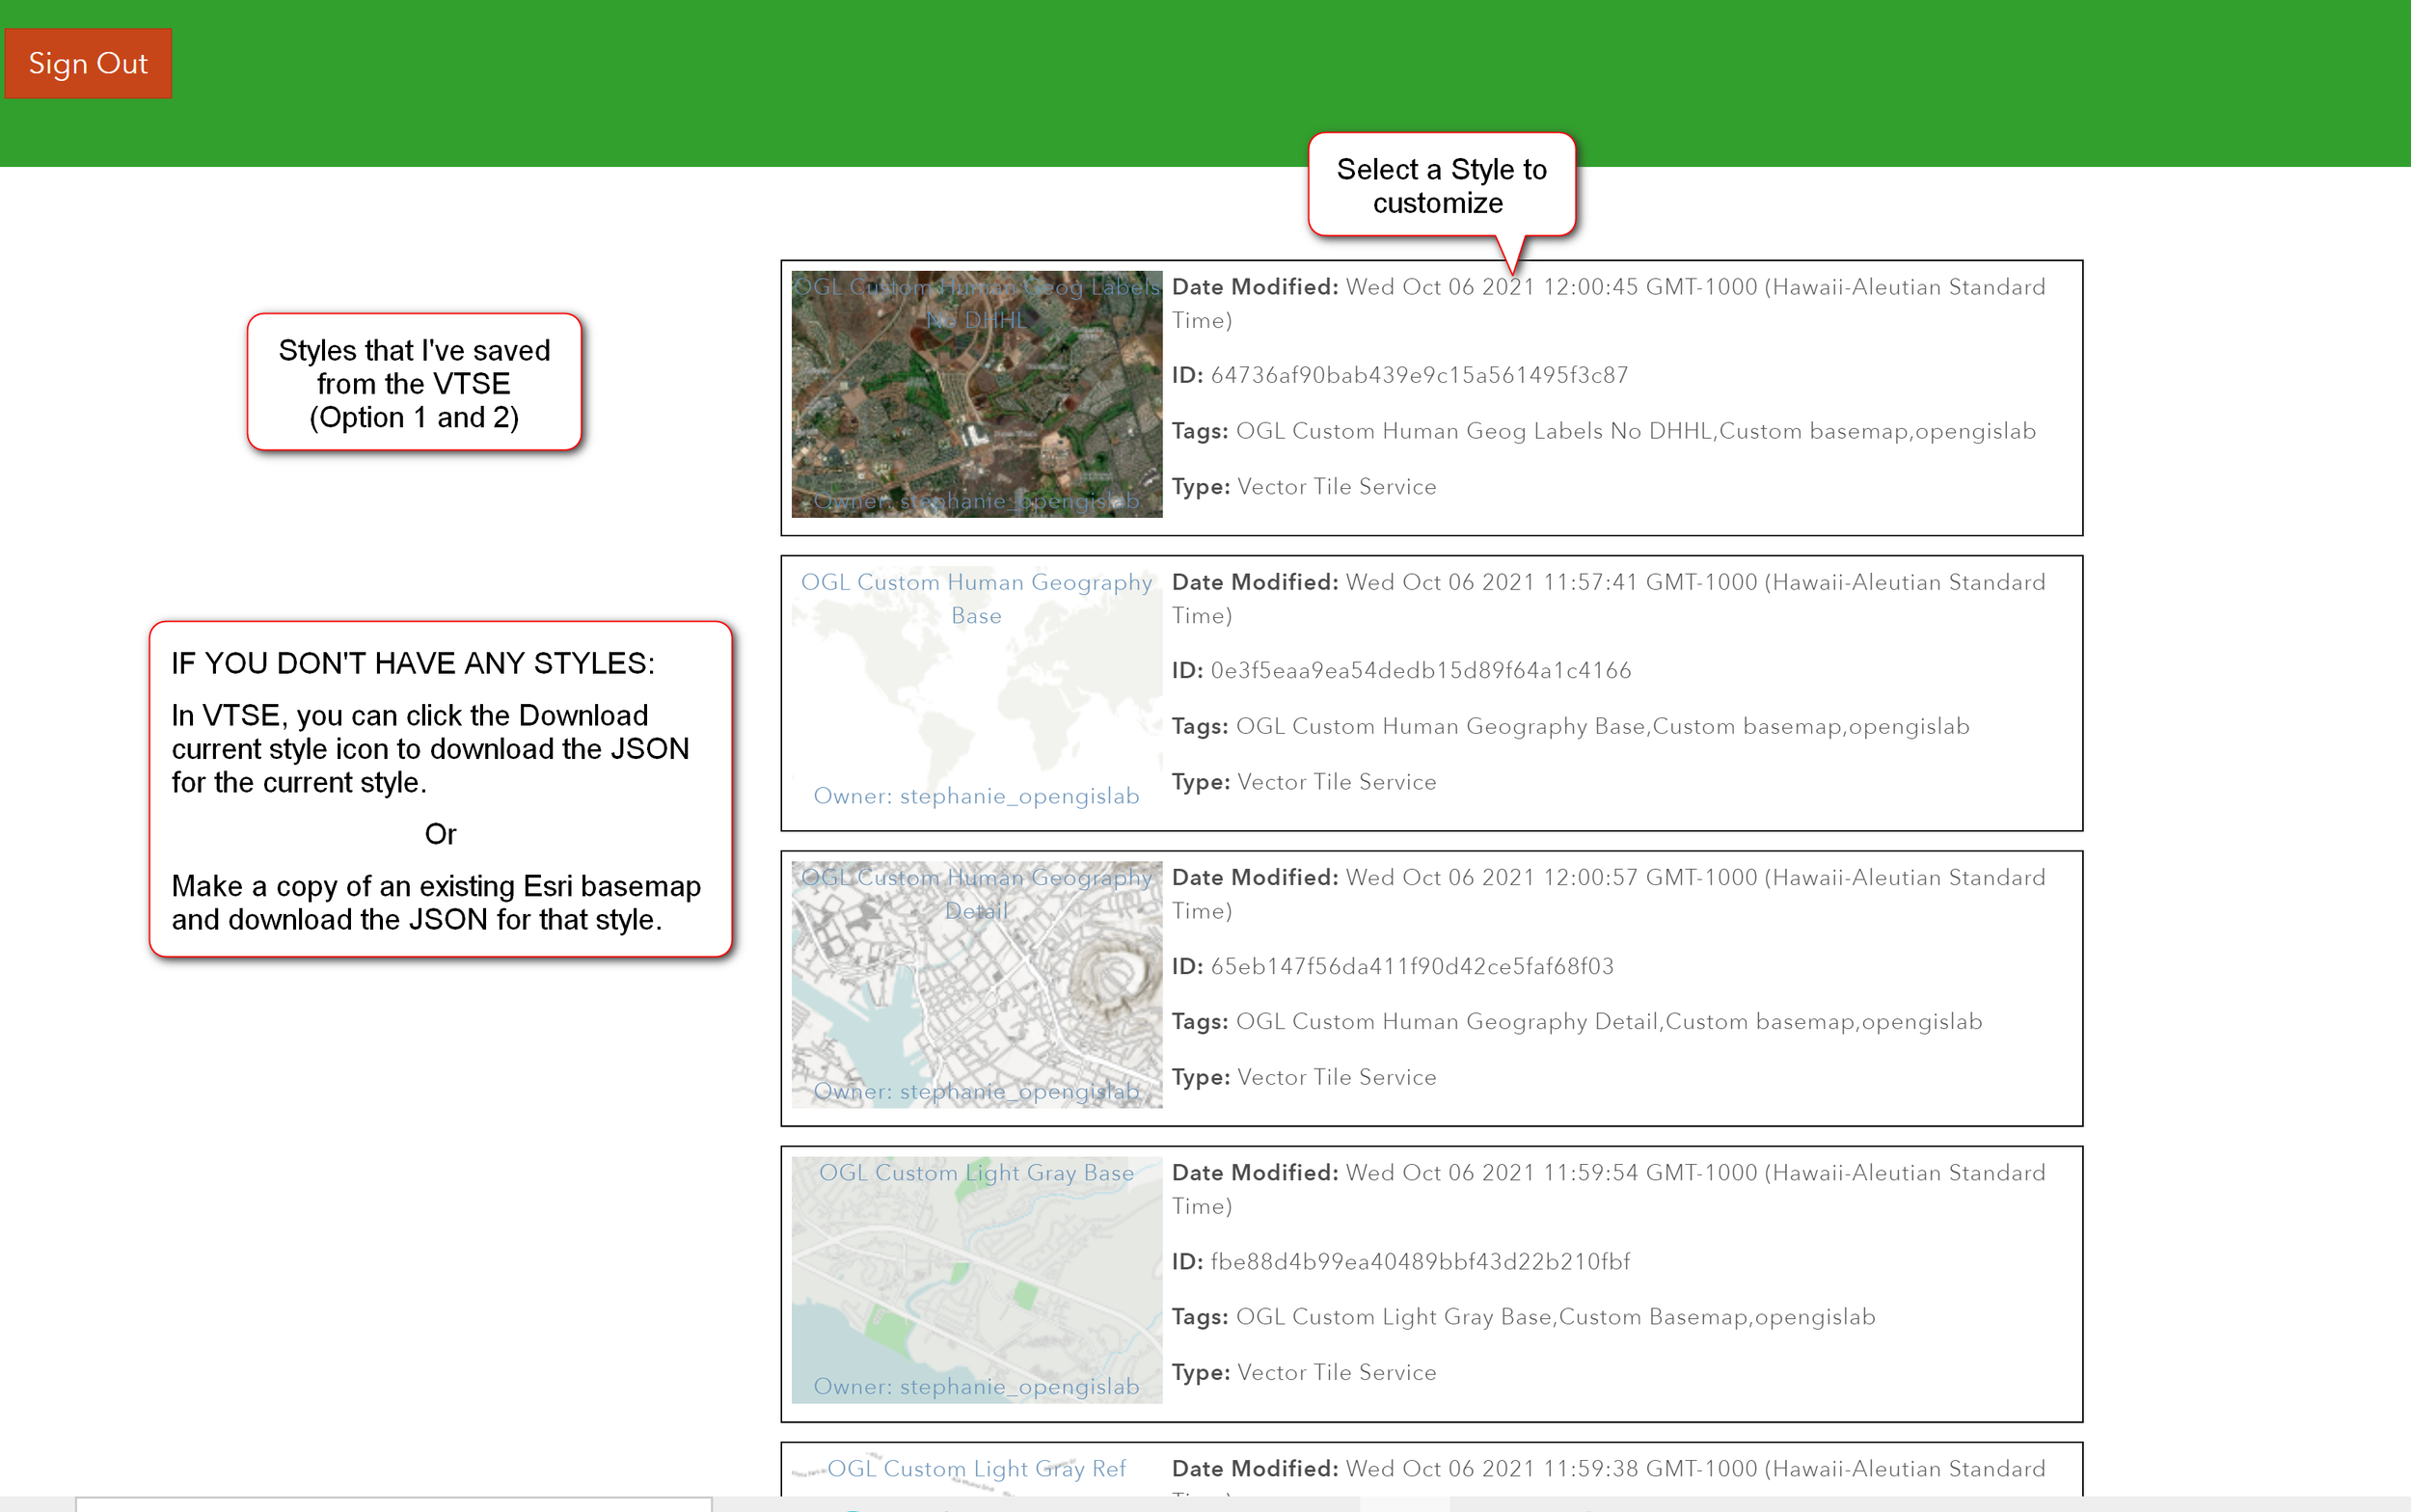
The JSON Style Editor can be accessed here. You’ll need to sign in with your AGOL account and allow Esri access. See the slides below for a quick look at the user interface.
Just for fun - Designing a basemap to match your brand
I love that I can customize Esri basemaps with little to no coding using the Vector Tile Style Editor. You can even design a basemap to match your brand if you wanted to. Here, just for fun I made a few quick changes to Esri’s Nova basemap to match the colors on my site. What do you think? Notice the logo at the bottom right corner - I added that to the image so you can see that color scheme (phantom blue/lush lava) for my site.

That’s it for this posting. I hope you’ve enjoyed reading it. There are tons of options and possibilities to make your own custom basemaps. Just remember though that these maps are generally multiscaled - so changes made at one scale or zoom level may not look right at another scale/zoom. Also, keep in mind that a well designed basemap or any map for that fact takes time and effort.
Thanks for reading, and until next time :)